
Lewis Read Extensions and Flippers
Lewis Read returns to explain more about rig mechanics. This time around he gives some thought to your extensions (read: Line-Aligners and Noodle arrangement)…
I remember the first time I saw a proper hook extension; it was on a historic Colne Valley club lake. The noted member trotted past with his rods banded together, staying mobile and proactive… a proper angler and one who caught far more than his fair share. Naturally, being nosey, I clocked the rigs—longish nylon links on lead clips—and each hook had an extension of at least a couple of inches! He had been catching very well too, so this all stuck in my mind. I was fascinated and pondered as to just what kind of bizarre carp angling witchcraft and trickery this could be…
Down the years, I have come to understand the mechanics that make this arrangement tick a little better. The principles that ensured our friend had a successful day’s angling back then, are exactly the same ones that hold true to this day. The combination of an extended shank ensures that the hook enters the fish’s mouth correctly orientated, and then has to leave the mouth with the all-important sharp and pointy bit facing the fish’s lip. This is a very simple sounding, yet it is an exceedingly effective principle.
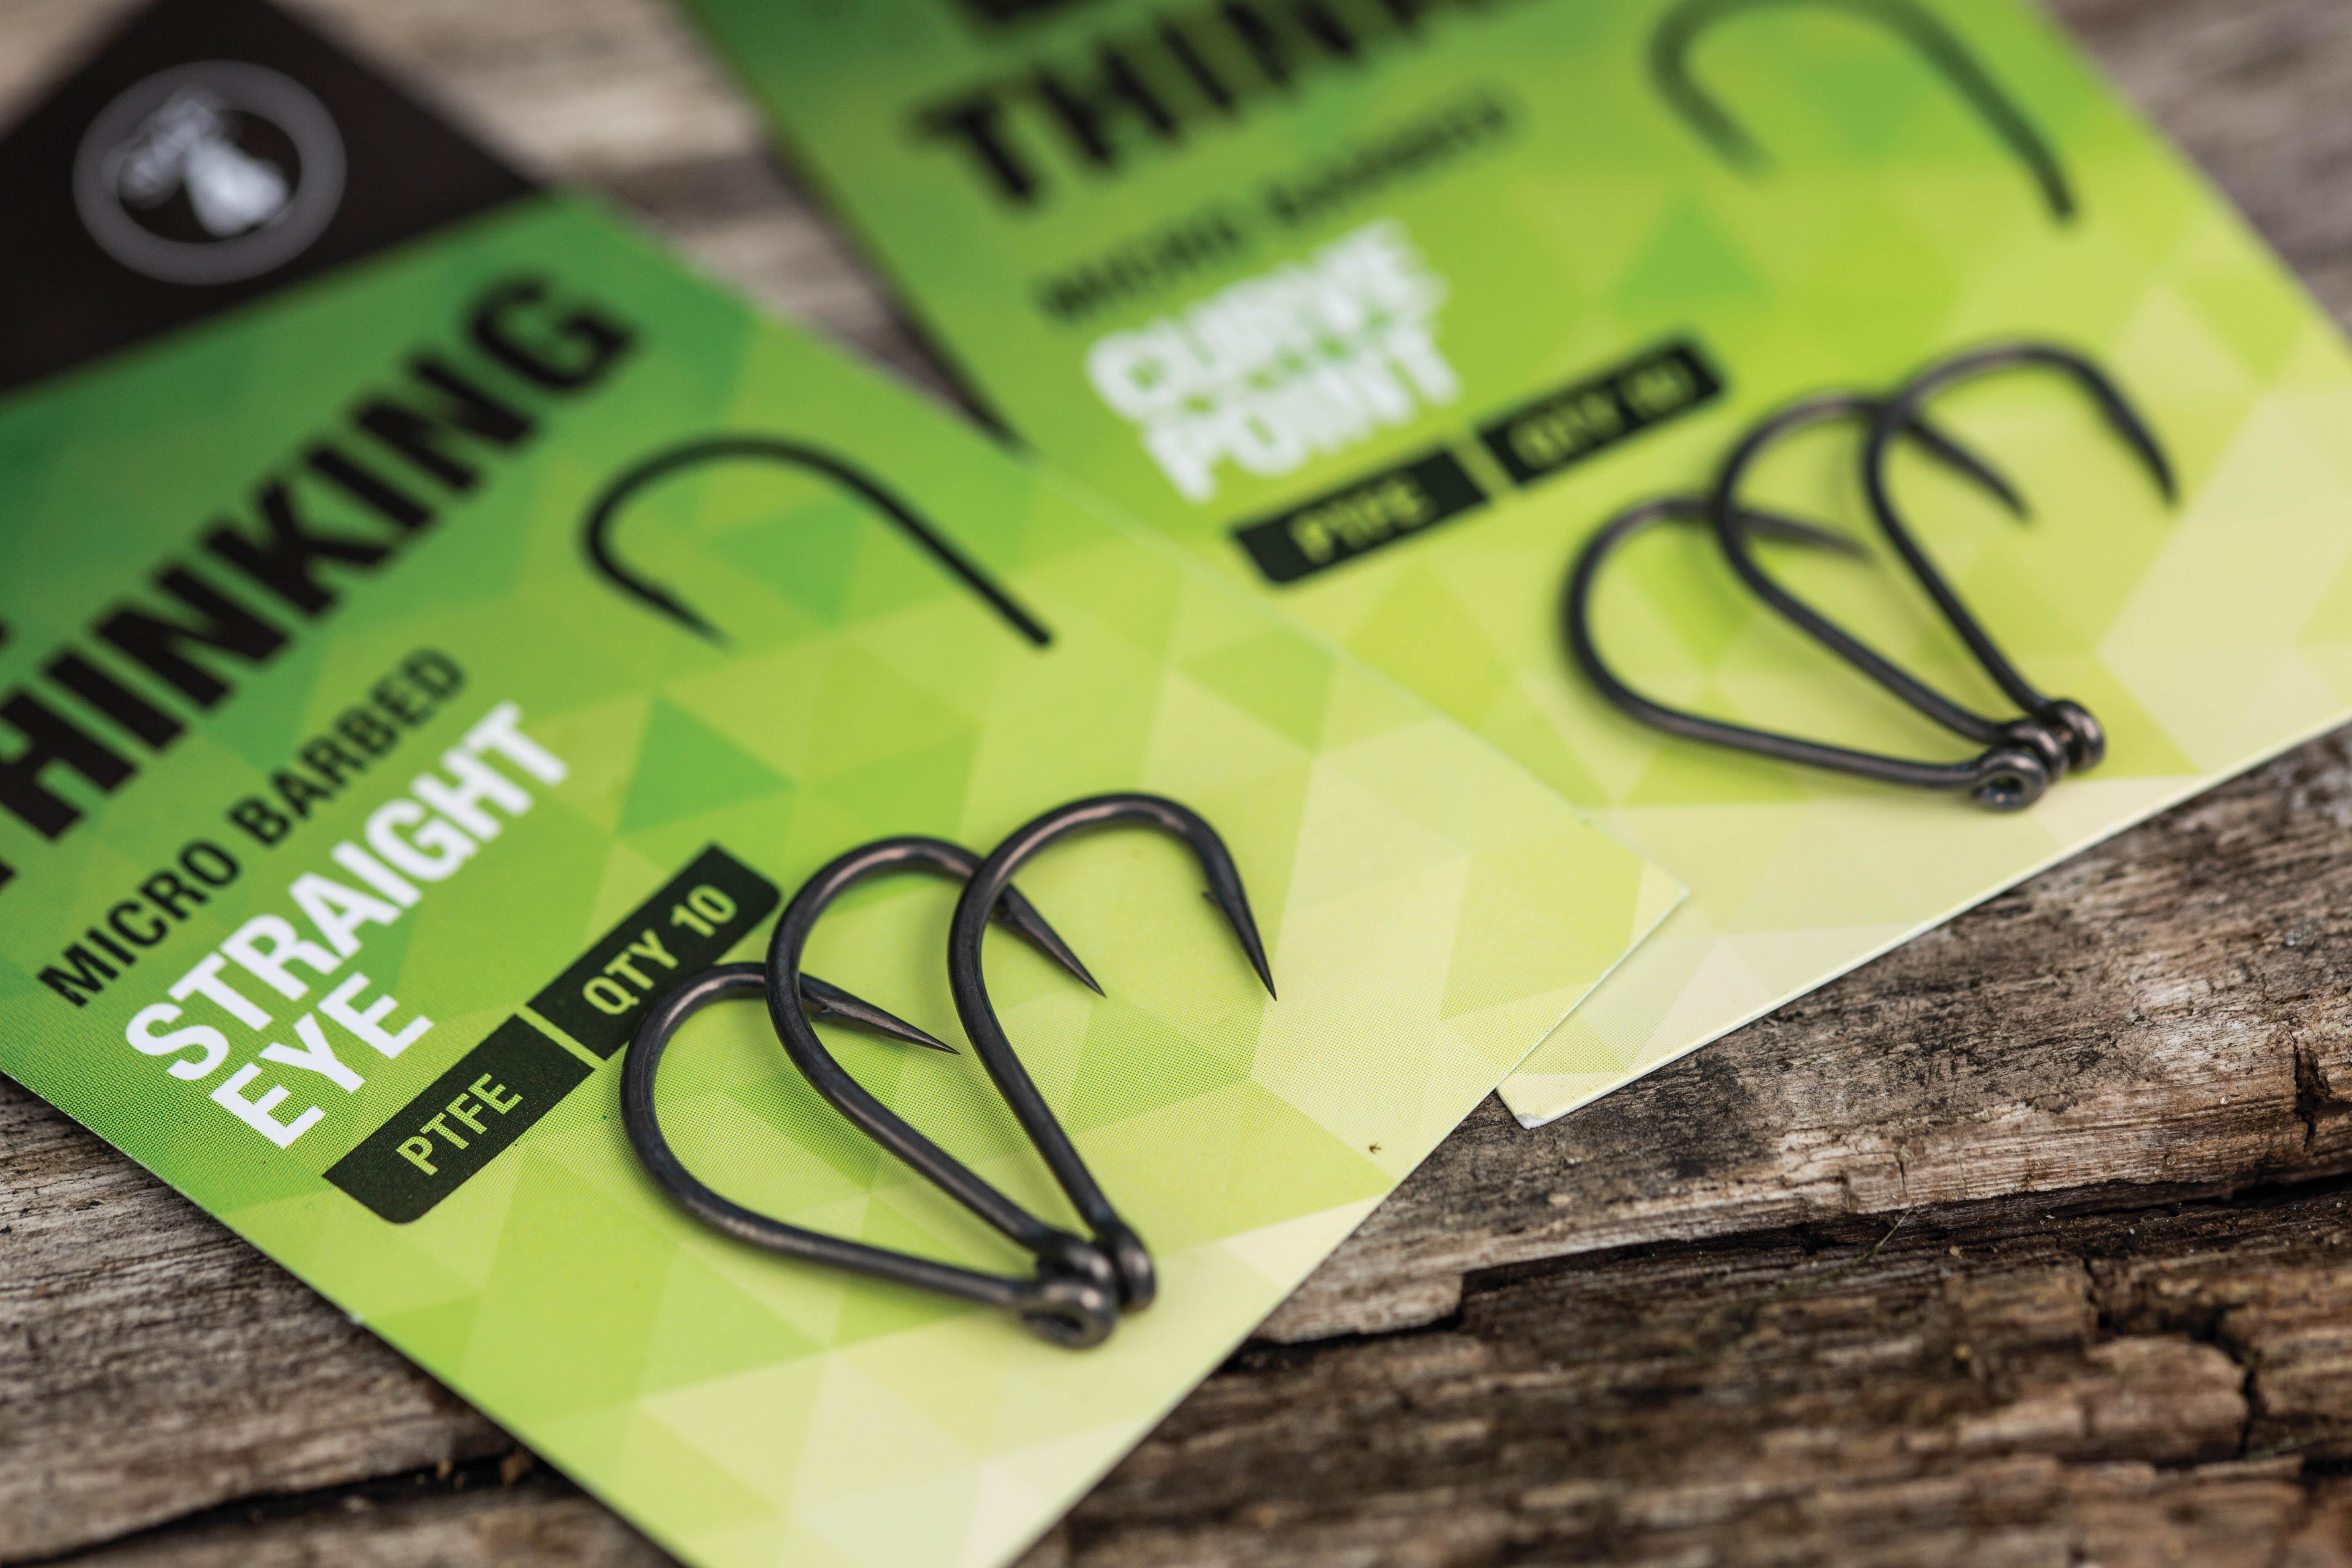
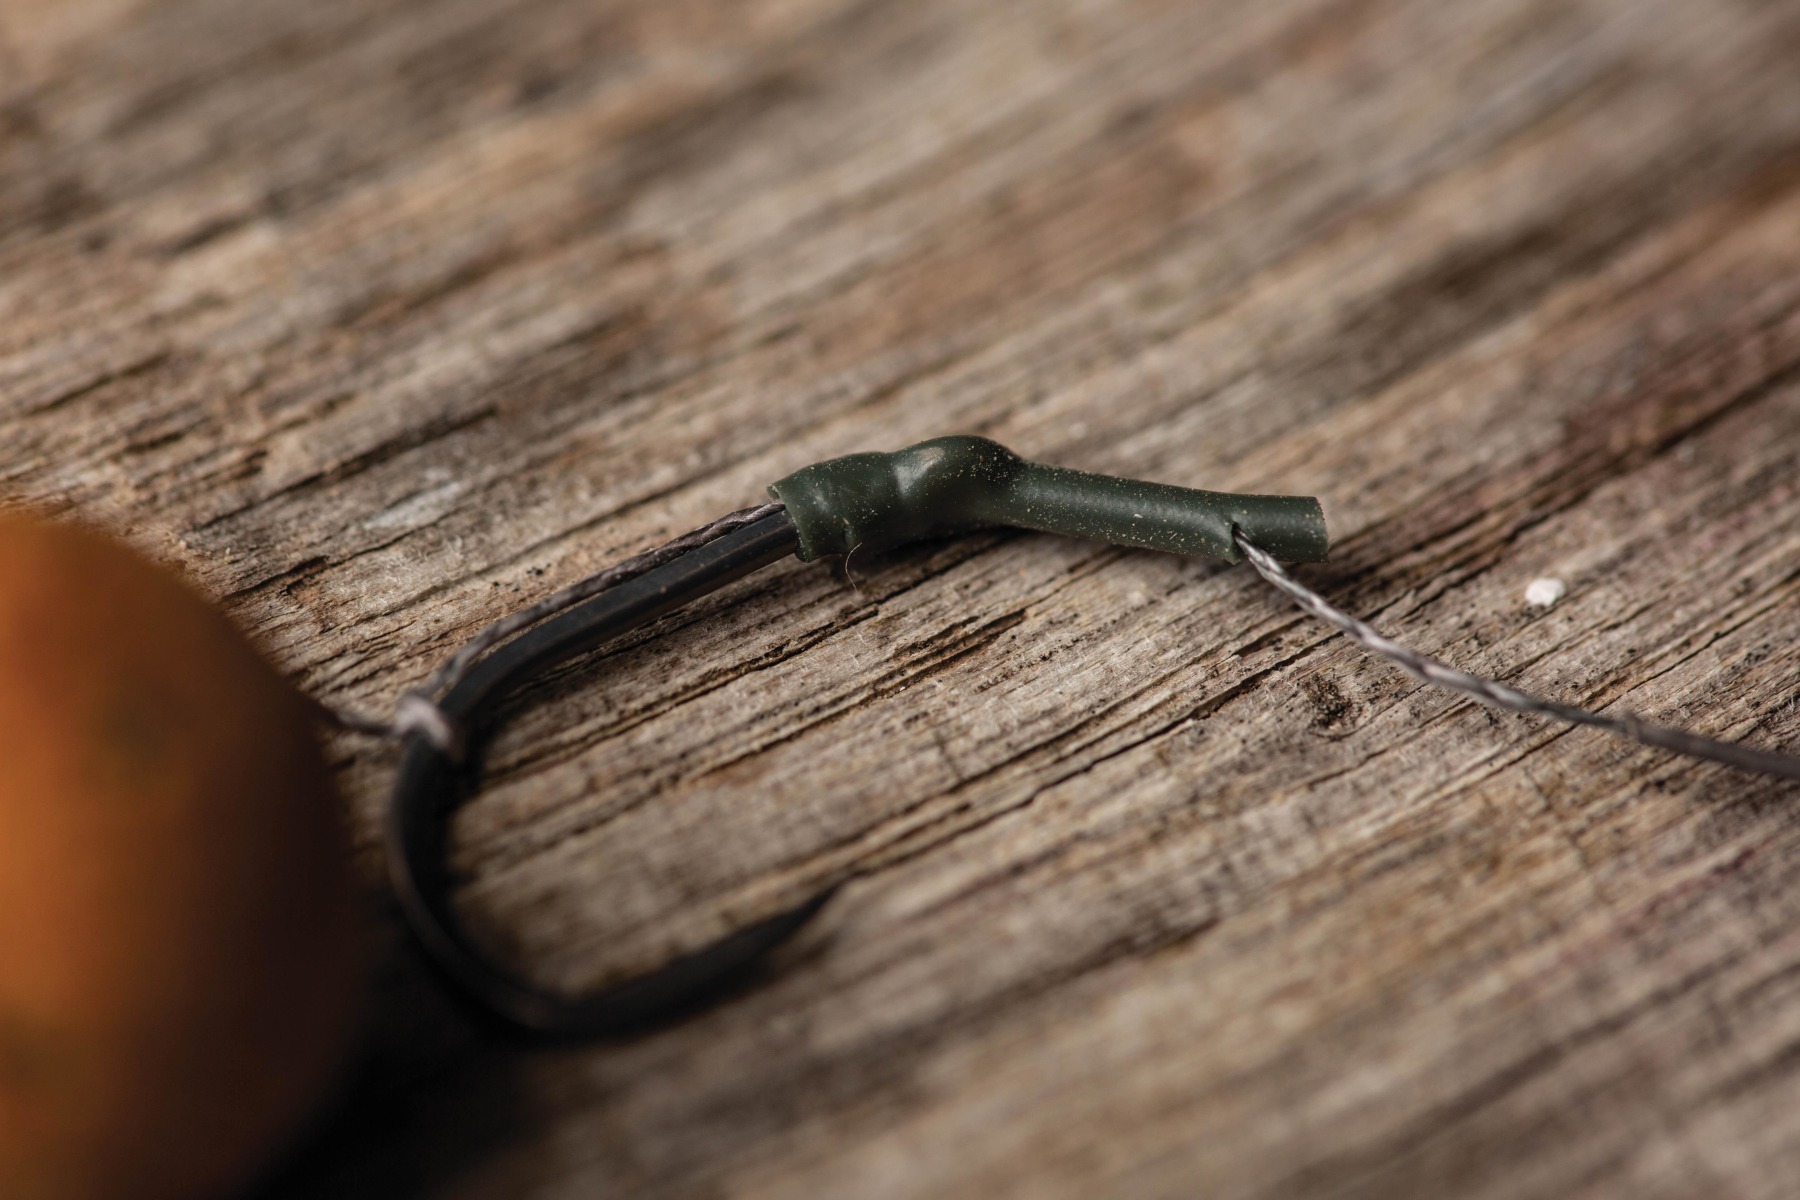
Since those days, the use of extensions has evolved enormously, having been refined as anglers experimented with profiles, lengths and different materials, ranging from a bit of Biro inner tube in the early days, to the refined shrink-tube arrangements so popular now, thanks largely to their phenomenal effectiveness.
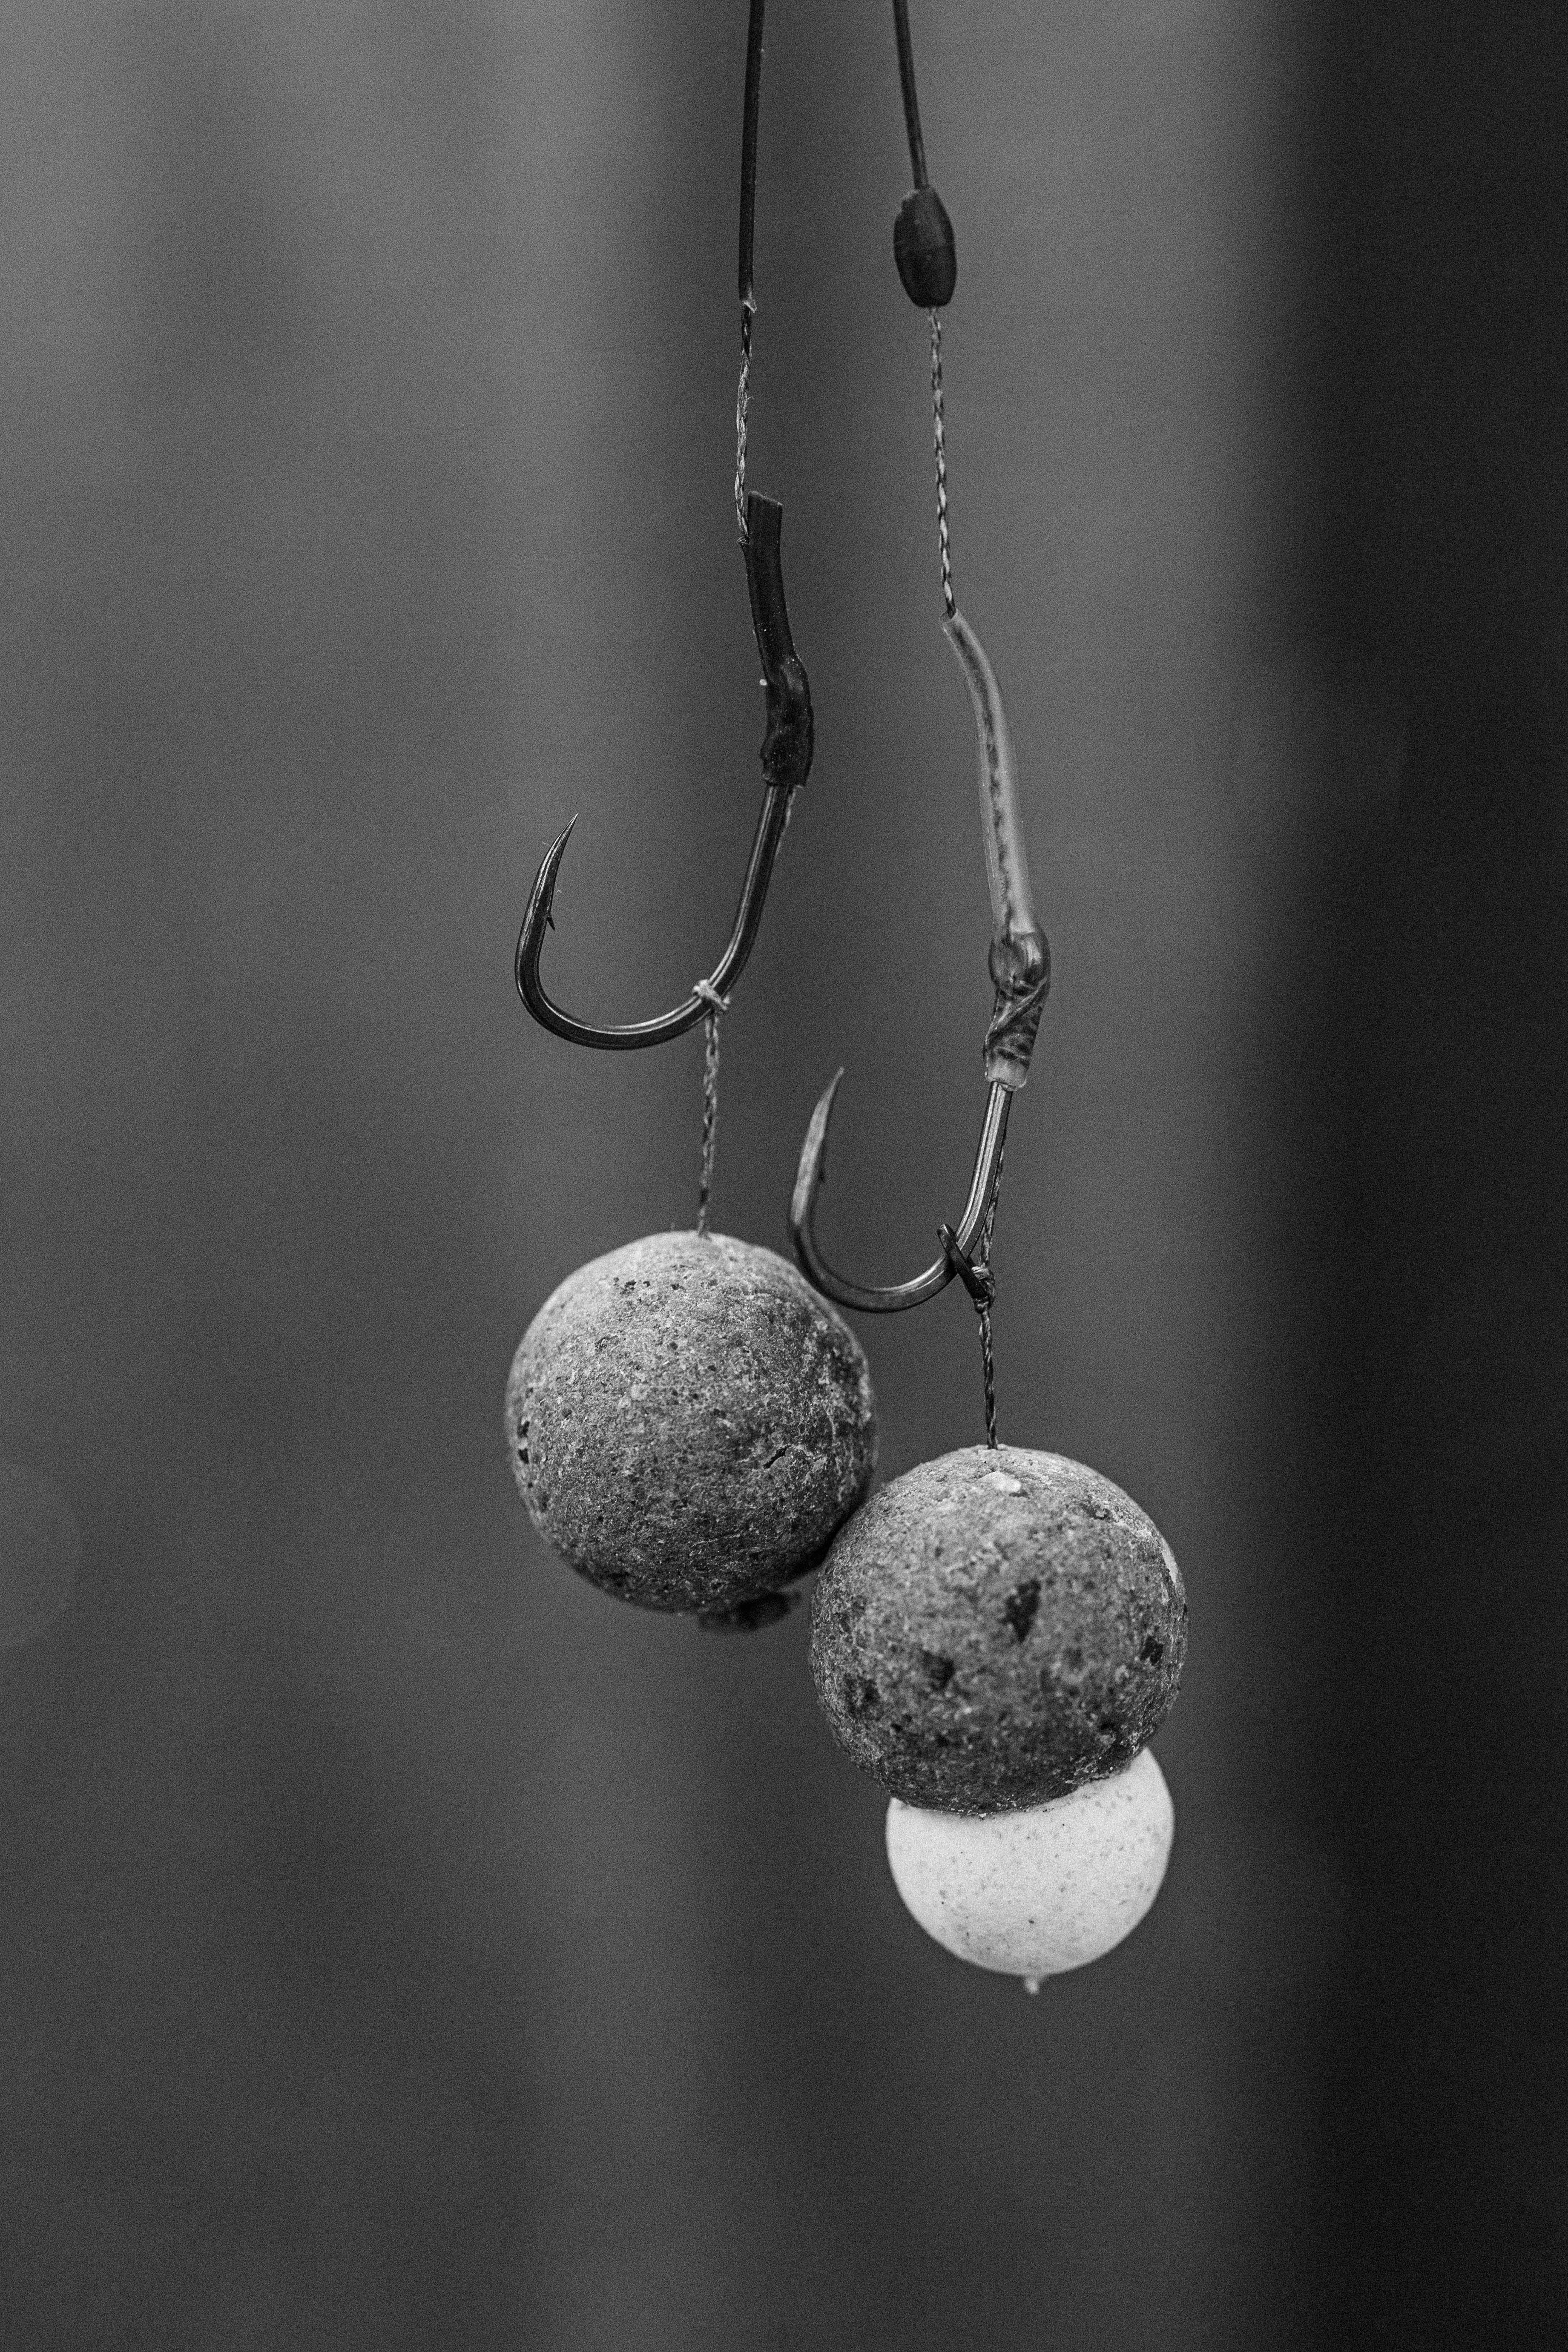
Evolving from the simplest straight extension, the use of shrink tube has obviously enabled forward-thinking anglers to develop really aggressive rigs such as the Withy arrangement, which utilises a curved section of shrink tube (very curved now, despite being a gentle flowing curve at inception), angled kickers, and longer, Noodle-style extension. Some of these feature at least one angle or curve, and in some cases more, to ensure that the hook is controlled and highly reactive when inhaled by a browsing cyprinid.
I always feel that both kickers and hook aligners work best with non-reversed hooks, and as with most rigs, the devil is in the detail. In this case, the kicker is best kept in perfect alignment with the shank and the hook point, without a twist or kink that could force the hook to react, favouring one side of the twist or the other. This is a detail that is really important for fine-tuning most rigs, but it is especially important for those which utilise a hook extension or have a stiff hook section.
*This is the main reason the new Noodle Kickers are slightly stiffer than other preformed extensions, as it is vital that the Noodle stays in the right position.
With this style rig, fine-tuning the tubing by adding a small kick near the eye will cause the hook to react extremely quickly; it almost acts like it’s priming the hook, so to speak, so it is already in the right place well before the main angle at the tail end of the kicker does its job. At worst, if fish are feeding gingerly, this means the hook will take hold in the scissors, just on the initial hook reaction, whereas fish confidently browsing will invariably be nailed with the full length of the kicker inside the lip… nirvana indeed!

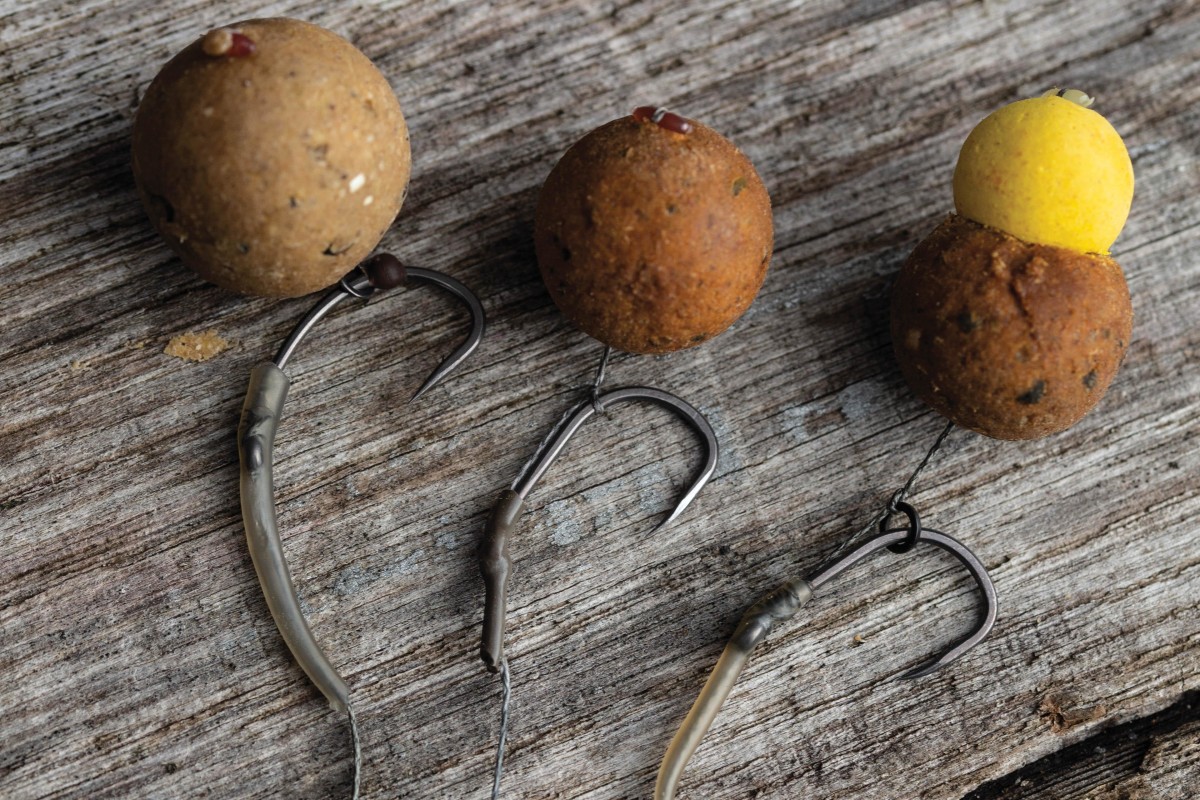
HOOKBAIT WEIGHT
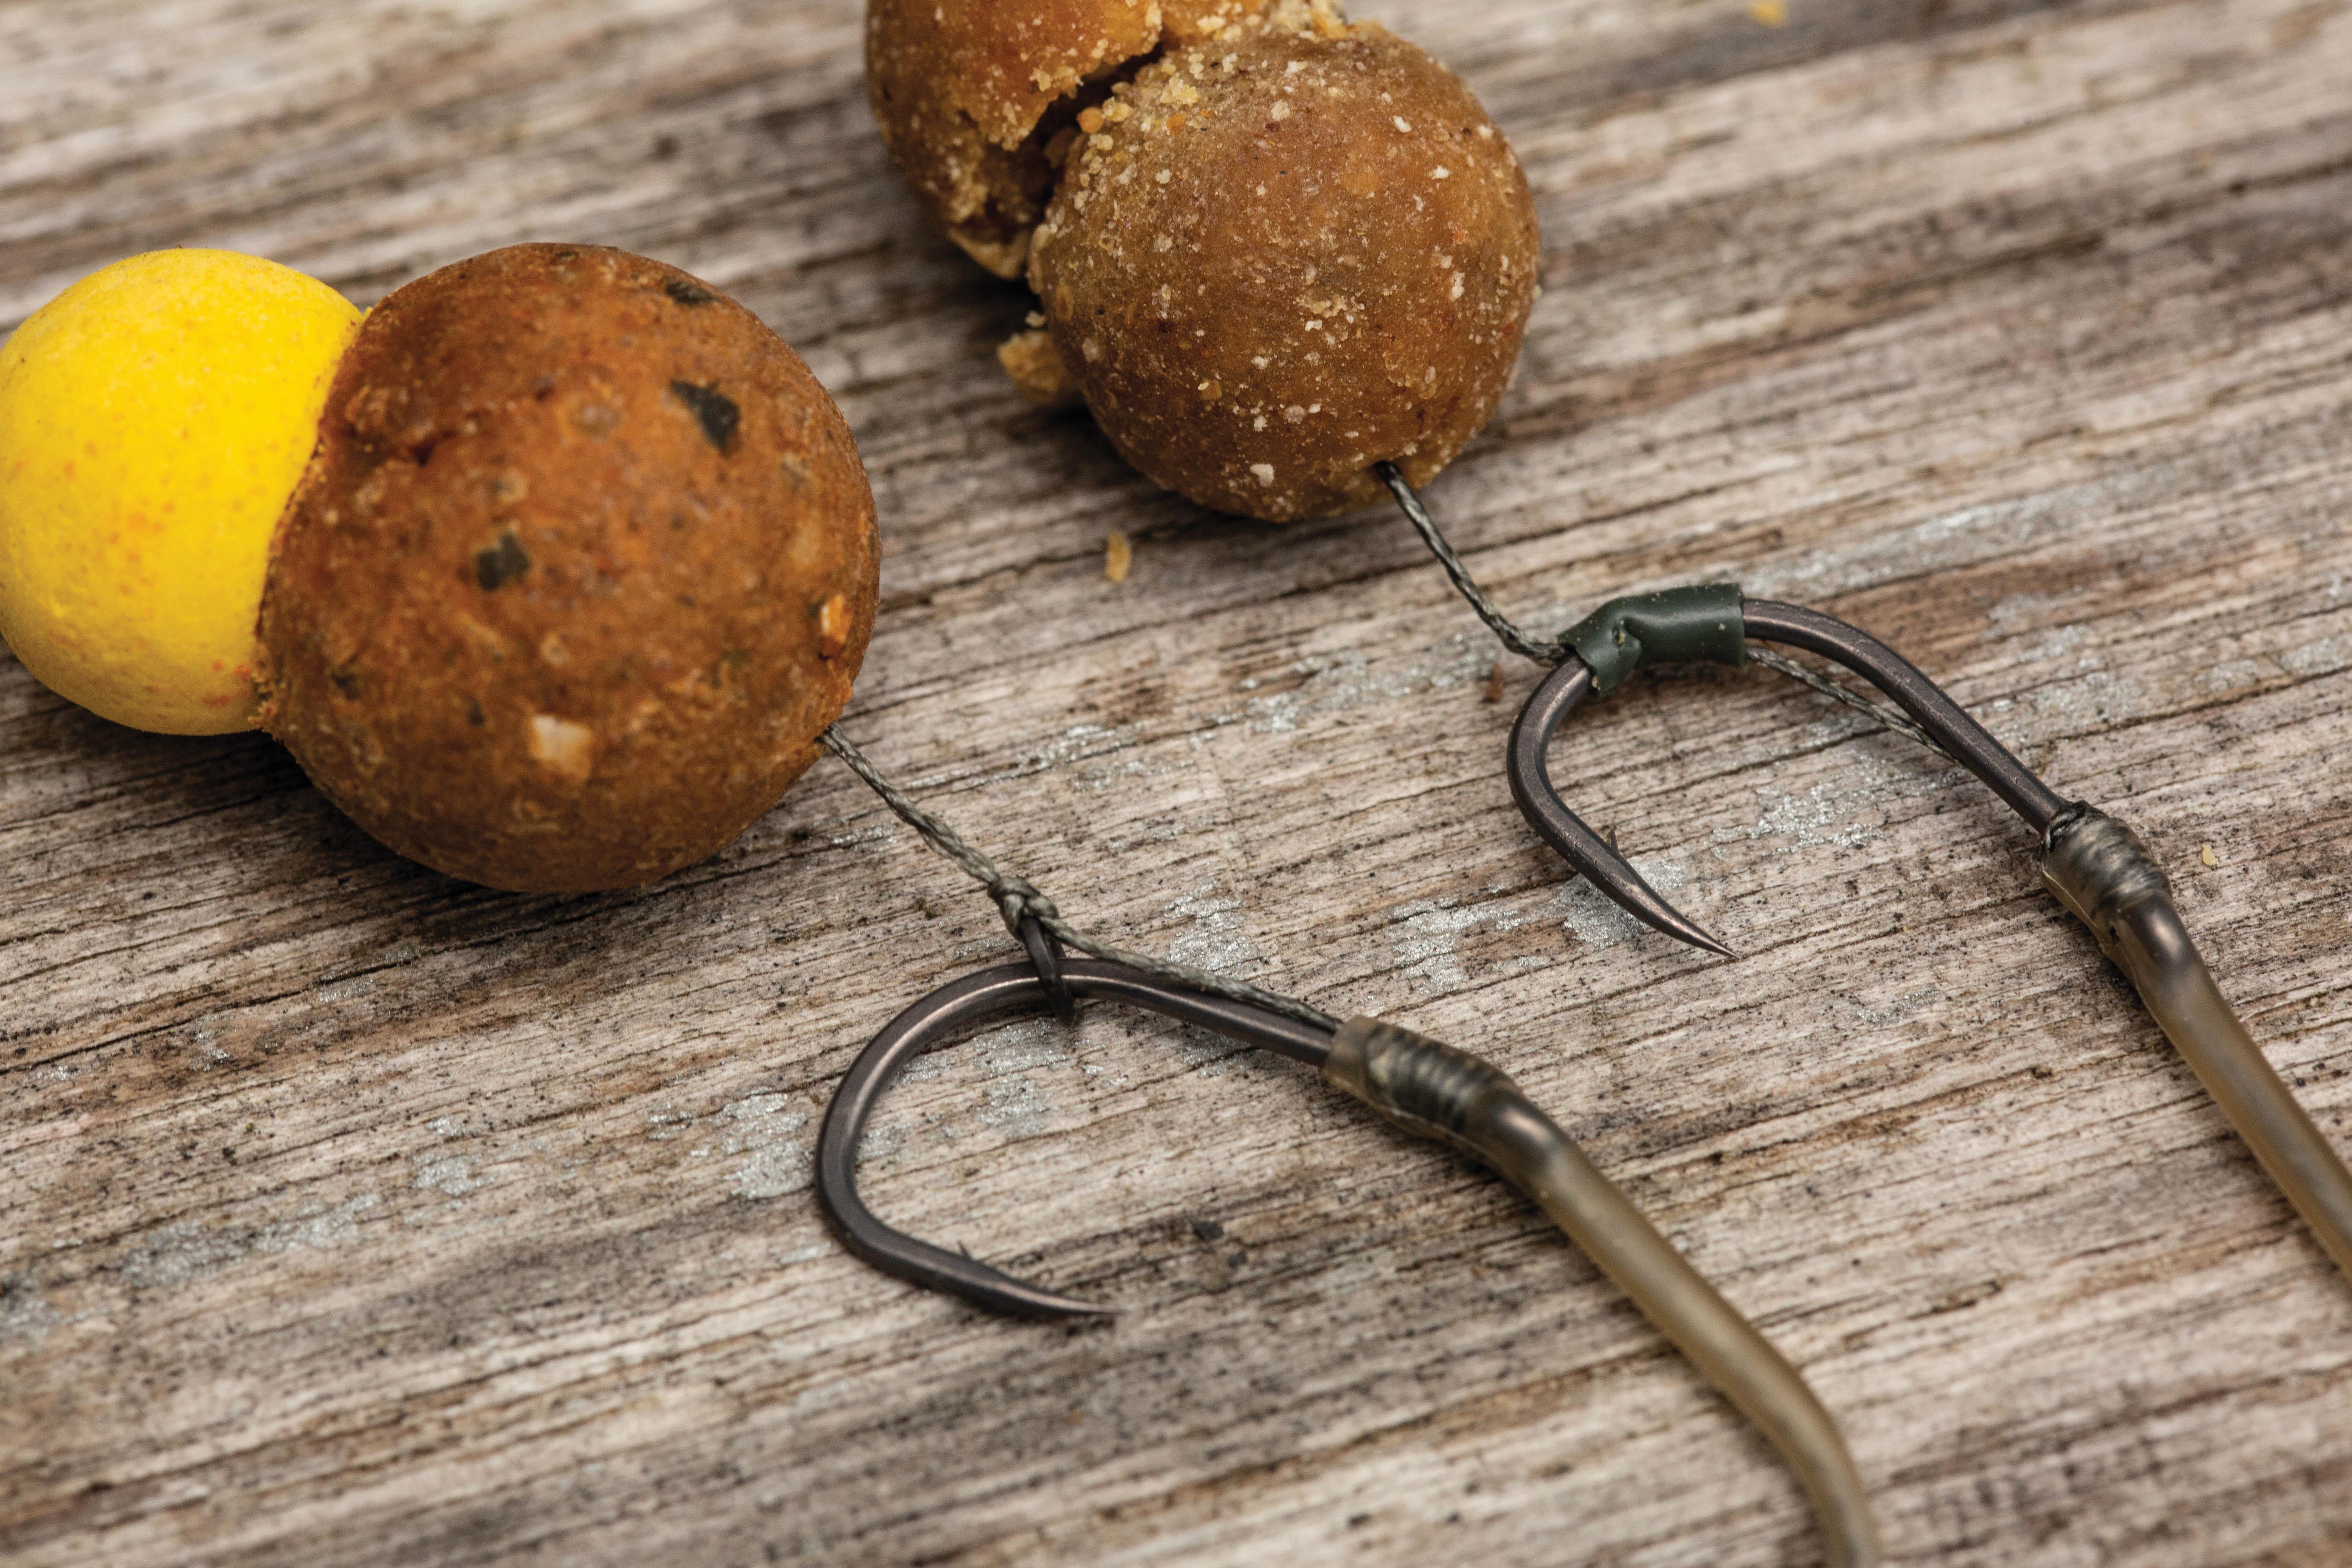
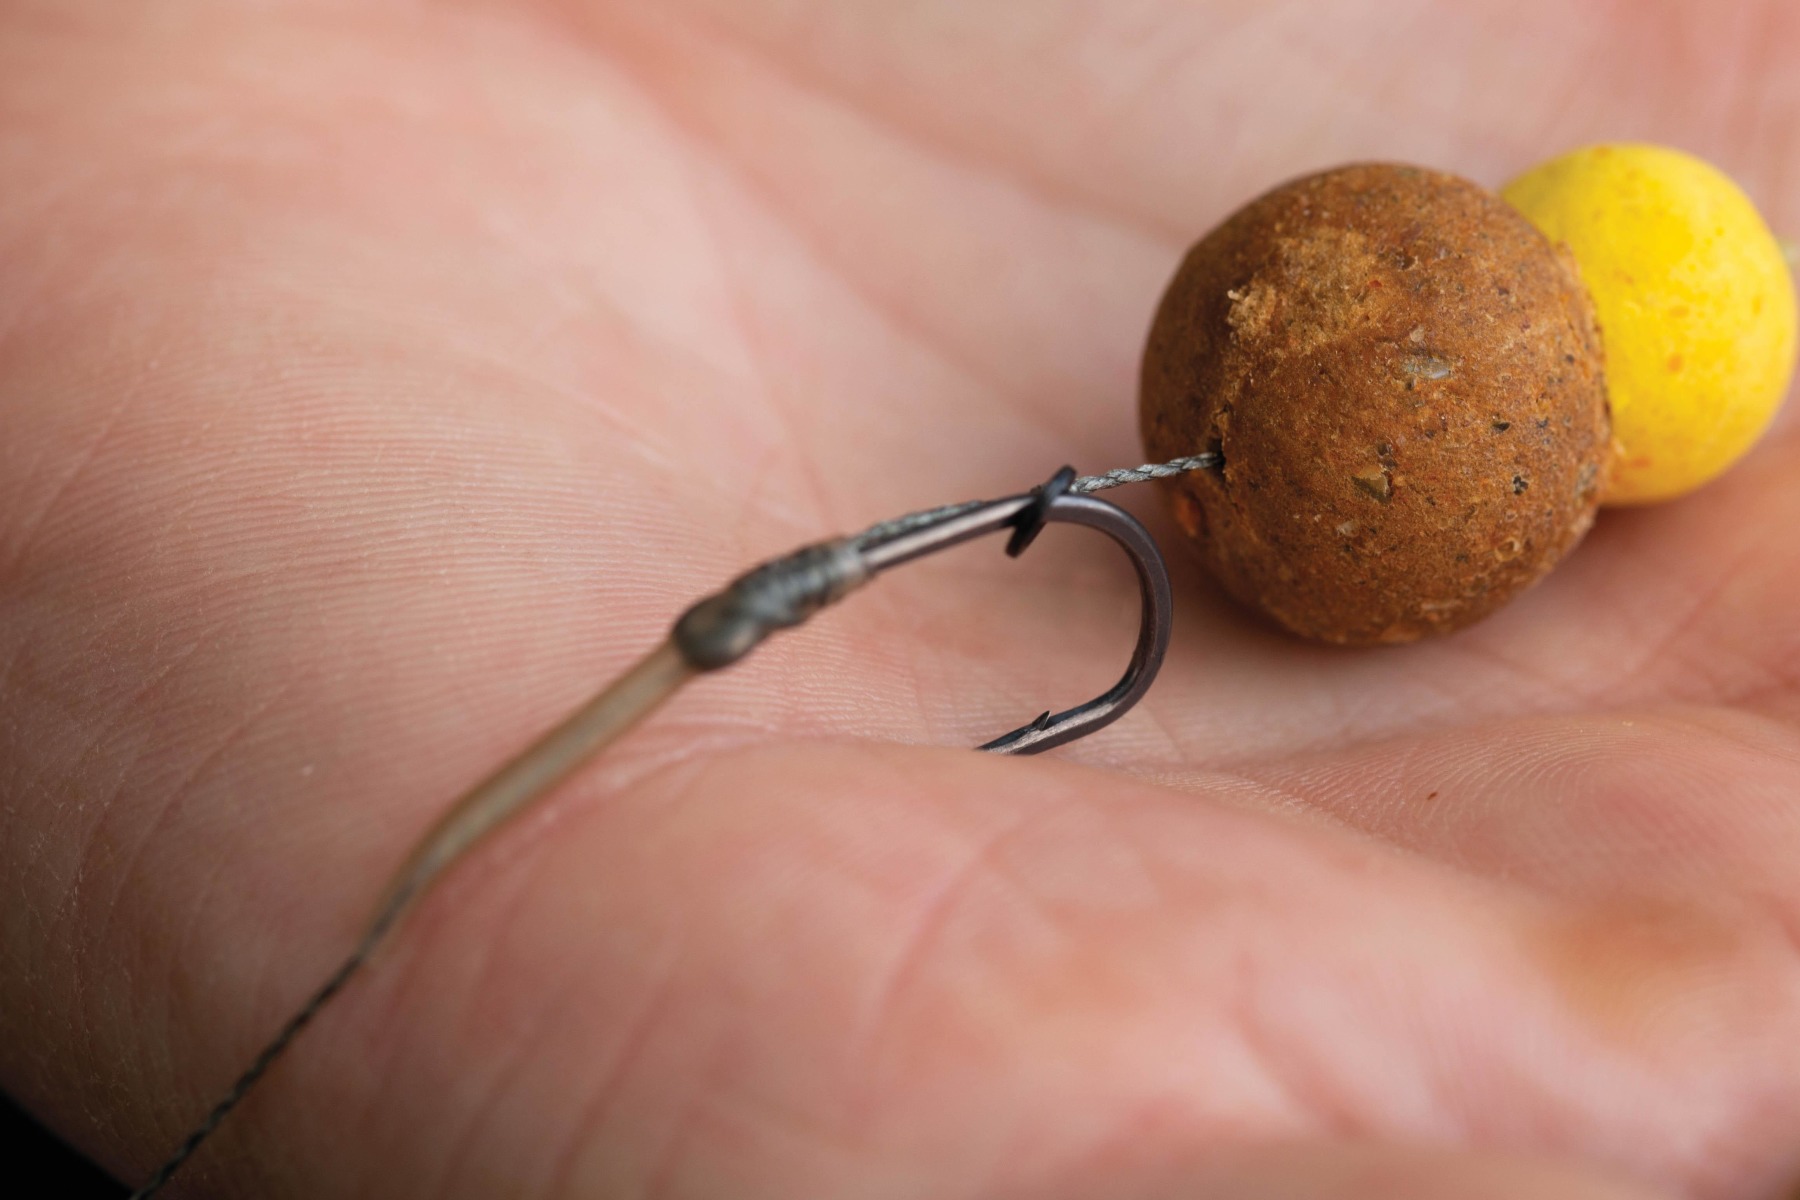
Hookbait and Hair positioning can be varied, and I would suggest that a good rule of thumb is for balanced hookbaits to come from the hook shank—positioned opposite the barb is a good starting point. Alternatively, heavy, unbalanced straight-out-of-the-bag hookbaits are reliably fished with the Hair trapped round on the bend—just like the Flipper Rig. With the Hair trapped in this manner, those heavy hookbaits simply help drag the hook point down, adding yet another layer of control in terms of consistent presentation, and then hook placement, the ultimate expression of which is great hook holds.
BLOWBACK OR KNOT?
This is a perennial question. If I am using bait that is likely to attract the attentions of small fish, then invariably, I’ll trap the Hair with a small section of silicone, or maybe a hook bead if I’m being really fastidious with my rigs. This way, the hookbait presentation cannot be ruined by small fish knocking the blowback ring up to the hook eye. With more carp-focused hookbaits like boilies, nuts or large particle, then I am happy to revert to the blowback ring on the Hair.

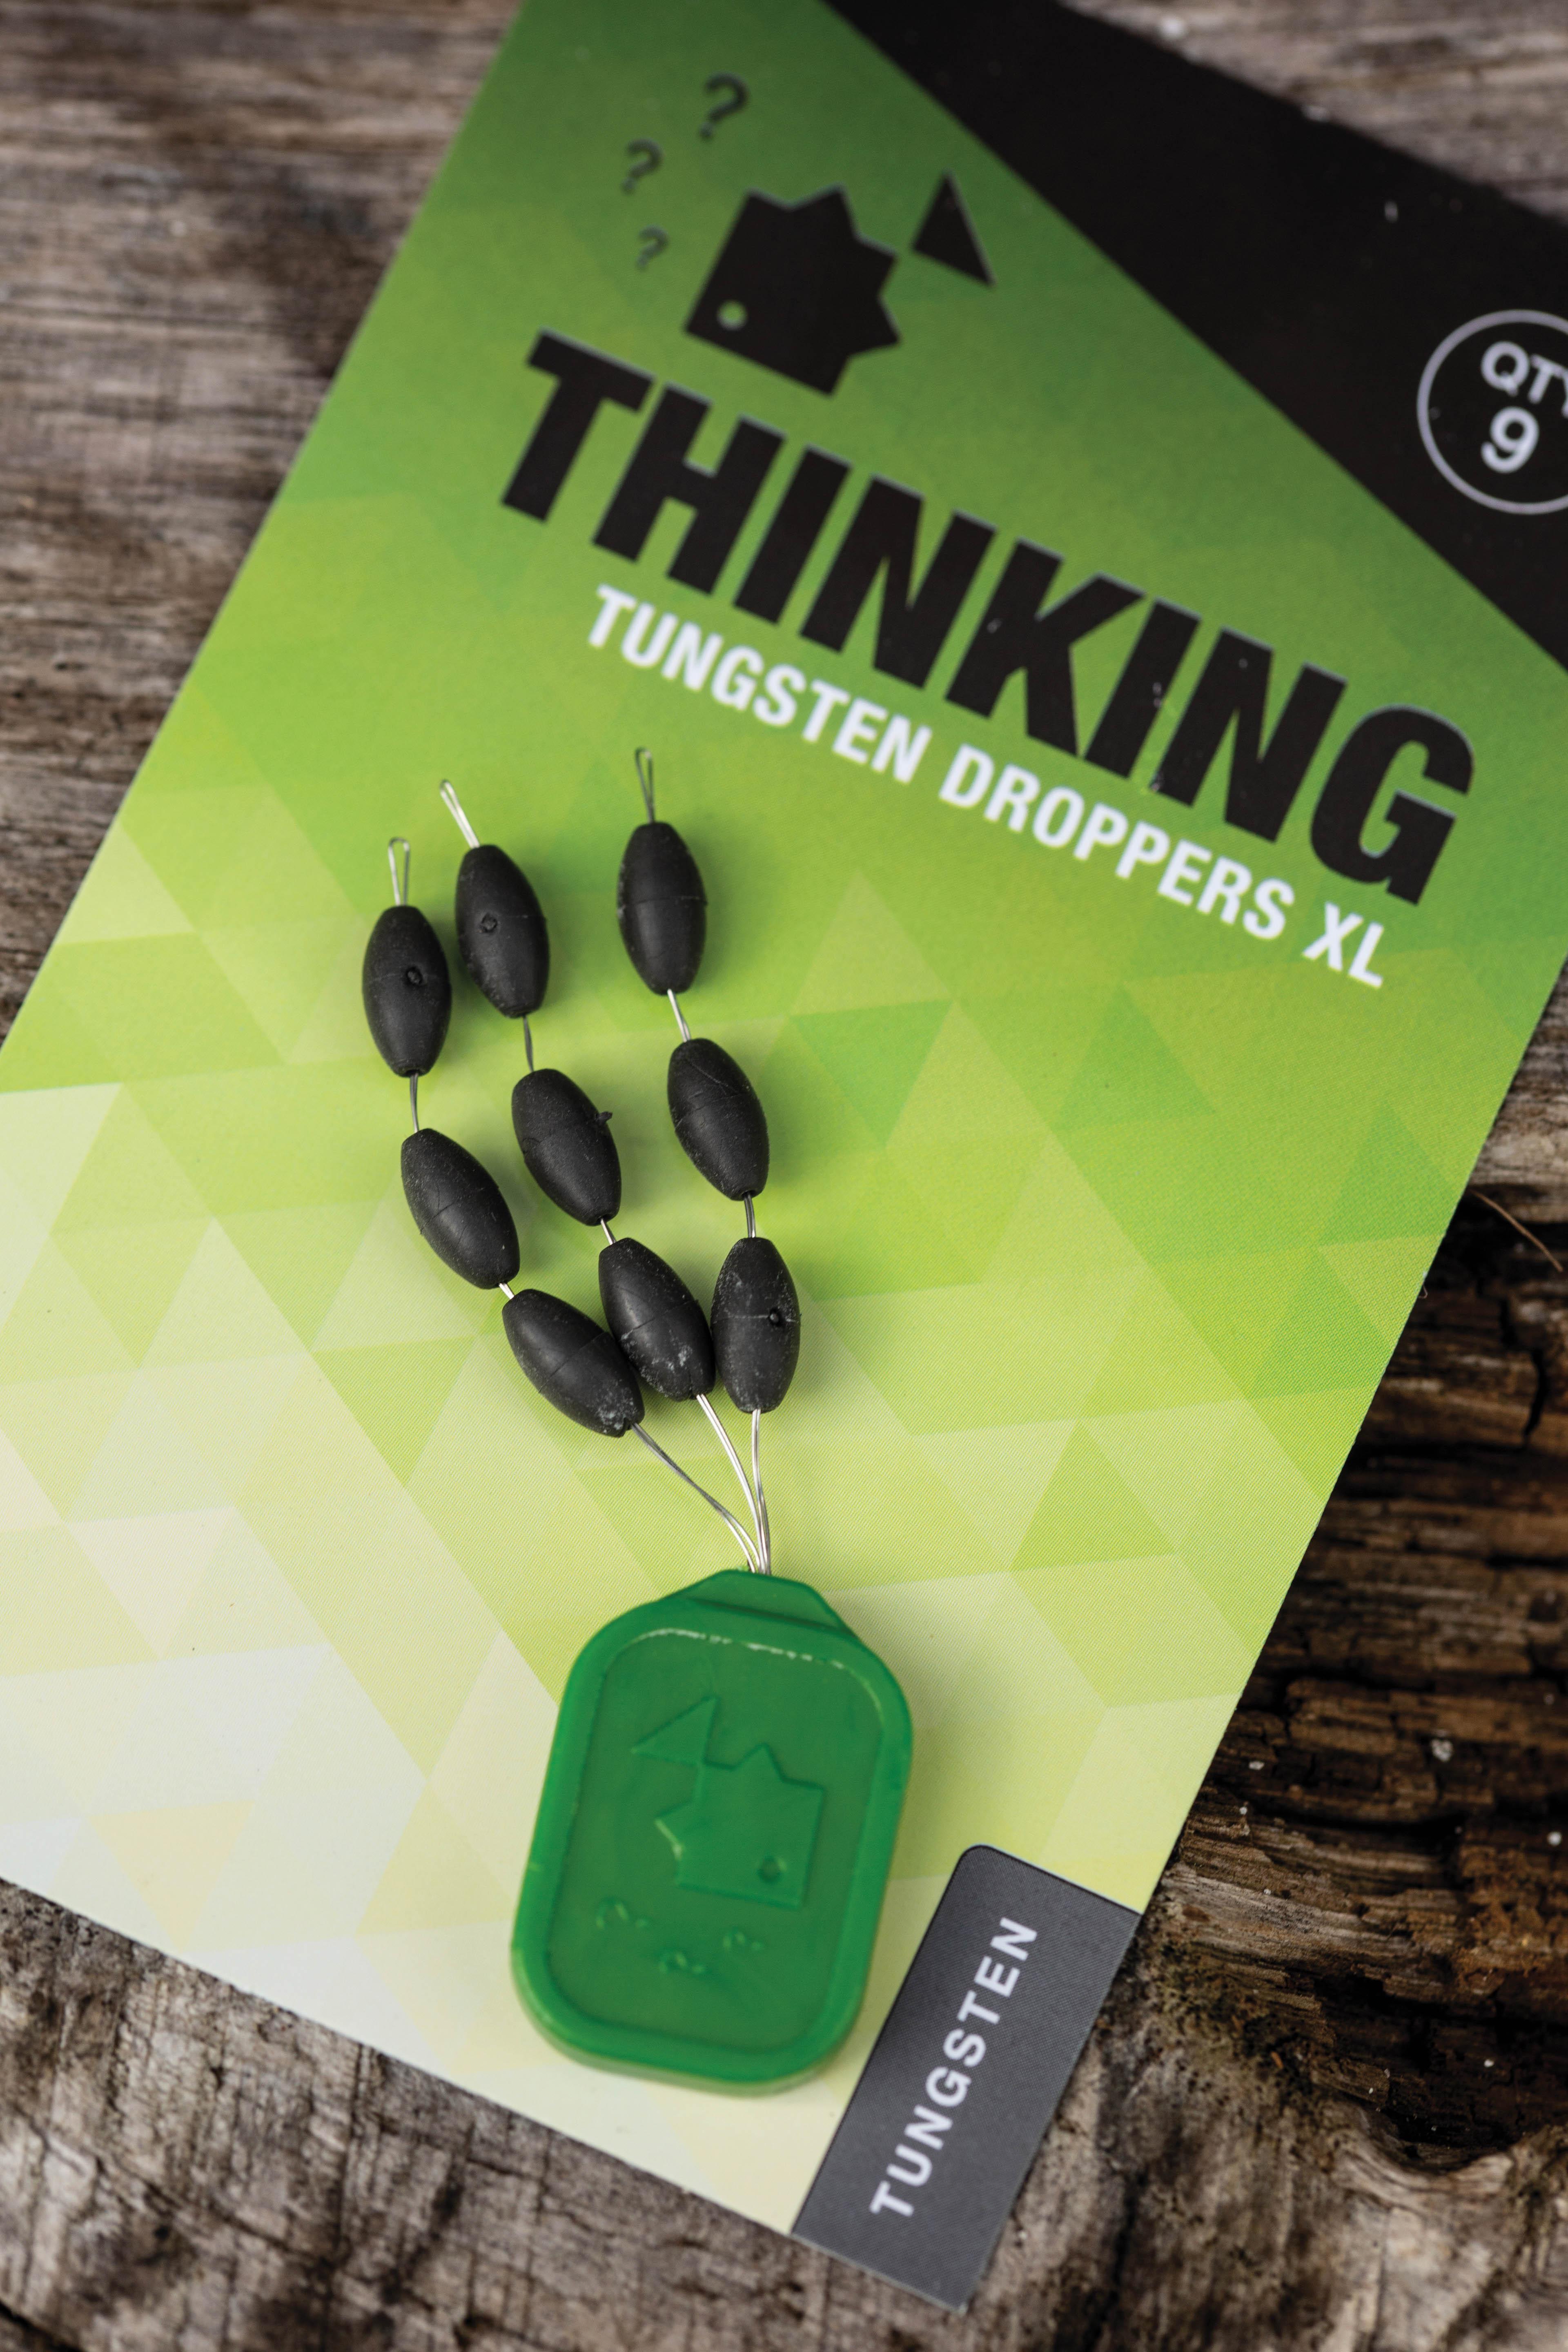
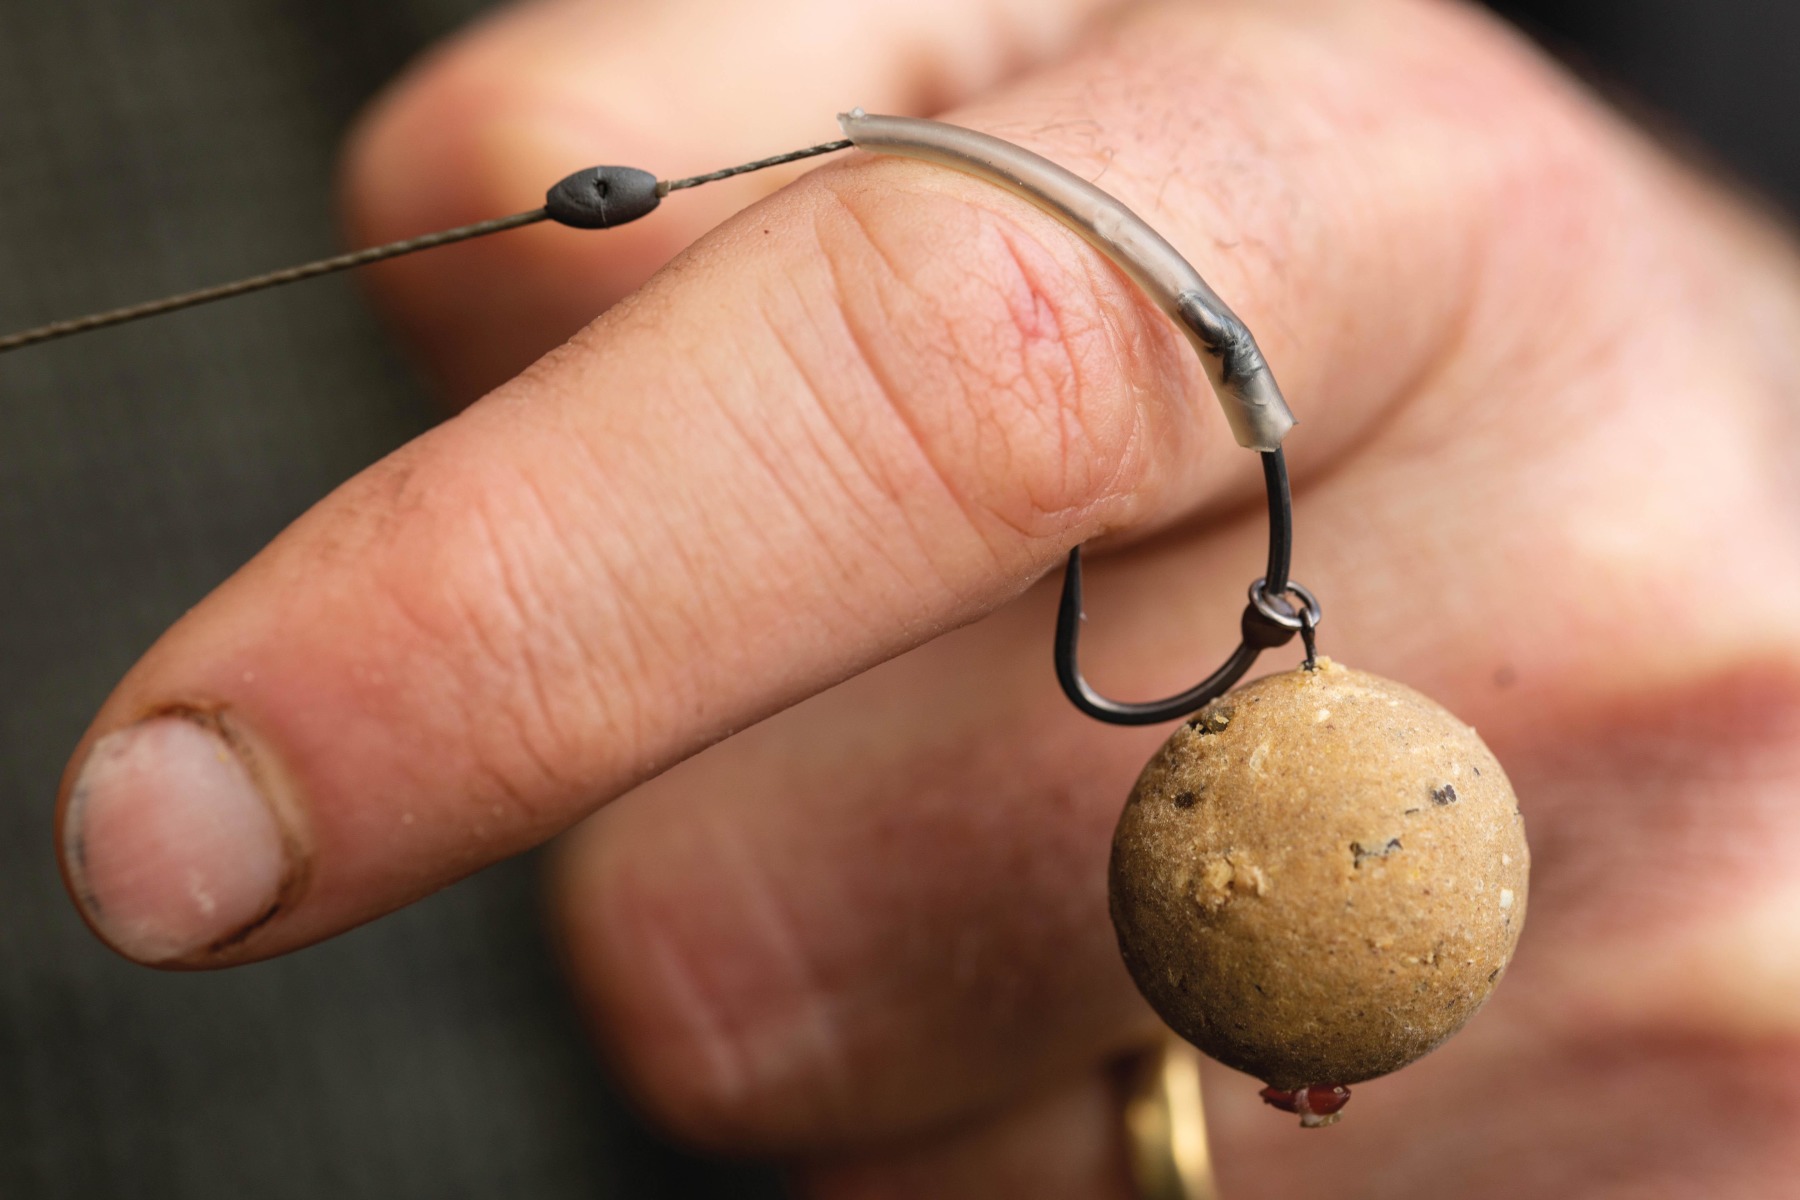
ADD A DROPPER
A further subtle tweak which really helps the rig react positively and reset consistently, is the positioning of the dropper or tungsten putty close to the end of the shrink tube or preformed kicker on the stripped portion of braid, just far away enough to still allow the hook to rotate, but near enough to avoid tangles—about 1cm is more than enough. And there’s no need to be shy either; a nice, extra-large dropper will only enhance the reaction and rotation of the hook, so the rig reacts even faster.
LINE-ALIGNERS
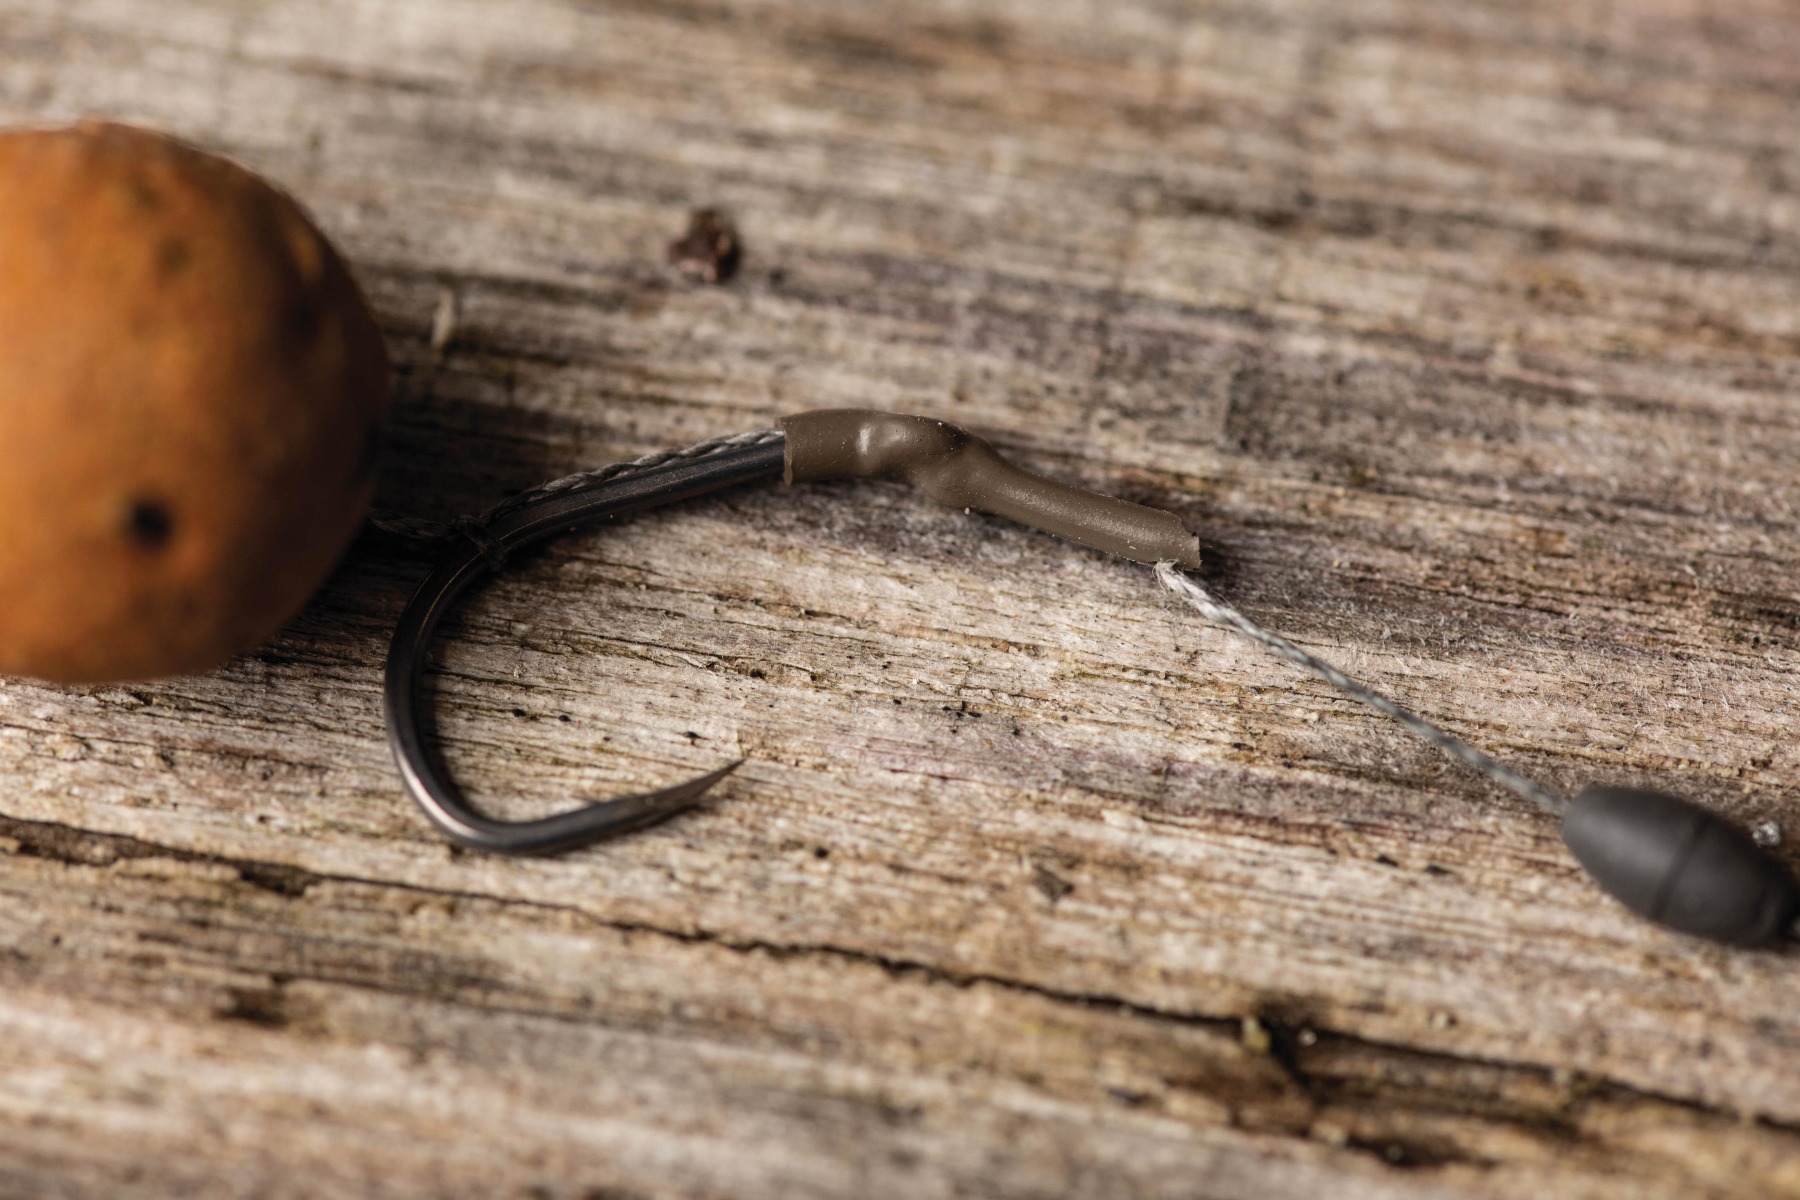
Despite the two being lumped together under the title of this little piece, I personally think of line-aligners as an entirely separate entity. The tighter tolerance from a much finer and defined exit point, and created by using a fine needle and flexible tubing, ensures that you can exquisitely fine-tune a line-aligner to an extremely high level, making sure that the hooklink and the hook point are aligned perfectly.
Despite the focus on semi-rigid shrinking rig tubing for many kickers, I think there’s something to be said for utilising silicone tubing with a more natural feel, and is less obtrusive, due to texture and the shorter length of most line-aligners. The silicone certainly still creates the same aggressive flip when the carp inhales the hookbait, and the hooklink tightens over the fish’s lip, and it may be worth considering if you find yourself playing with rigs one day.
THE RIGHT ANGLE
Ah, and before I go and forget again, there is one last little detail which may bring a few extra per cent to your rigs, and that is the angle that you trim the end of the line-aligner. Almost all readymade kickers feature a nice tapered end, but if you’re making your own hook aligners, try trimming the end so that it is angled (top edge removed), as this will ensure that the end of the tube cannot get in the way. Admittedly, it is just a small tweak, but it’s one which just makes the whole rig feel right, and ensures it reacts right, more of the time.
THE RIGHT PATTERN
Hook pattern choices are never set in stone are they! As with almost all rigs, the choice of which pattern to use is often based on personal preference and confidence. As long as you are confident that the mechanics of the rig are not impaired—that is to say the hook is still rotating aggressively—then simply utilise your favourite pattern.
So, whether you fancy trying a hook pattern that features an out-turned eye (normally poo pooed for this type of rig), a straight eye, or a conventional in-turned eye, as long as you test the finished rig and it functions as expected, you should rightly be confident that all will be good when it gets picked up and embedded in those big rubbery lips.
Testing bottom-bait rigs are best done with hookbaits in place, but I have yet to find a way to balance hookbaits and pop-ups in air, so I prefer checking these by drawing the rig across the back of my hand, or out of a mildly cupped hand—talking of which, reminds me of Catholic school!
If you suffer from inexplicable hook-pulls whilst fishing conventional rigs, or feel that the fish are regularly feeding on your areas and getting away with it, then there are always simple options to help switch things around in your favour, and tinkering with the hooking mechanism doesn’t necessarily mean changing everything, and it may be the case that a seemingly small adaptation can tip the balance in your favour.