

Why using a balanced hookbait is a no-brainer
John Kneebone explains how and why using a balanced hookbait is quite simply a no-brainer…
Catching carp: for me there are number of deciding factors and elements that led to this occurrence, and for it to happen a certain number of them need to be in place. It’s not always the same things, but there are a minimum number of aspects that need to be reached if you are to encounter your first take of the session. The more aspects that are in place or unison, the more fish you will catch.
Obviously a lot of these ingredients involved are out of your control, such as the weather conditions or pressure from other anglers, but a fair few things are under your own management, and therefore cannot be ignored. Location, mobility, bait application, as well as finer details like the choice of terminal tackle and rigs all leading to that important and vital final act: a carp sucking your hookbait into its mouth. For that reason I believe it then makes absolute sense to pay a fair amount of attention to the hookbait itself and the inclusion of ‘specialist’ hookbaits within your fishing approach.
Colours and flavours are all-important but it’s not long before the buoyancy and balance of such hookbaits become a key factor where performance is concerned. Sometimes masses of buoyancy is required for heavier rigs like the Chod, but sometimes the balance between positive and negative buoyancy needs to be a subtler affair. Perhaps in trying to mimic the characteristics of your free bait and feed, the topography of the lakebed maybe, or simply the mechanics of your rig and presentation.
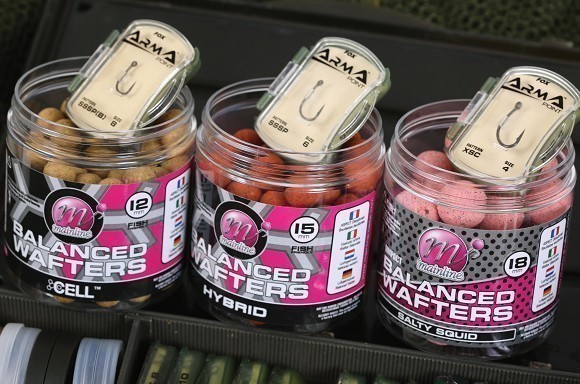
This is where ‘critically-balanced’ hookbaits come into play – a hookbait advantage that has become a whole lot easier to employ with the Balanced Wafter range of hookbaits from Mainline. Why? Well, firstly you don’t have to roll them yourself, which in the past has generally been the case. These hookbaits are ready-to-go, straight out of the tub. In fact, they couldn’t be easier to use: simply threading one onto a Hair rig is all you need to do to present these hookbaits and engage the advanced benefits.
So given the choice of attaching a standard bottom bait or a Balanced Wafter, each requiring the same minimal level of effort to use, to me it’s a no-brainer. The many advantages of the wafter win hands-down – every time!
Balanced wafter: What are they?
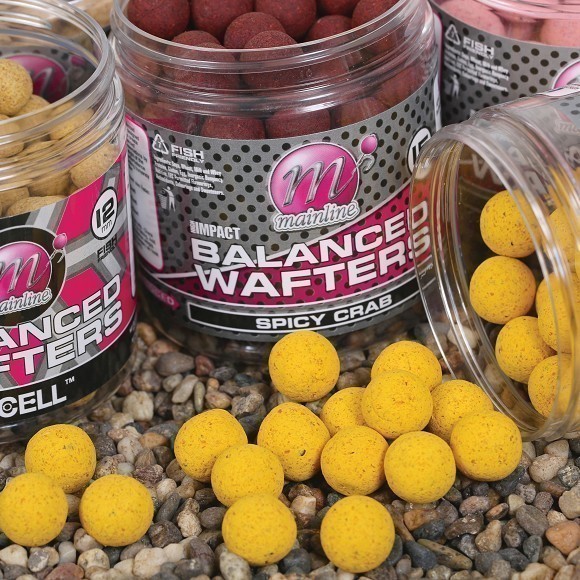
Basically, Balanced Wafters are a range of hookbaits that are neither standard bottom baits or pop-ups – they are a combination of the two made using both sinking base mix ingredients and buoyant ones combined at precise levels. The result is a slow sinking, ‘critically-balanced’ hookbait that will react and fly up into the mouth of inquisitive carp very quickly. All that’s needed to counterbalance the almost neutral buoyancy of the wafter is the weight of the hook and rig.

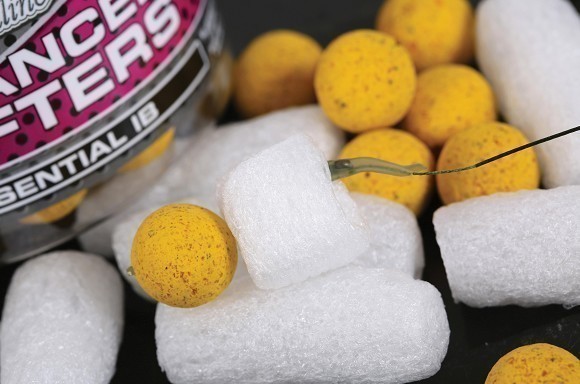
A Balanced Wafter hookbait will react similarly to your freebies – ideal when fishing over a spread of boilies
Advantage #01
Matching your feed and the feeding situation
I generally place baits other than Zig or surface baits into two categories and feeding situations: boilie baits and fishing a wider spread of freebies and particle baits such as hemp and pellets fished as tight to one spot as possible. The great thing about wafting hookbaits is they hold characteristics to match either style perfectly.
Take boilie fishing for example: the free baits scattered around react and perform differently to the one that’s attached to a rig when in the vicinity of feeding fish. Short of the resistance generated by the terminal tackle they will gently sway, roll, lift-up and drop back to the bottom – quite a way in some instances. Put a few boilies in the edge and gently move your hand past them and you will see this movement. Now for the most part I don’t think this lack of similarity between free bait and hookbait is overly detrimental in getting a bite, but I don’t think you can discount it as a possibility either. For that reason and because it’s something I can easily avoid by simply applying a wafter to my approach, I will. I mean, why wouldn’t you? Lighter in weight than a standard boilie, the wafter will behave in just the same way as the freebies despite being attached to a rig.
Increased rig performance equals catching more fish
In contrast to a spread of boilies where I’m looking to coach the fish into moving between mouthfuls, I like to keep my hookbait(s) and free bait in a tight spot, close together where particles are concerned. Okay, you’re always going to get the odd Spomb drift off course when you’re baiting up, but the last thing you want is too many spread about. A stray Spombs-worth of particle can preoccupy a couple of carp for quite sometime (and obviously they’ll be nowhere near your traps) because with so many small food items close together the carp make little to no movement as they feed.
It’s also this lack of movement that is the key point to consider when matching the feeding situation with your rig and hookbait. The fish will be in a tilted position, mouths close to the lakebed as they feed, so for me, a pop-up three-inches off the deck is not the one – the hookbait must also be close to the bottom. A small wafter is perfect for this situation and as you’ll see later, you can easily tweak your presentation so it is critically poised to react as soon as it is approached.
It’s worth pointing out that I like my hookbait to standout, and a 12mm bright yellow Essential IB wafter or the ‘Corn Stop Rig’ which I’ll show you later are ideal for covering this need.
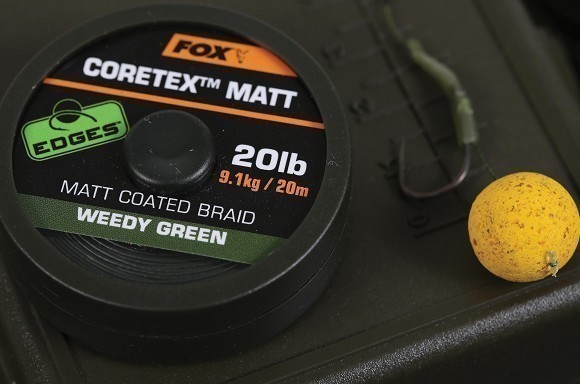
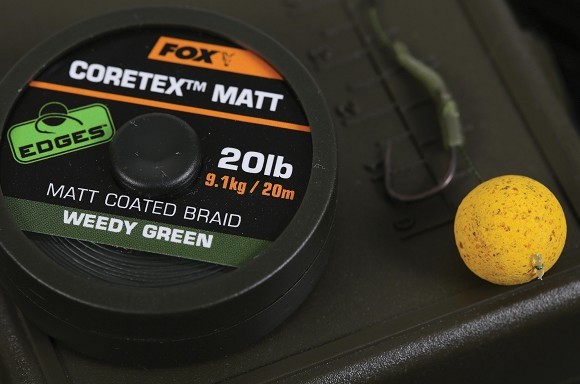
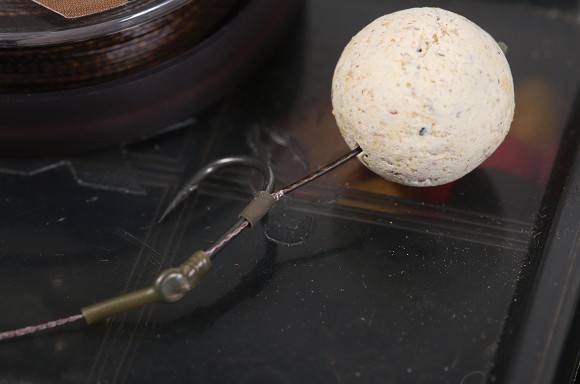
A supple-coated braid makes the perfect hooklink material for a long wafter rig in choddy, weedy conditions
Advantage #02
Avoiding the popular approach
In my experience, pop-ups without doubt overshadow the use of bottom baits on most venues, and for good reason – they are superb hookbaits! Most lakes contain some sort of weed these days and pop-up rigs are a fantastic way of gaining good presentation in these conditions. There are also times when an ‘in-your-face’ bright pop-up is just a great tactic for attracting a bite – I’m not about to dismiss any of this.
What I will say though, is I’m also sure there are times when even the most prolific set-up is ignored or rejected due to its popularity – especially on pressure waters. The fish can simply wise-up to the same thing over time and/or need to be in the optimum feeding mood to go for it. Obviously ideal conditions are not always in place and temping a bite can be pretty hard, and so an alternative to the norm can be needed.
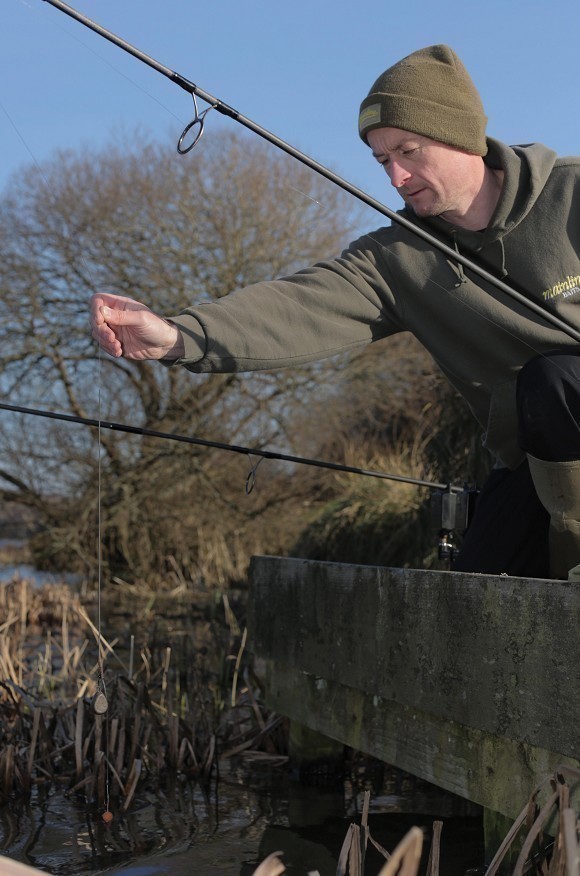
Using PVA nuggets will help set the slow sinking rig
Balanced Wafters are the ideal choice as they can provide you with confidence even when a tricky lakebed containing chod or weed is encountered – just like a pop-up. All you need to do is take advantage of the ‘slow sinking’ properties of the wafter. Longer hooklinks are the way to start, using a coated braid that will be nice and supple to follow the contours of the lakebed, but will contain enough memory to kick-out the hookbait away from the lead. Add a PVA nugget for insurance and the wafter will come to rest nicely above light weed or onto silt or chod.
Although the biggest edge perhaps is when it comes to fishing clean areas. Like I said, very few anglers fish straightforward bottom baits, flush to the deck and a clean spot of clay or gravel is the ideal opportunity. With that little bit of buoyancy held within a wafter, you can add clean silt to that list too.
What’s great is that you’re not actually using a standard bottom bait despite the hookbait being tight to the bottom. The wafter is ‘critically-balanced’, poised and ready to react quickly and positively to feeding carp, providing you with the best of both worlds, an alternative to pop-ups where tricky conditions are concerned and probably a different rig presentation to the guy in the next peg and the one after that. Tactics that the carp are not likely to have seen a great deal, even on the most pressured of lakes and therefore one they won’t have wised-up to – now that’s an edge.
Setting up: The basic guidelines
The Balanced Wafters have been designed with simplicity in mind. Despite the fact you can apply various tweaks and set them up to your preferred style, there’s no real need to overly complicate things – a straightforward Hair Rig is fine. There are three sizes of Mainline wafter which have each been designed to suit a common hook size. The guidelines are: Wafter/Hook Ratio: 12mm/size 8; 15mm/size 6; 18mm/size 4. Not all hook manufacturers use the same gauge wire and so hook weight and counterbalance may also vary, so always check rigs prior to fishing.
Advantage #03
Increased rig performance
Again, referring back to where I began this piece, I’m a great believer that when attempting to induce a ‘carp take’, a certain number of things must be in place. The more things that are in-tune, the more likely are the chances of catching. So anything I can add or control must not be overlooked, so things such as rig mechanics and performance are paramount, regardless of what water I’m fishing.
Leaving the hooklink coating on the Hair section can add a little weight and help the hookbait kick away from the hook
When I’m fishing, say, a big low-stock pit, bites are going to be few and far between, takes are precious and obviously you want to make them count, so if another angler talks about routinely paying massive attention to every detail of their approach it’s understandable and easy to relate to, but it really makes no difference what type of water you’re fishing.
If I’m on a runs water, I want runs, and as many as I can get – and stacking a few more odds in my favour just like you would on a more difficult water will do that. Even lakes black with fish still contain carp rarely caught and therefore highly desirable. How do you know it won’t be one of these fish that comes across your rig? You don’t and so it always pays to fish for what you might think is the cutest carp in the lake and the more friendly fish will look after themselves.
So what could be simpler than threading a Balanced Wafter onto the Hair to increase the chances of your hook going from its position of rest to a secure hook hold in the carp’s mouth? It’s just too simple to not bother no matter how easy a lake may be.
Essentially the Balanced Wafter sinks under the weight of the hook to hover just above the hook. Dependent on the length of the Hair or rig tweaks you may make, this also does a good job of hiding the outline and sight of the hook from above. A small added benefit but not really the main one, which comes from the slight buoyancy of the wafter negating the weight of the hook. In terms of rig mechanics this means that the time it takes for the hookbait to fly into the fish’s mouth under suction in dramatically increased; along with the turning speed of the hook, and ultimately the hooking potential of the rig. Even when carp are cautious or feeding with little movement, the resistance of the lead is instantly engaged to help gain a solid hook hold.
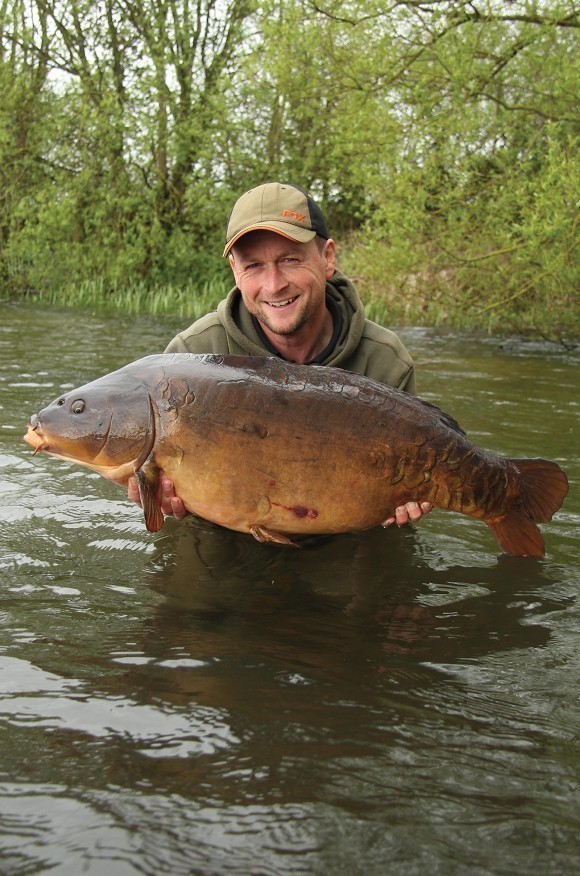
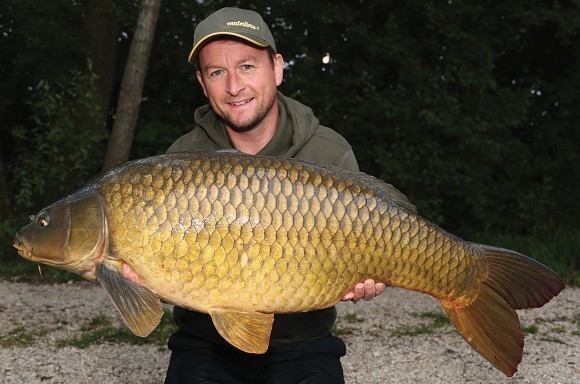
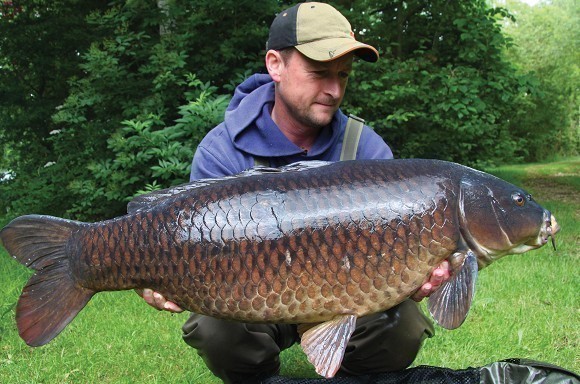
A brute taken on a balanced hookbait
No matter if it’s a rare target or a high number of bites from a prolific water you’re after, these are fundamental fishing elements enhanced by a balanced bait, which can only improve your catch-rate.
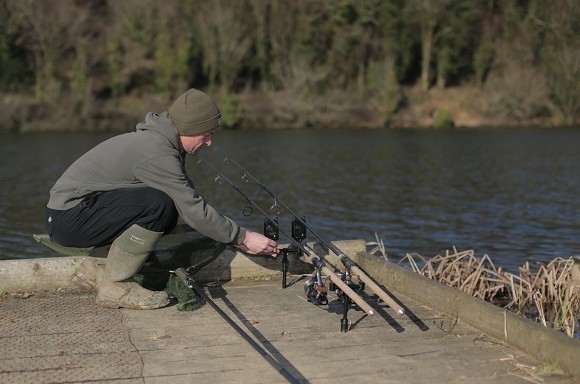
Rigs, tweaks and presentation
Other hookbait edges worth trialling
As I’ve said, the Balanced Wafters are suitable for any bottom bait-based presentation, however simple or advanced you’d like that to be. For that reason I would advise incorporating wafters into your favourite rigs and those you are most confident in using.
Personally I like to use a coated braid Hair rig with an inch or so of the coating removed near the hook for general presentation – a rig of around seven-inches in length that I’ll lengthen to 14-inches upwards when weed is an issue. When fishing over clear areas such as gravel, which will generally equal a clear water pit, I find a Combi Rig to be very effective. Utilising a fluorocarbon boom section to help disguise the hooklink in the clear water, although the hookbait is still simply attached to a Hair.
A long bottom bait presentation helped nail this stunning common
One set-up I’ve not yet mentioned where the qualities of a wafter really shine is solid PVA bags – where a little balanced bait plus a mouthful of pellets are working together in unity to create a deadly trap. The attraction and enticement of the tasty morsels contained within the bag combined with a hookbait poised to react from any carp investigation. Although the rig I use for this set-up is again a simple Knotless-Knot Hair Rig, tied very short at just three- to four-inches in length with soft braid.
The PVA bag rig is a good example of where small tweaks can fine-tune the set-up of the wafter. Add a little buoyancy with a small piece of foam or one of my favourites, a tiny corn Hair stop and it’s possible to have the rig poised to the absolute limit – with the hook upright and barely touching bottom or sat above the pellets of a bag. In contrast to this, you may prefer the hook and rig planted low to the bottom or sitting down within the PVA bag contents. Stepping-up the hook size with a small wafter is an easy way of achieving this.
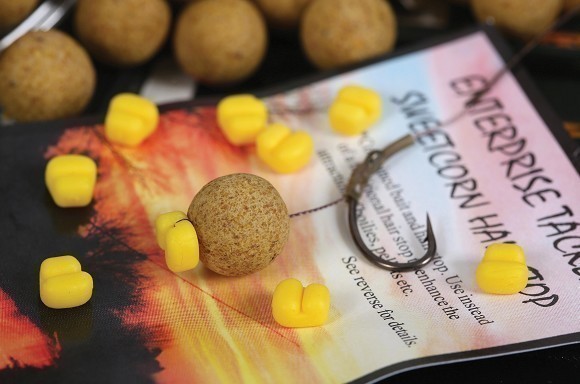
Add a little buoyancy with a small piece of foam or one of my favourites, a tiny corn Hair stop
You may find that the counterbalance of your preferred rig, hook pattern and/or make falls slightly outside the general guidelines of Balanced Wafters and a few adjustments need to be made to set them up exactly how you like them. There are a few ways of doing this but what’s vitally important is that you always lower your rig in the edge or a bucket of lake water and check how it sits before casting out.
Like I say, it’s not difficult to tweak the balance to set the wafter precisely how you want it – suited to your fishing situation and ready to conclude all the other things you’ve put in place in gaining a bite!
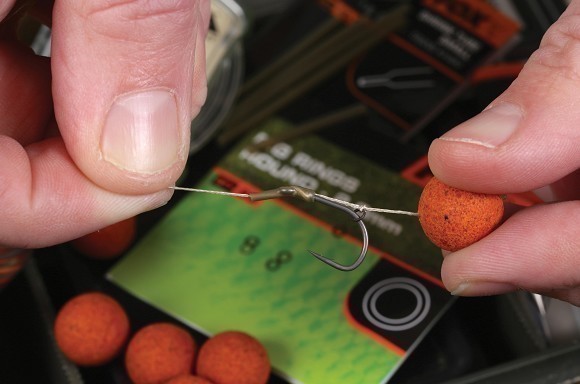
How to tie John's Balanced Wafter Combi Rig
STEP 1 These are all the components you need to tie John’s Balanced Wafter Combi Rig.
STEP 2 Cut away 14cm of braid, form Hair-loop and thread on a 15mm Balanced Wafter.
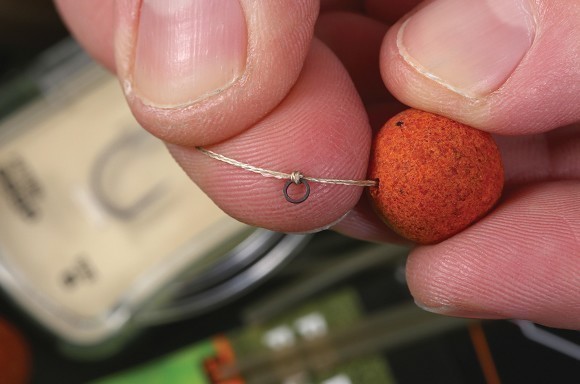
STEP 3 Add a rig ring 1-2cm from the wafter securing in place with an Overhand Knot.
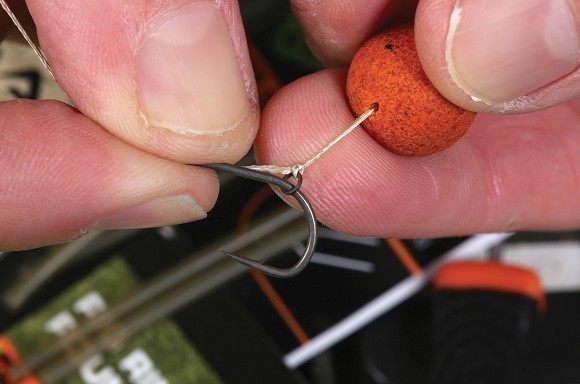
STEP 4 Pass a size 6 SSSP hook through the rig ring so it sits just before the hook bend.
STEP 5 You can now secure the hook in place on the braid using a simple Knotless Knot.
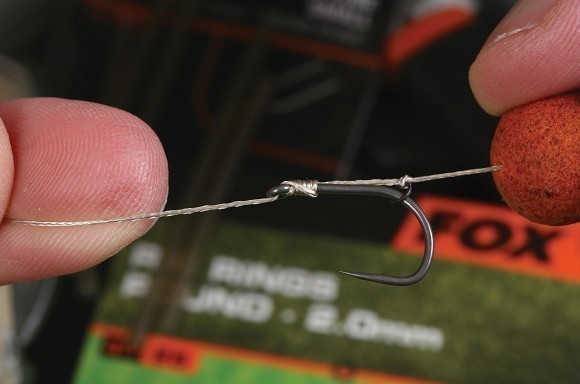
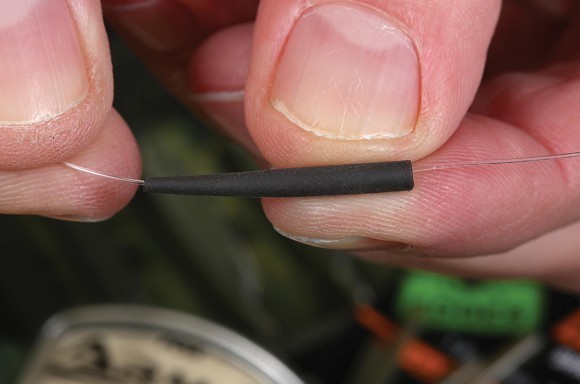
STEP 6 Trim off a short 1.5cm section of small shrink tubing and thread onto the braid.
STEP 7 Position the tubing on the eye of the hook and shrink down over steam like this.
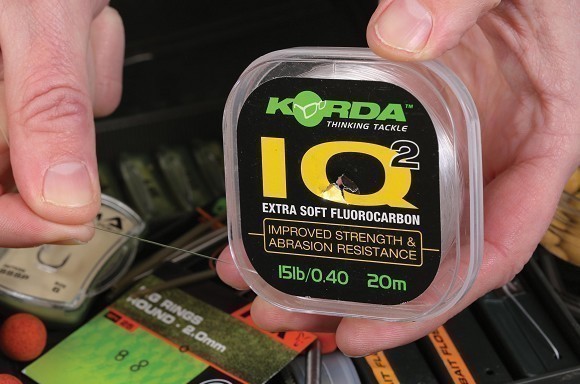
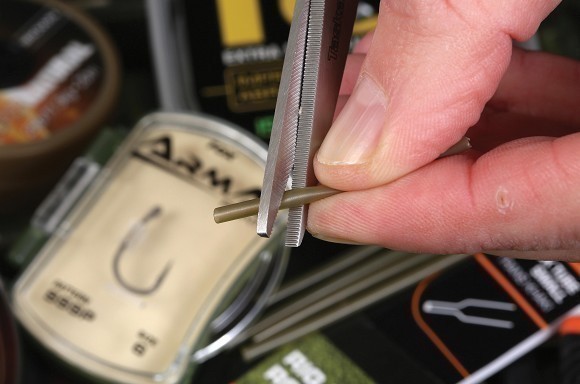
STEP 8 You will need around 24-26cm of supple fluorocarbon material for the next step.
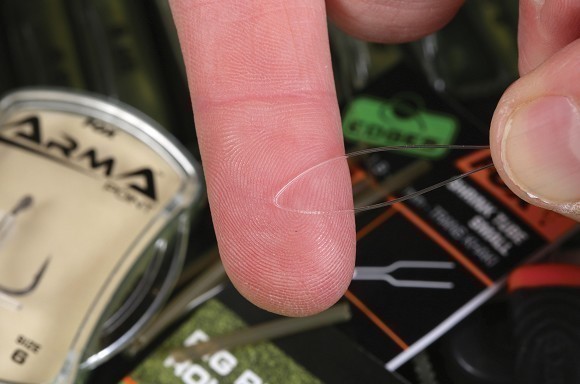
STEP 9 Fold around 4-5cm of the fluorocarbon back onto itself to form a sharp loop.

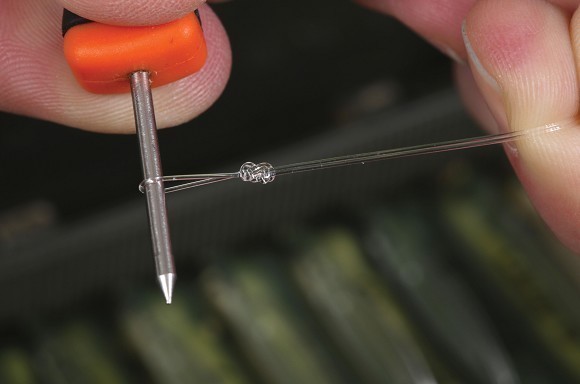
STEP 10 Pass the braid through the loop wrapping down and around it six or seven times.
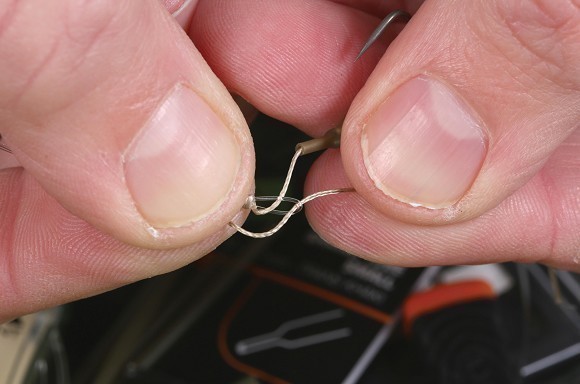
STEP 11 Take the braid back through the loop and tighten down by pulling this tag end.
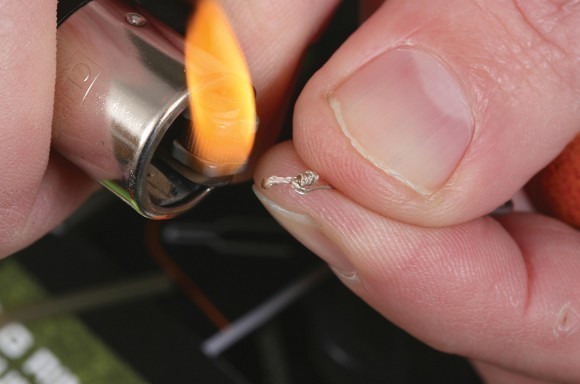
STEP 12 Trim the knot leaving around 4mm of mono, blob the braid to prevent slipping.

STEP 13 Mould some rig putty around the knot to tidy it up and aid hooking potential.
STEP 14 With the combi knot complete thread an anti-tangle sleeve onto the hooklink.
STEP 15 Tie a Figure-Of-Eight-Loop Knot in the end of the fluorocarbon and tighten.

STEP 16 Pull the anti-tangle sleeve back up over the knot and the finished rig is ready!