

How To Achieve Rig Finesse
When it comes to rigs and rig mechanics, Lewis Read has much to say. Here, he offers yet more tips on how to get your set-up exactly right
My standard method for checking the sharpness of a hook point is the well-described fingernail test. Over the years, doing a plethora of work nights has often meant that I bring my hooks back on rigs already on the rods. I just make absolutely sure that the hook is ‘sticky’ when touched against my nail, whether it’s held straight to the nail, or touching it at a slight angle—so with the hook leant over both ways. This test shows, quite effectively, whether the point is slightly burred. It’s something I have always done, but I am more aware of it now than ever. If I am unsure, or want to double-check my initial prognosis, I will run my fingertip along the hook point (away from the point itself). When doing so, you can normally feel even the slightest of burrs, as it will trip repeatedly, across the sensitive skin of your fingertip. If the hook passes these simple tests, then it’s more than good enough for me. Sharp is sharp.
In almost every case, other than when using tungsten-coated hooklinks, decent rig putty adheres without any problems. The only issues with adhesion occur when the surface, or the braided material is moist. As long as the hooklink or swivel is dry, and you have plasticised the putty slightly by giving it a gentle roll between your fingers—softening it and making it stickier—you will be able to feel that it has attached firmly. You can test it with a little pull or a push to completely confirm that that’s the case.
Tungsten hooklinks are just plain weird, and I will use a couple of tungsten droppers instead. Why? Well, the surface of such hooklinks tends to be very smooth due to the inclusion of super-fine tungsten powder, and getting any putty to adhere to it is more trouble than it’s worth. On hooklink braid, if I twirl the braid, opening the fibres and then work the putty into that section by rolling it between my fingers, it will lock into the braid and form a lovely, tidy mouse dropping-shape weight.
On swivels, I roll the putty so that there is a tapered end that will pass through the swivel eye. Then, having wedged the thinnest end through it, roll the remaining putty around to form a tidy teardrop shape that is seamless and fully adhered to, and around the eye.
How balanced I like to make my pop-ups largely depends on the rig, and to a lesser extent on the baiting scenario. Some set-ups, like the Hinged Stiff Rig, require a particular balance to ensure optimal performance, one that allows the hook section to move nicely on the loop. Whereas the ‘Metal Mickey’ or Combi/Cobra version can be overweighted—and fished slightly lower—if fishing over a bit of ‘munga’. So realistically, my go-to option is a slow descent, whether it’s a Ronnie or a Hinge, one that allows the hooklink to lay out gently. I will adjust and overweight it very occasionally, though. I will also occasionally super-finely balance singles in cold water, if I am using boilies for hookbaits in winter, although that’s a rarity, to be honest.
The key to tying loops that sit straight and perfectly round, is to practise, practise, practise! There’s so much information about knots online. Practise tying your knots, and test them until you are personally satisfied that the knot is the strongest option, and is ‘stable’. By stable, I mean that the knot suits the material. For instance, the lovely tidy Rapala Loop Knot I use, and advocate with fluorocarbon, is a bit pap with normal monofilament hooklinks. On a first pull, it can seem perfect, but it seems to lose its tenacity and grip with softer mono materials. In this case, I revert to the olde world and ultra-dependable Figure-of-Eight. It doesn’t create that lovely, rounded teardrop shape, but it’s as strong as an ox!
The single most important instruction in respect of that specific knot, is to tighten it using the tag, not by pulling on the loop, to avoid forcing twist into the loop and making it look as nasty as a decaying rat on a sharp stick.
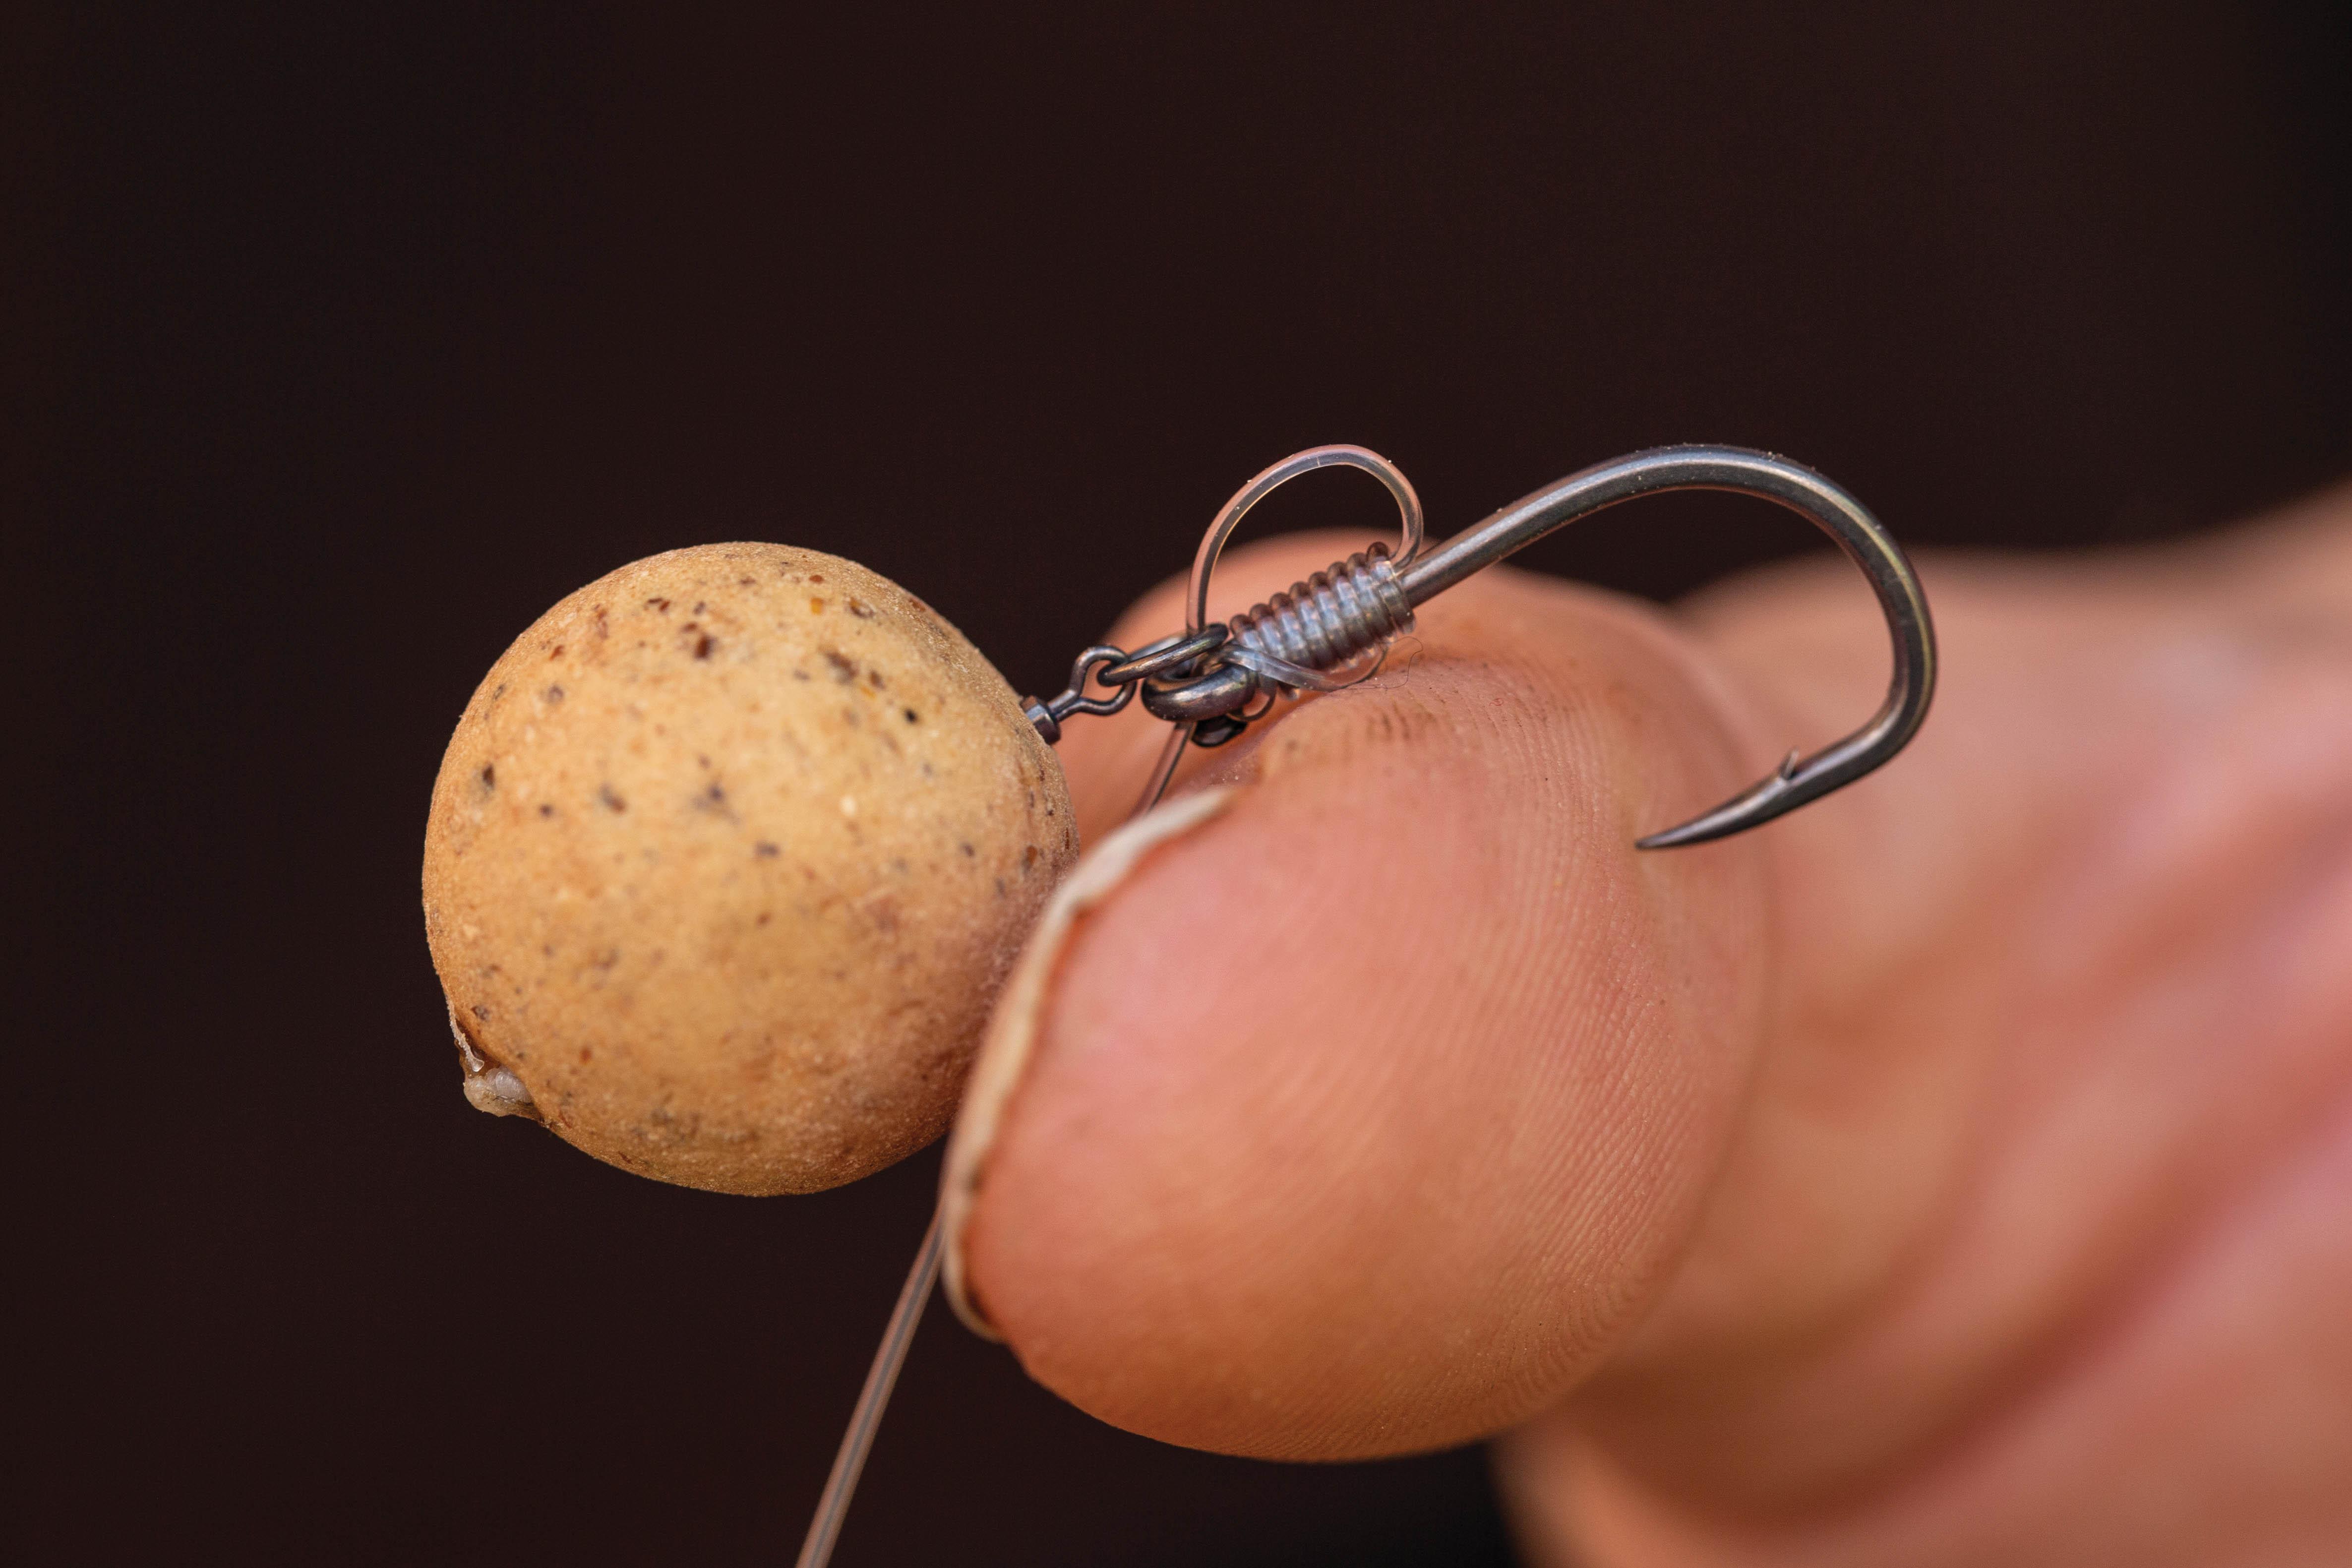
To create the perfect ‘D’, you must make sure that the material you are using is perpendicular to the back of the hook—i.e. it doesn’t come off at an obtuse and nasty angle. With this solid platform, I’m confident that you’ll find it hard to muck it up.
Size-wise, I stick with about seven or eight turns for out-turned eyes and Thinking Anglers’ Beaked Chod hooks, and approximately 3 to 4mm in height. To get the ‘D’ to form a nice teardrop, I use a strong, round profile, hard hookbait needle and make sure the tag (that forms the ‘D’) does not come up from the top edge of the Knotless/Whipping Knot at an angle to the hook shank. Doing this ensures that the hookbait sits a little tighter to the hook, at least with a pop-up. Pop the tag through the eye of the hook so it physically straightens the hook in relation to the hooklink.
The fine-tuning of rigs relies on an understanding of how the rig works, the retention of its main components, and the use of correct materials. By then adjusting a rig’s minor elements, you can improve its effectiveness. In reality, you’ll rarely make a rig work better, mechanically; rather you’ll get the rig to work well with the materials and components that you personally favour. This could be by adjusting the length of a kicker to suit your favourite hook pattern, because an in-turned hook eye has a different angle, or the gape is wider than the pattern you have already used with a presentation needs to be adjusted to make the hook flip aggressively. There’s a lot of great technical advice available from amazing anglers. Look at what they are doing, then tinker and do your own thing. You can even combine concepts to create ‘Franken-rigs’, but the tried-and-tested methods of creating twisting, turning hooking mechanisms is broadly well understood, and that’s a cornerstone in my honest opinion.
I look at some long Hairs with a large slice of bemusement (dusted with a sprinkling of utter horror!). I have yet to come across any situation where a short or medium-length Hair has proved to be detrimental. I define short as having the hookbait touch the start of the bend of the hook, and medium as having a gap of up to 10mm. Anything beyond that has created way more problems that it ever fixed.
I will simply pass on some wisdom that was conveyed to us many years ago by that old sage, Micky Gray, when we first ventured on to the hallowed ground of Yateley. He suggested that we would be fishing for paranoid carp that had been pressured for years, and not to mess about with long Hairs as we needed to make sure that the hook went in to these crafty fishes’ mouths. There aren’t many fixed rules in fishing, really, so I’m sure that ridiculously long Hairs work somewhere, perhaps where the carp are barely fished for, and all have huge, cavernous mouths. In my experience, though, they’re pants! Micky was spot on: tidy ‘D’s, swivels on shanks, and short to medium-length Hairs for me, please.