

Oz Holness's subtle Spinner Rig
Oz gives his take on the evolution of the 360ş rig and how a few tweaks brought about its successor...
You really can’t have failed to notice the impact of the Ronnie/Spinner Rig over the past few years: a different spin - if you excuse the pun! - on the uber-efficient 360ş Rig, but without the pitfalls of having to correct its sometimes awkward and slightly ‘agricultural’ nature. You had to be ultra-cautious once a hooked fish was in the net with a ‘360’, and in order to unhook fish quickly to ensure the swivel didn’t catch the net and cause damage, waders needed to be on hand at all times.
There were of course, ways of getting around these issues by using shrink tube and bits of rubber sleeve etc., and aside from the niggles, it was the efficient rotation and low-lying presentation that were always so appealing… and they never seemed to fall off once hooked! The fact that the swivel rotated with the movement of the fish helped keep the hook neatly in place. This helped the hooked-to-landed ratio immensely. The set-up really relied on a very specific pattern or shape of hook for its effectiveness, due to the need to thread the hook through the eye of a small swivel to create an angle; for me, this was another of its limitations.
 Early spring success on Oz’s own version of the Spinner Rig
 I was immediately impressed with the Ronnie-style set-up, but not entirely convinced it was any better than the pop-up arrangements I already used… why fix what ain’t broke? I’d read a lot of about the use of the Ronnie and had a lot of friends who used it in its various forms. The biggest thing that put me off using it extensively myself, was the number of losses it seemed to bring. This could have been down to several factors. Obviously, the swivel allows the hook to spin through 360 degrees and when fished on a big ring swivel, there was always the chance of a hook-hold in less-than-ideal areas of a carp’s mouth. With the pattern of hook championed for use with the rig, swept-shank and straight-pointed, this could possibly have led to fish being ‘bumped’, losses occurring very quickly after the take or worse still, right at the very end of the fight! For whatever reason, it seemed that there were a few issues that weren’t as prevalent with the 360, and with a lower ratio of hooked fish to captures, I steered clear and used my trusted arrangements.
The one thing that eventually changed my mind was when a few friends, and Thinking Angling consultants began toying with the same swivel arrangement after changing the swept-shank hook for the new TA Curve Point pattern: a wide gape model with a subtle in-turned eye and a wickedly sharp, claw-like point. The results were outstanding and hook-holds nigh bulletproof! Losses became almost unheard of and one of our team members landed upwards of 40 fish without a hook-pull… it was time to take another look!
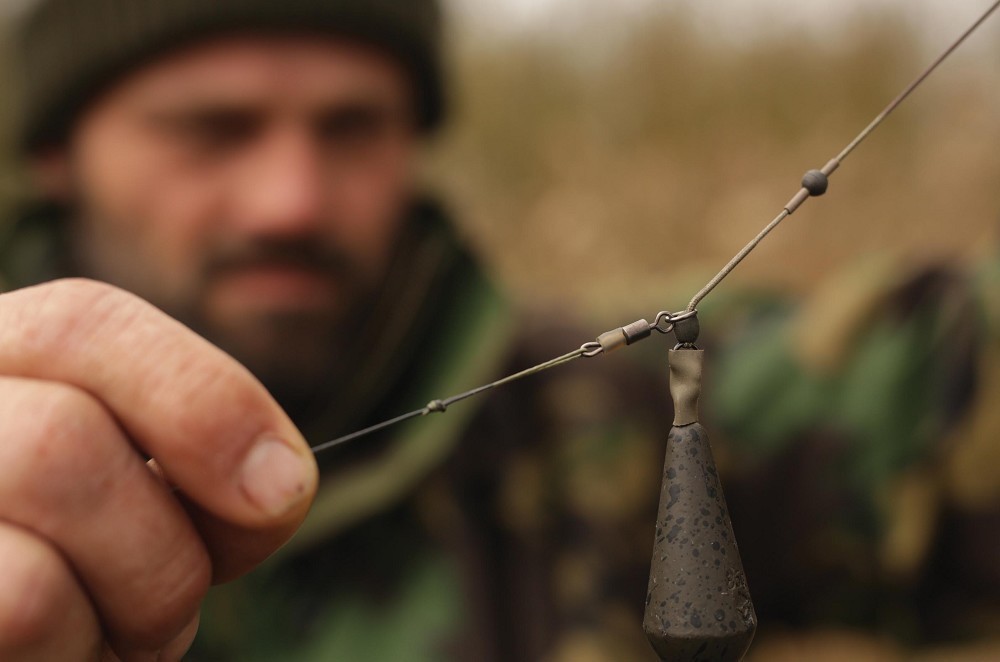 Oz favours a helicopter system when fishing this rig
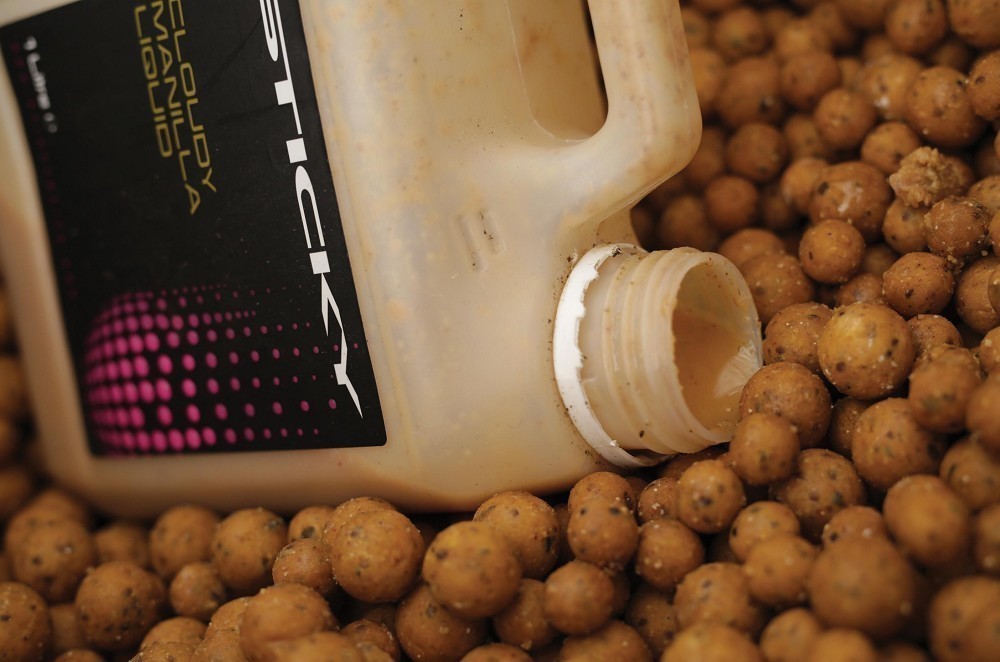 A spread of soaked Manilla boilies in 12 and 16mm make the freebies
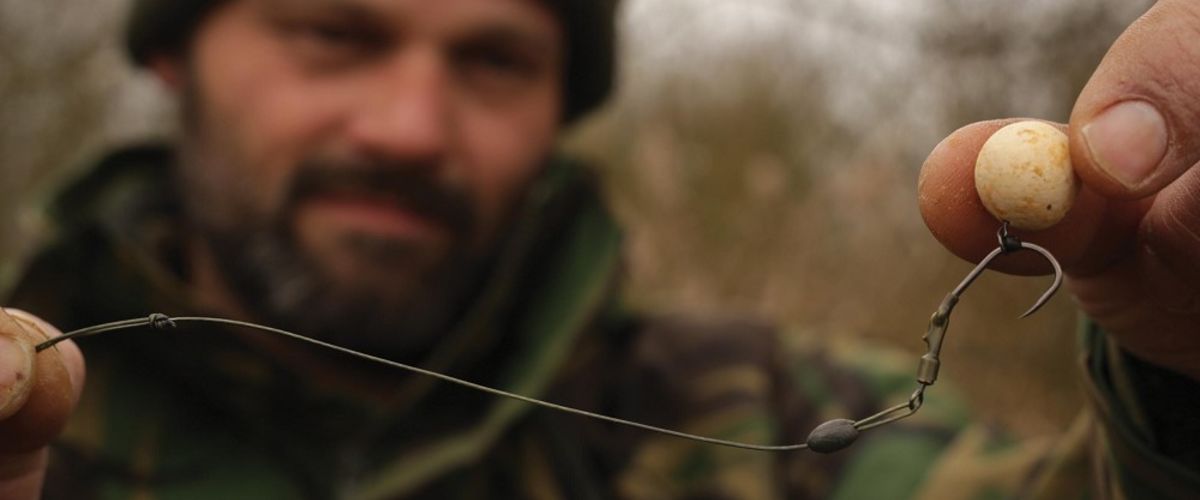
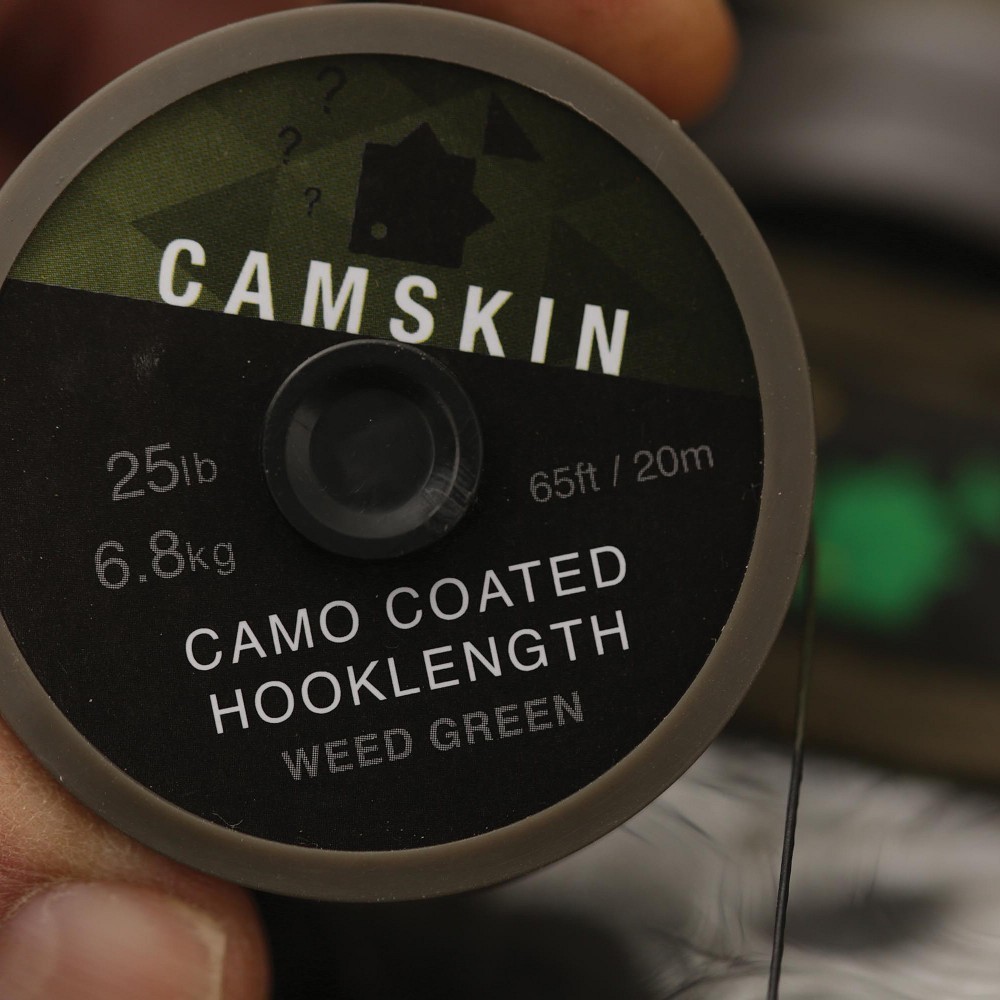
I spent the winter looking at all the variables and tested the set-up with different sizes of pop-up until I arrived at a finished rig I was happy with for my style of angling. For my spring fishing, I rely mainly on single hookbaits for ‘visual’, daytime angling when casting at showing fish. The nights are spent fishing over lightly baited areas of small food items: mainly crumbed boilie, chopped nuts and small particles such as corn and hemp. Very often in these scenarios, I want to use a small pop-up of around 12mm to match the food items on offer. I found the size 5 hook perfect in this scenario: a beautiful balance of strength, subtlety and gape and visually, it just looked right for the job. My swivel of choice was TA’s PTFE size 11 Quick Link that again gave a subtle, and ‘stealthy’ look to the finished rig which suited the way I would tie the hooklink. My choice of hooklink for the spring was the new Camskin in 25lb: a low diameter, coated braid that I could use with a loop knot at both ends without the coating breaking - this was key, as I wanted the loops to add extra ‘travel’ to, and movement of the rig wherever it settled.
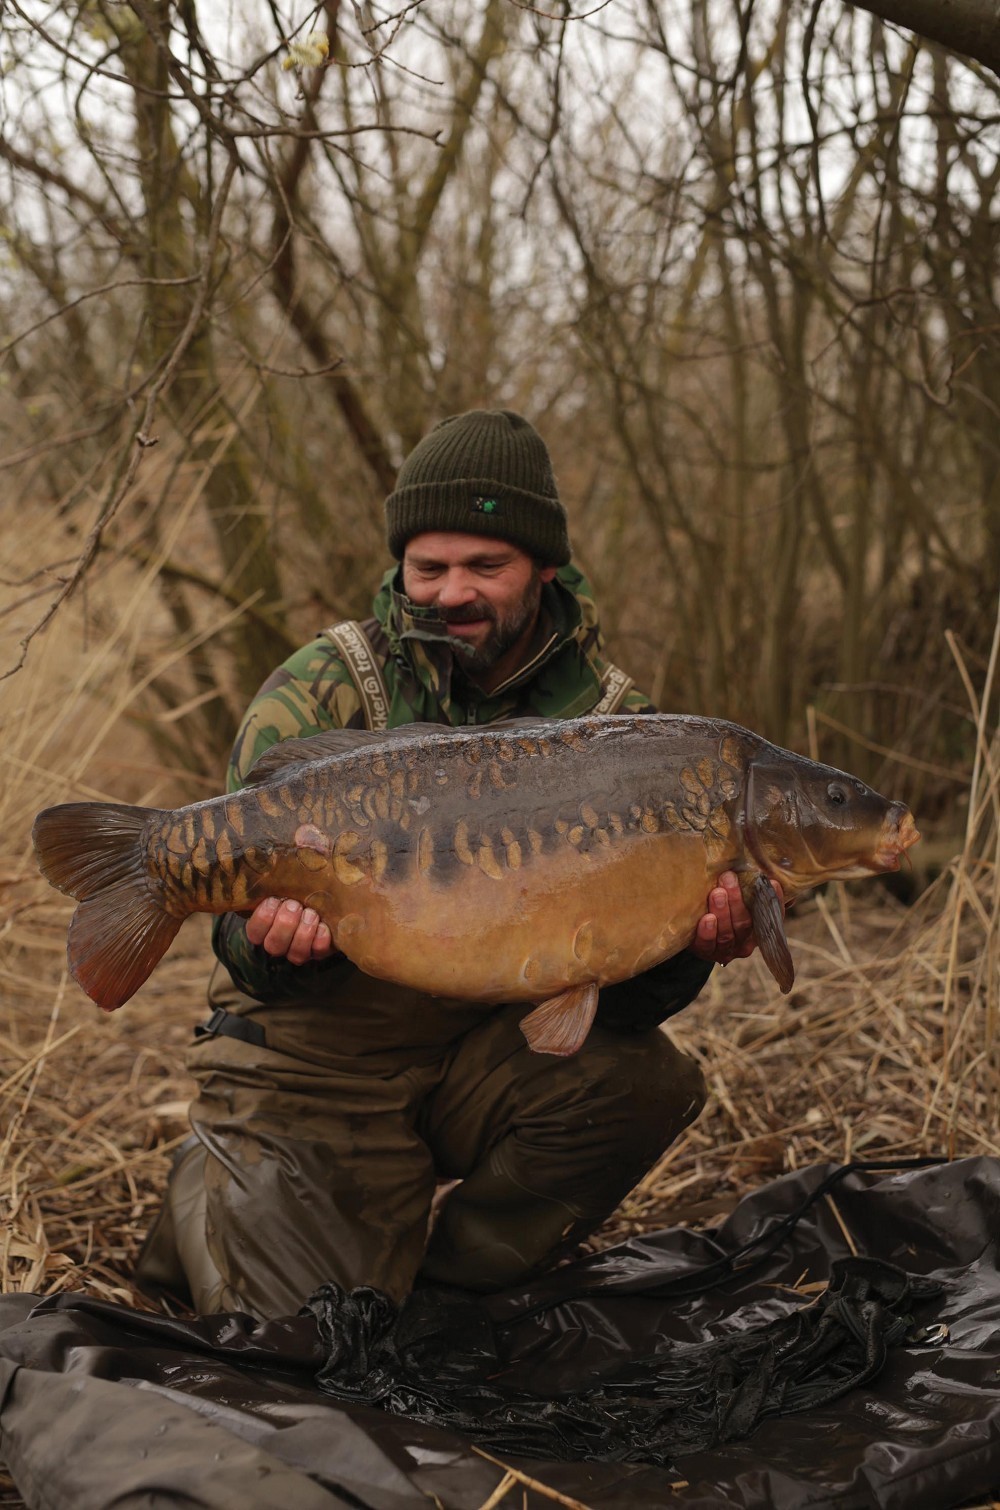
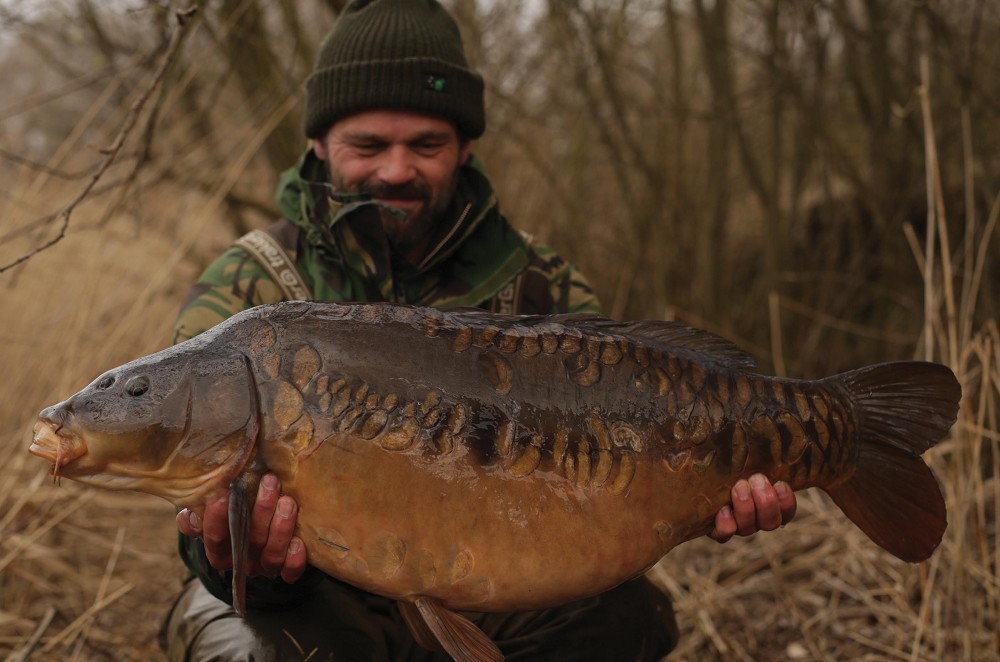 A cracking 30lb 2oz mirror, one of four fish caught during a session using the rig
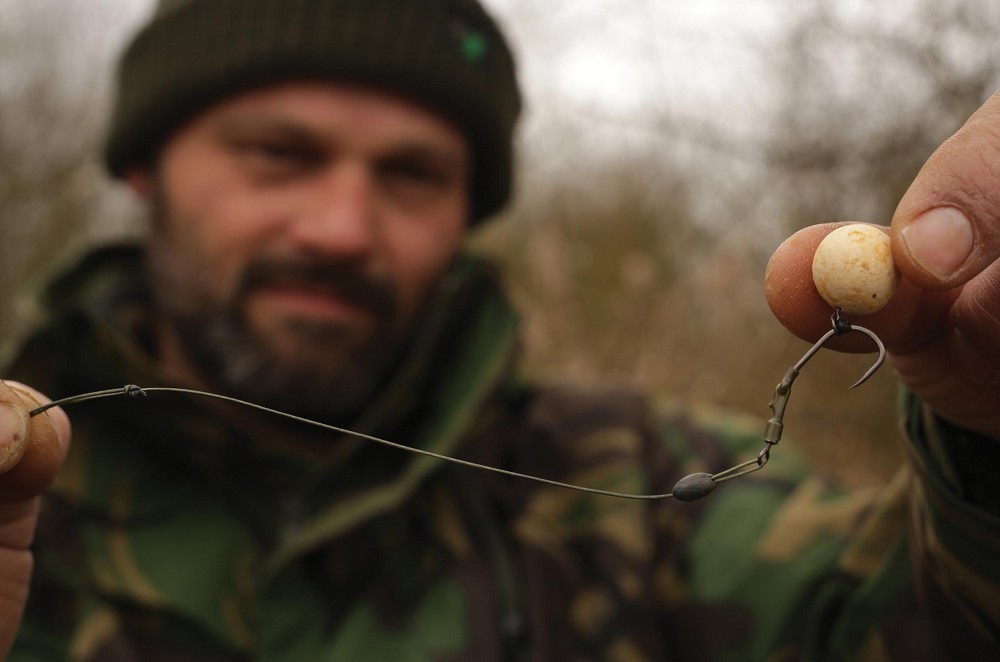 The rig is full of movement, which Oz believes is super important
I also wanted to be able to add amounts of putty to the knot of the loop to control and address how the pop-up sank and didn’t want this to be dictated by the weight of the swivel. For instance, if I was fishing over light, new weed-growth - particularly silkweed - I wanted the pop-up critically balanced and the bead on my heli arrangement pushed well up the leader. When fishing my baited spots at night or early morning, I would overweight the pop-up to pin it down on the harder areas to stop it being moved around in an unnatural manner. Of course, with the Camskin, I could match the colour to the substrate - it’s all about those small percentages! This arrangement was fished on my favourite heli leader system, making for plenty of free movement, whatever I fish over. For later on in the year when I use more boilie and when the weed’s up, the size 4 hook and a 16mm ‘match the hatch’ pop-up is the one!
Without doubt, the PTFE swivels - both the Hook Ring and Quick Change versions - enhance the mechanics of the rig, given their super-slick rotation. The loops at either end of the Camskin really seem to facilitate that built-in, free movement and aid hook-holds. The real game-changer for me though, was the utilisation of that beak-point hook: the Curve Point… as my pal Ben says, ‘Like a bramble mate, you can’t go past without it grabbing you!’
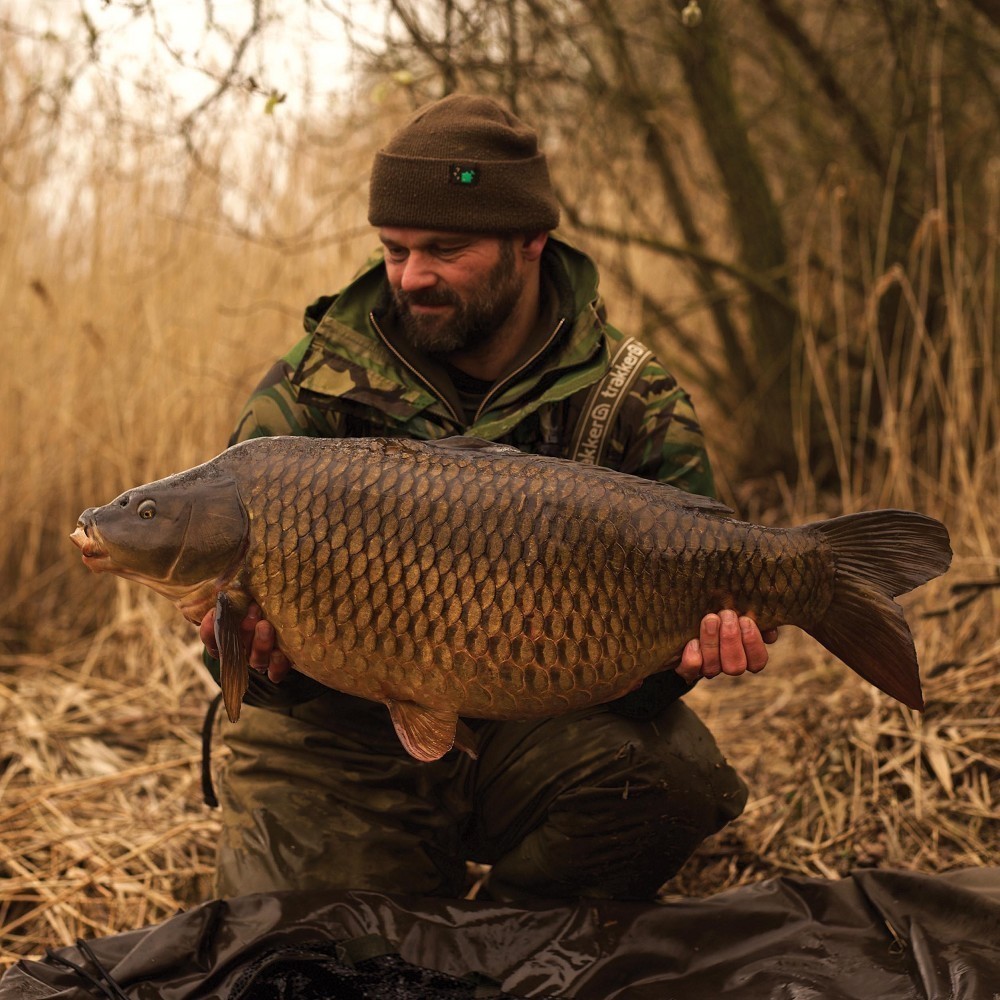 Another cracking 30lb carp caught on his Spinner Rig
 How to tie Oz's subtle Spinner Rig
Finely-tuned and nimble, here's how to put together Oz's version of the Spinner Rig
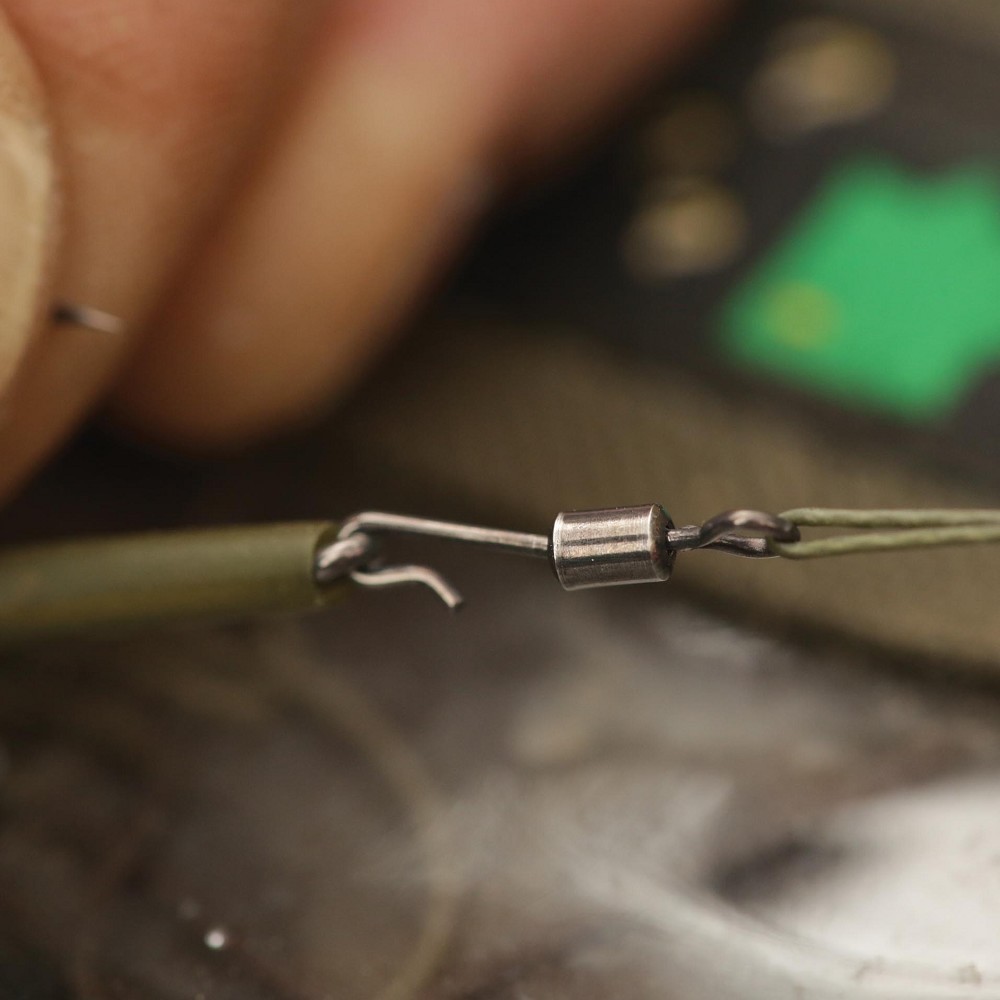
Step 1 Start off by taking a good length of Camskin hooklink.
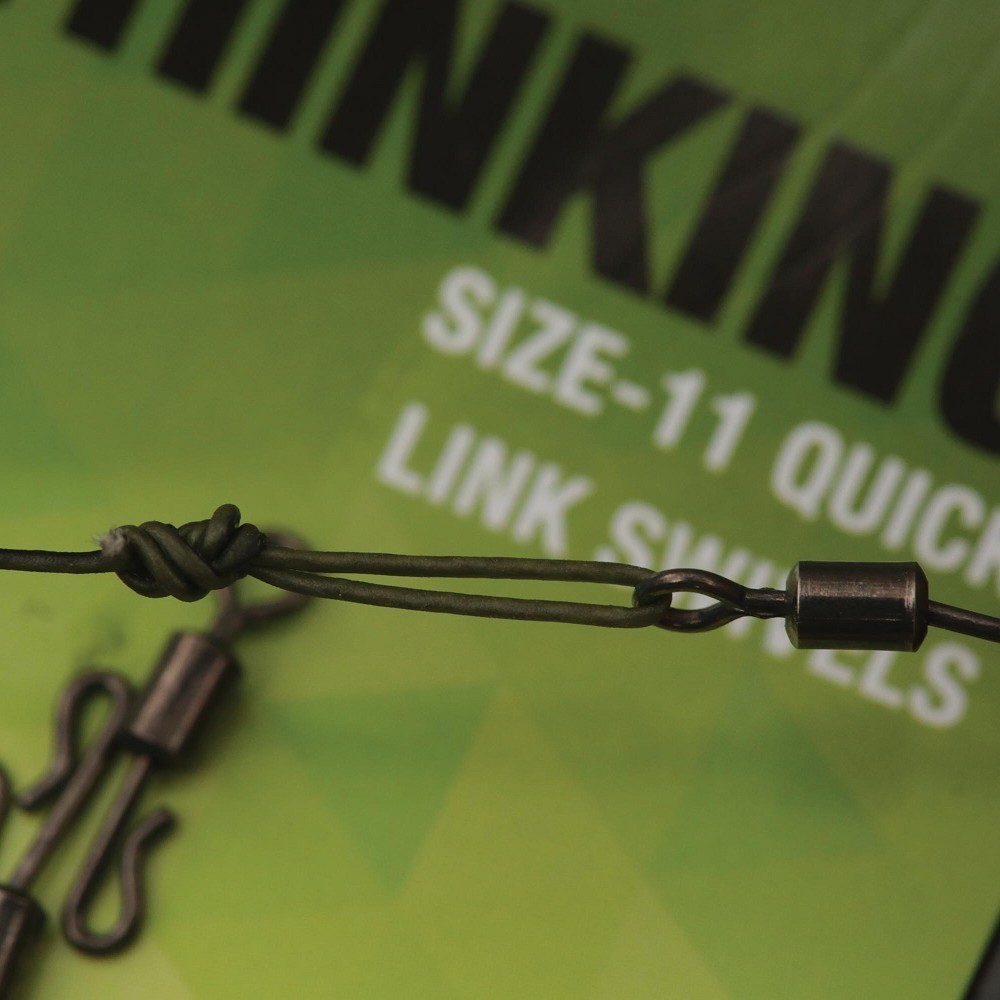
Step 2 Form a Figure-Of-Eight loop to the Quick-Link Swivel.
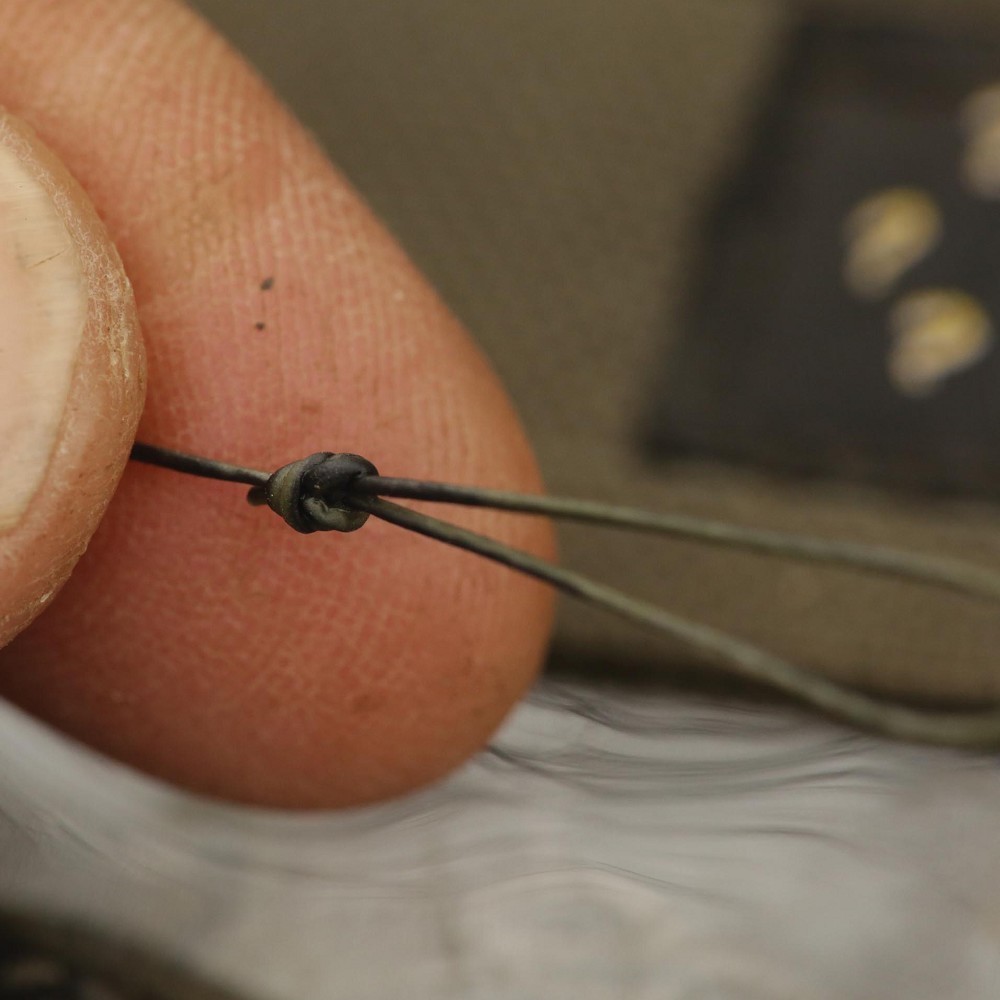
Step 3 And now do the same at the other end of the hooklink.
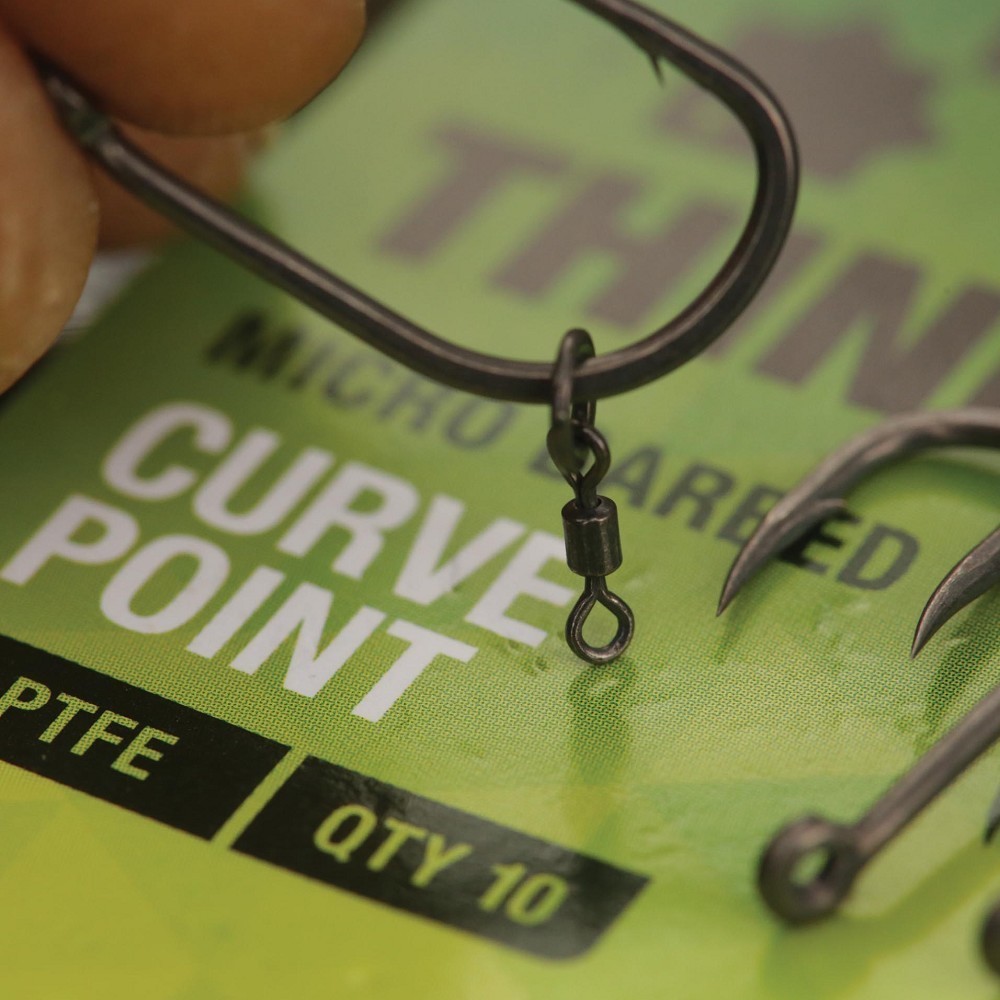
Step 4 Pass a Hook Ring Swivel onto a size 5 Curve Point Hook.
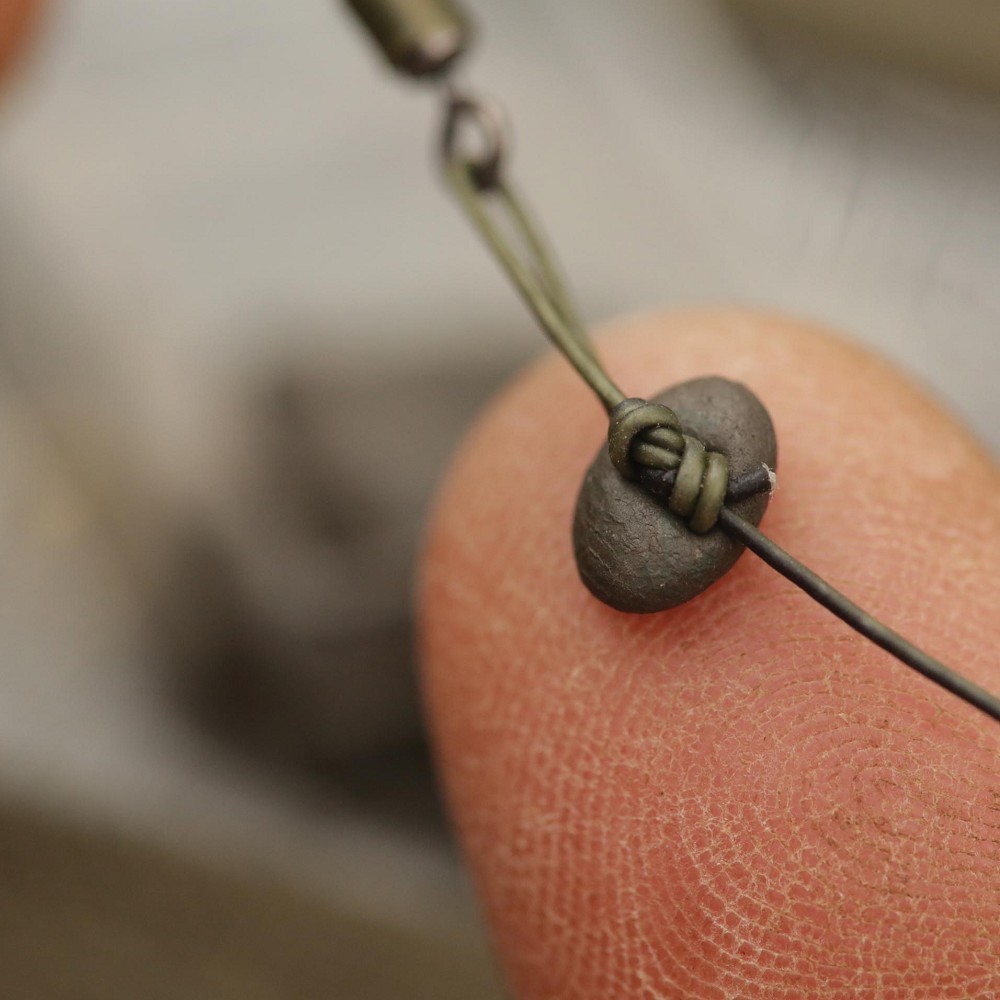
Step 5 Then trap the swivel with a Hook Bead as shown here.
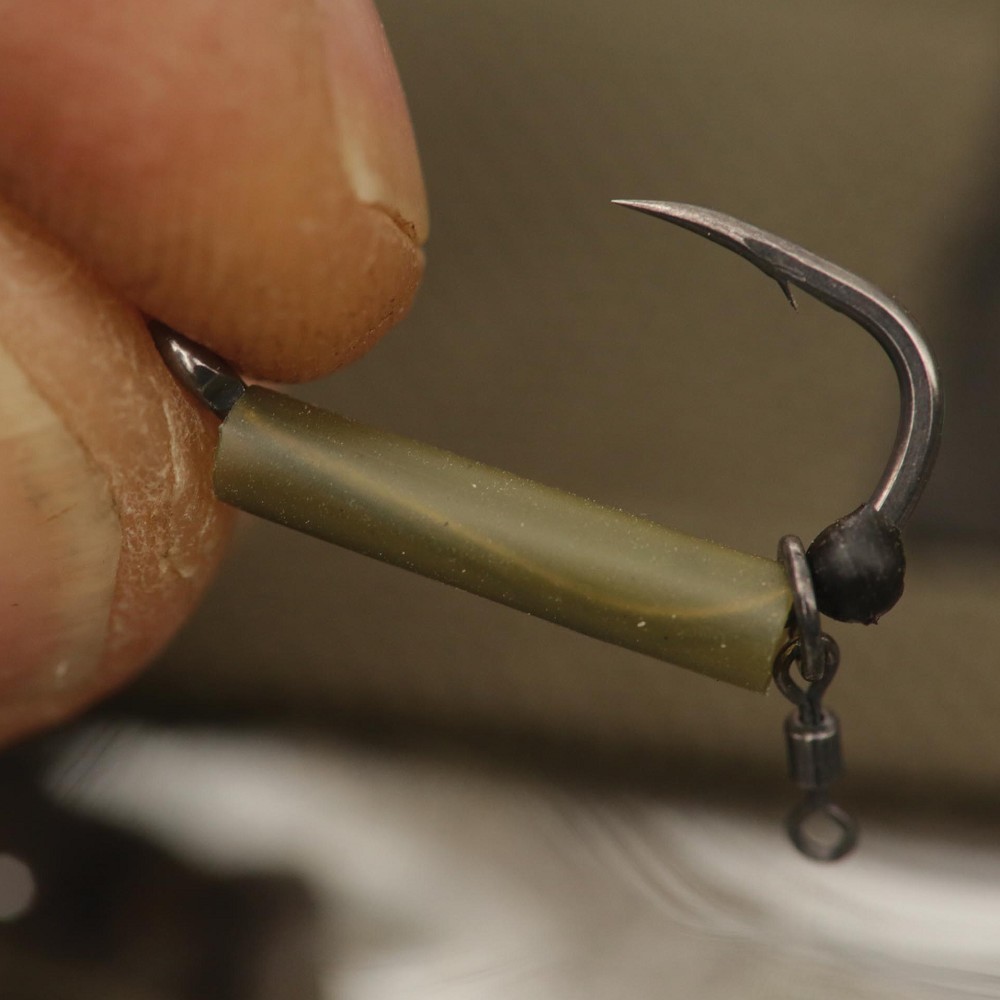
Step 6 Slide onto the hook shank a 1.5cm piece of shrink tube.
Step 7 Attach the hook onto the Quick-Link Swivel as Oz has.
Step 8 And now pull the shrink tubing down onto the swivel.
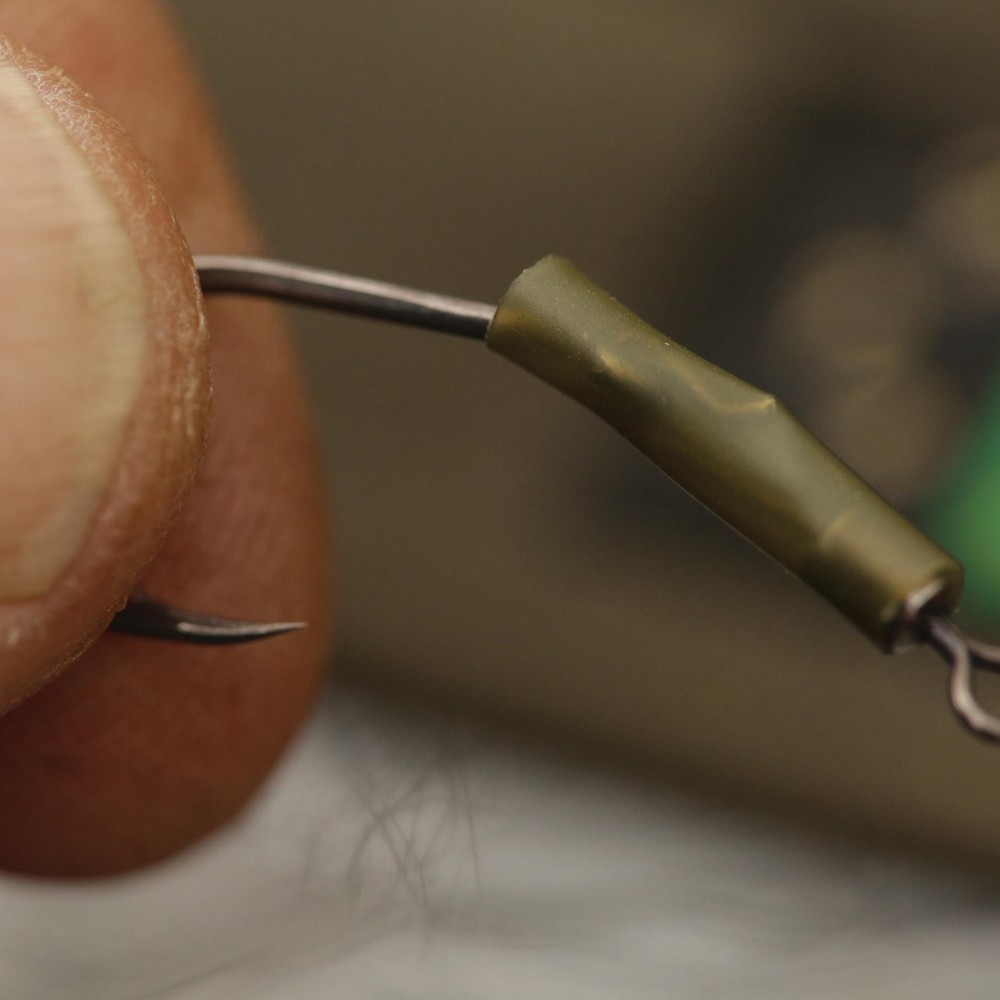
Step 9 Oz uses a flameless lighter to shrink the tubing down.
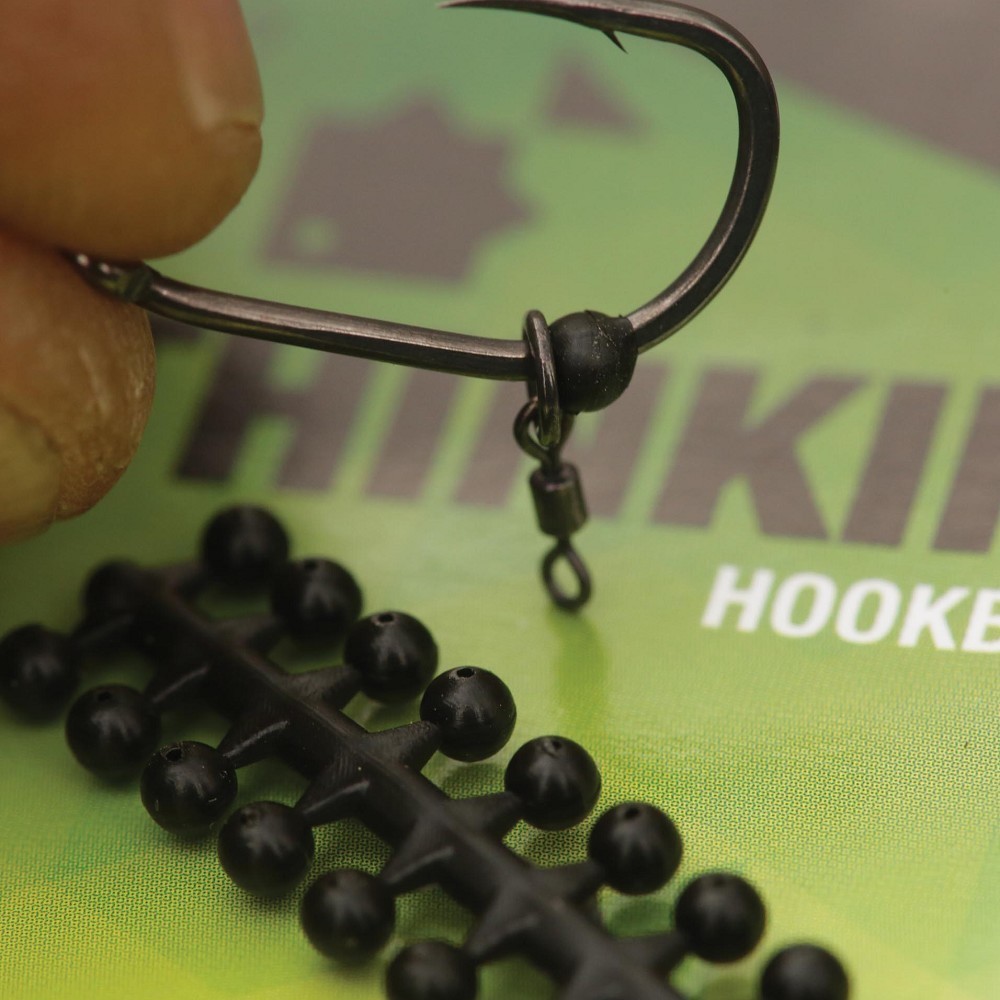
Step 10 Mould some putty round the knot nearest the hook.
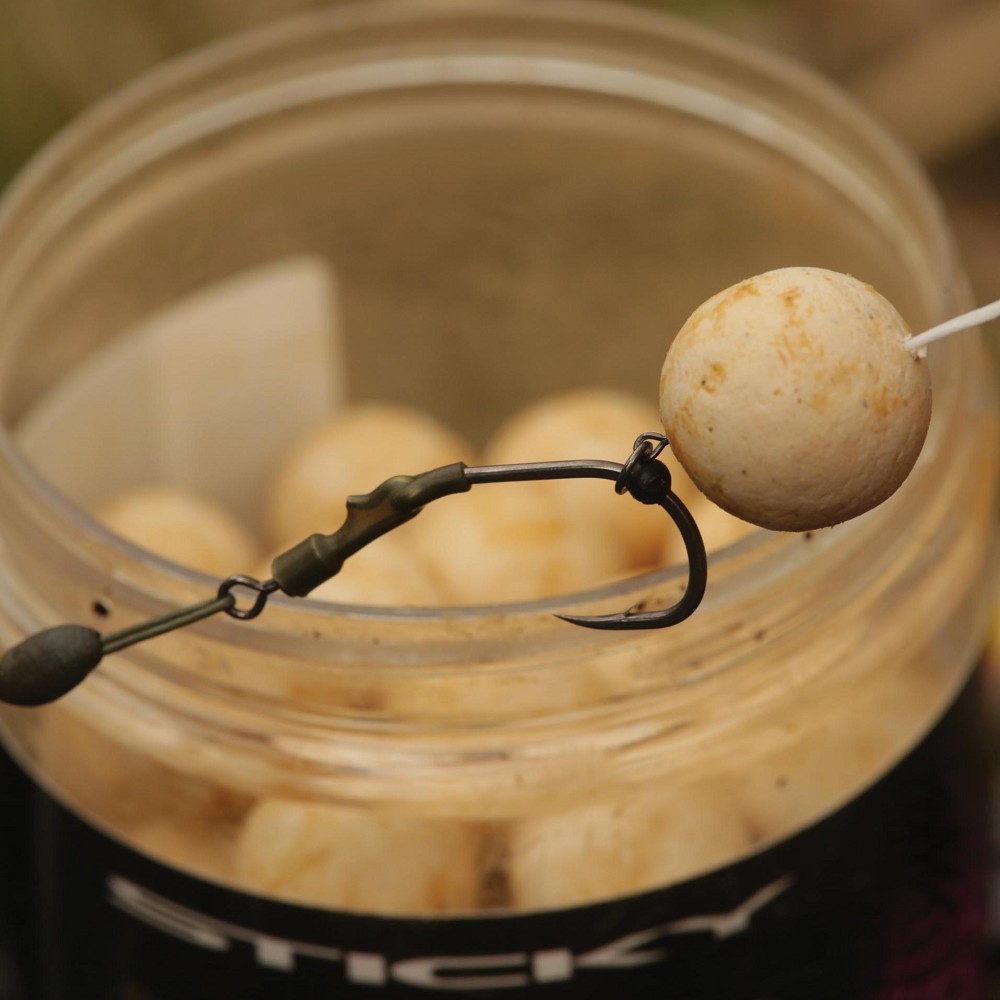
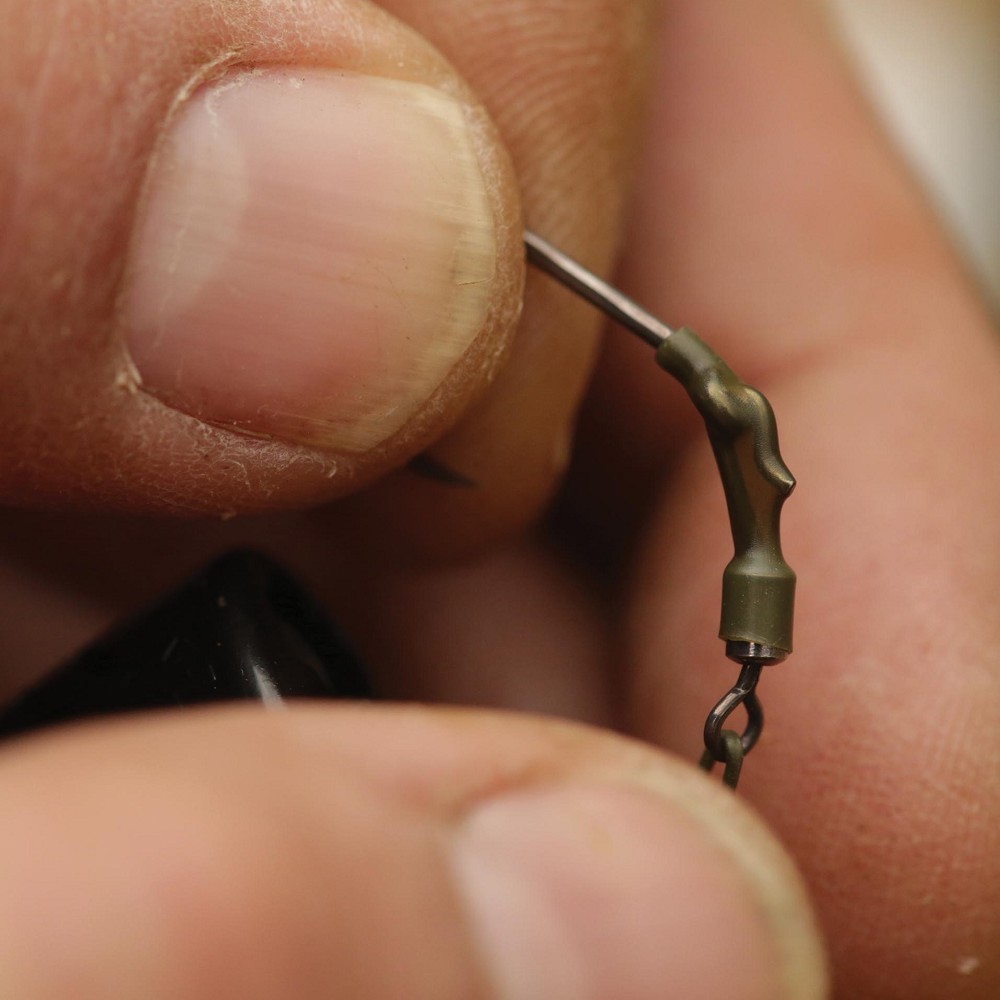
Step 11 Attach a Manilla White One to the Hook Ring Swivel.
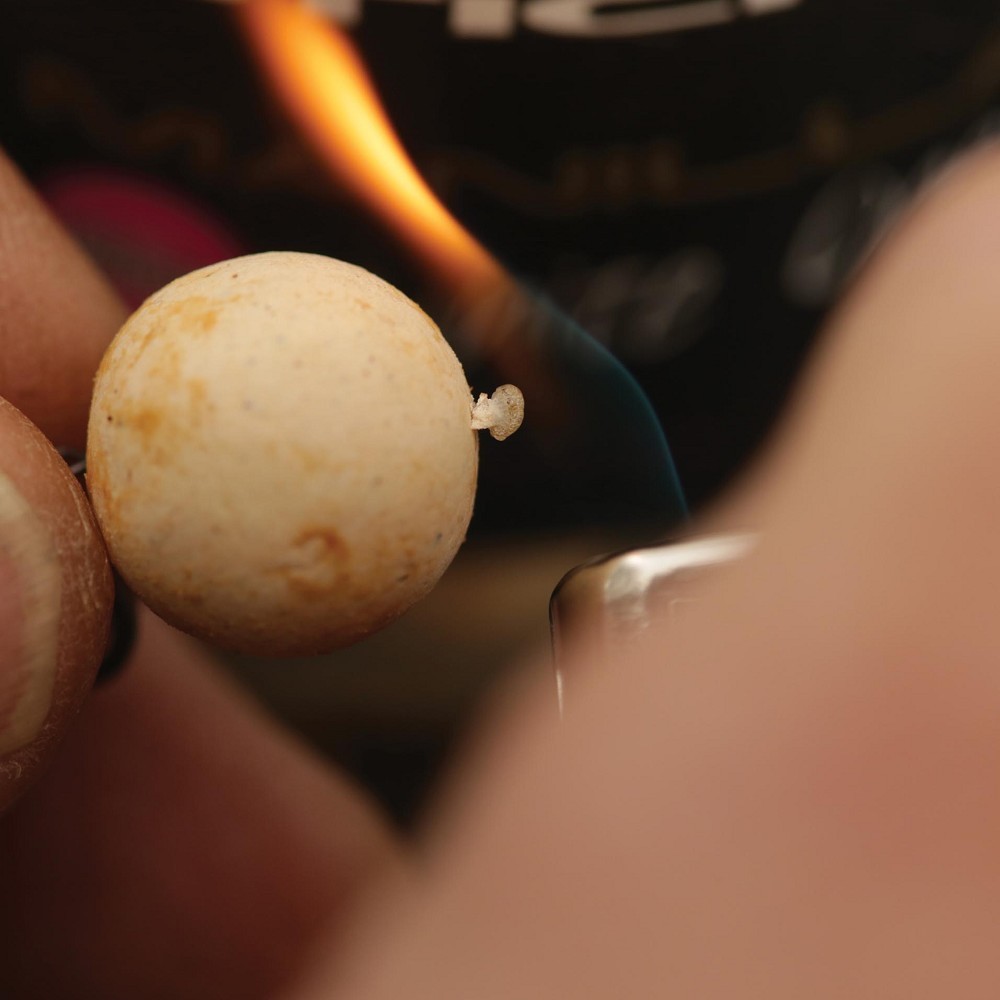
Step 12 And finally blob it down with the lighter to secure.