

How to get 'that shot'
Each month, photography royalty, Oli Davies, will look at a particular area and explain how you can achieve a similar looking photo album to his.
The depth of field is the term used to describe the ‘slice’ of a picture that is in focus. A very narrow DOF will mean only the tiniest slice, sometimes only a millimetre, will be in focus and everything else blurred out. Conversely a wide DOF will mean that pretty much everything in the picture is in focus.
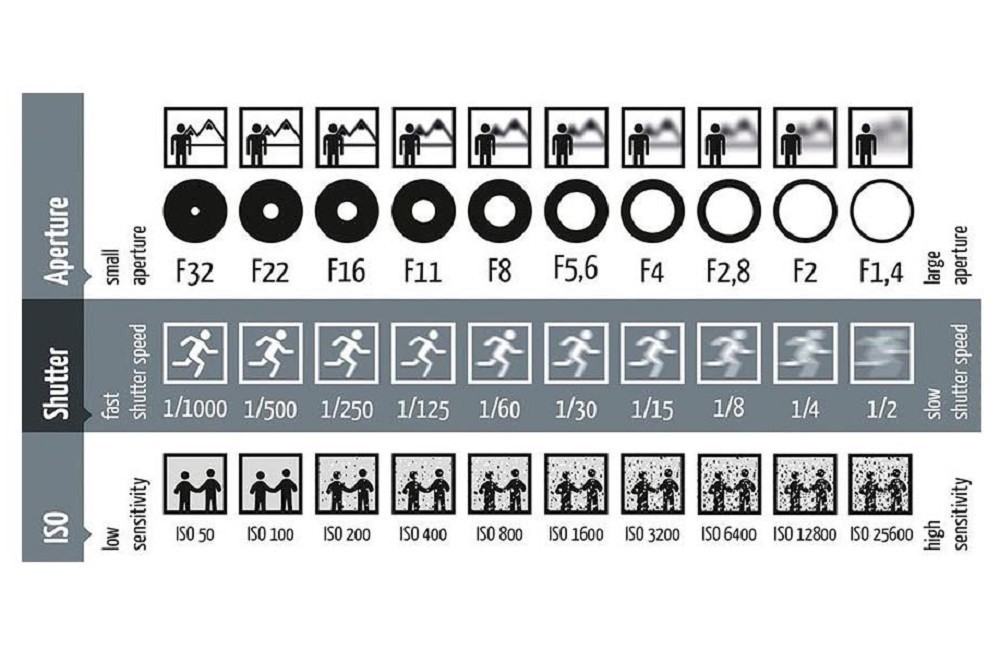 The ISO/aperture/shutter guide…
 The Basics
Of the three main controllable camera settings of aperture, shutter speed and ISO it is the aperture, or how wide the aperture ring of the lens opens that dictates the DOF of the image. By choosing a wide aperture (the lowest number) in order to correctly expose the image you will need to compensate by setting a low ISO and a fast shutter speed.
To achieve a wide DOF then the lens must be set to a high aperture (7.1 and above) and in order to ensure correct exposure the ISO may need to be raised and shutter speed slowed in order to let enough light in to expose the image. It sounds complicated, but actually all photos are essentially a balance of these three variables.
On auto setting the camera chooses the balance. In order to have better control over your images but still retain some auto functions try using the ‘AV’ setting on your camera (‘TV’ for Nikon users). This allows you to choose the aperture setting, and the camera will adjust the other settings accordingly. This is a good way of learning how these three settings affect each other.
Be Creative
While a wide DOF is used mainly for landscape and architectural photography where detail is important, shallow DOF is often used more creatively. It is particularly useful for isolating a subject from the rest of the image making it the focus of the picture, which leads on to the importance of choosing your focus point and focussing accurately.
When shooting ‘wide open’ (low aperture) it is critical that you nail the focus point. If you miss it even slightly then the picture won’t work as well as it could, and as previously mentioned, sometimes that ‘slice’ of focus will be razor thin so there is no margin for error.
It is easiest to achieve shallow DOF shots when using fast prime (fixed) lenses. 50mm is a good portrait length and both Canon and Nikon produce affordable fast 50mm primes. The ‘fast’ refers to how low an aperture the lens can achieve, and anything below f2.8 is generally considered fast. The bits of the picture that are blurred are known as Bokeh. It is often the quality and appearance of the Bokeh that really makes the sharp in focus bit pop. The faster the lens, the more pronounced the Bokeh, so once you get down to 1.8 and lower there can be some very interesting effects produced and you can really begin to harness and use them artistically.
 Identical settings: 24mm 1.4L 8sec f1.4 ISO3200: near focus
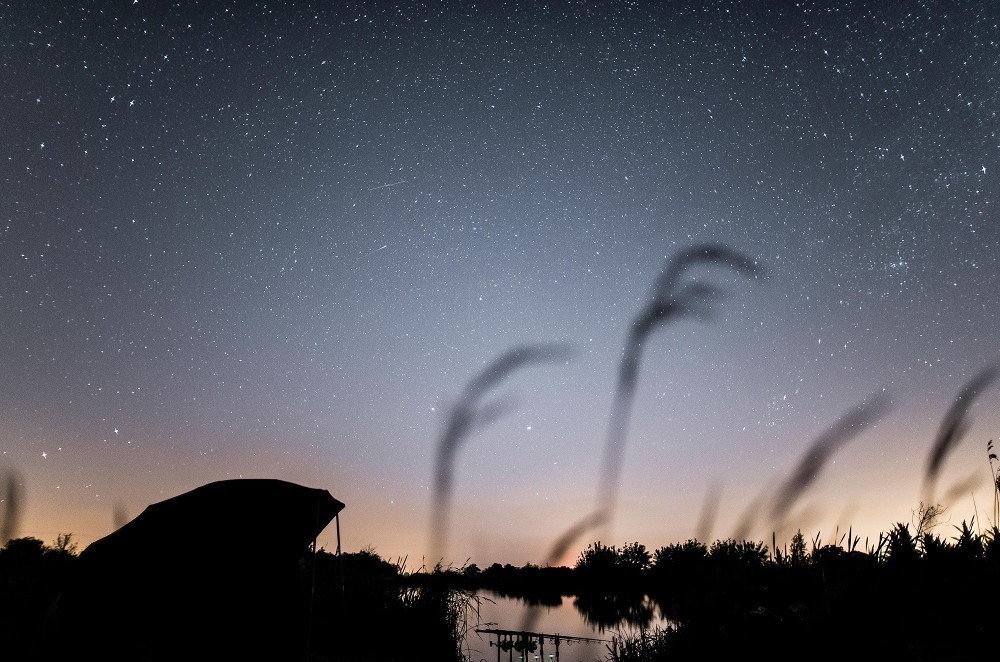 However, focussing to ‘infinity’ on the other hand, will mean that most of the picture is in focus
Focal Length
DOF also changes depending on how close you are to the object you are focussing on. If the object is close to the lens, and the background far away then even at higher apertures the background will be blurred out. Using a low aperture but focussing to infinity on the other hand, will mean that most of the picture is in focus. Confused yet?
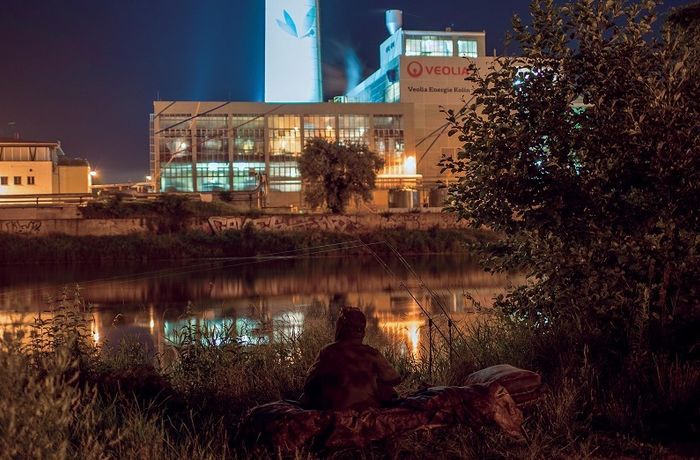
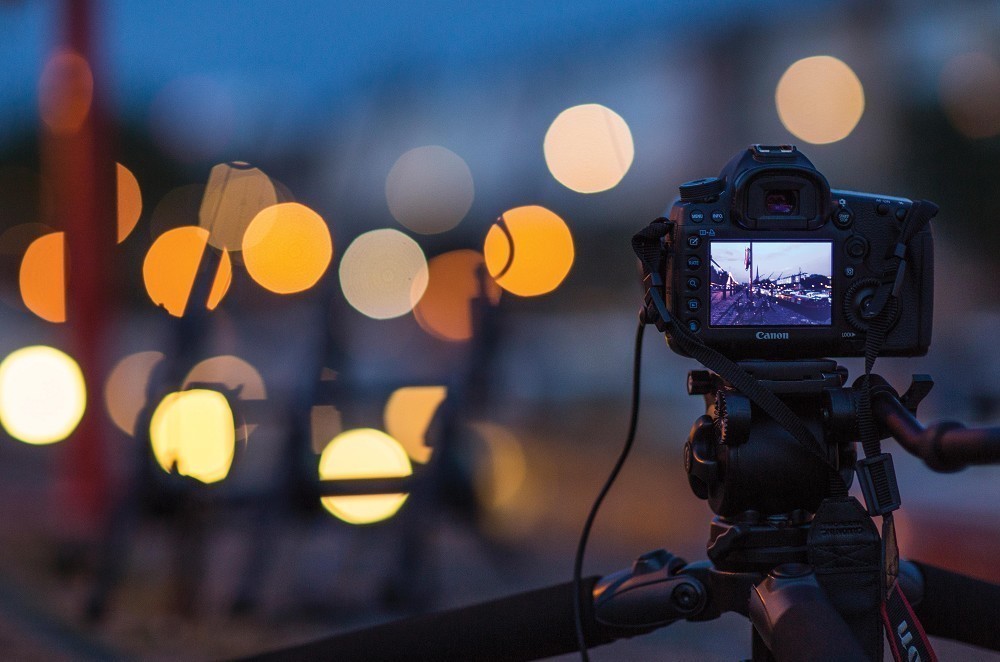 The nightlife
Settings: 1/80th, f1.8, ISO640
Lens: 85mm 1.2L: a good choice in low light because of the low aperture.
Lighting: Light source (and Bokeh) provided by street lighting.
Focal point: Is the screen on the back of the other camera which is shooting a time-lapse – but the feature is the rods lost in the Bokeh which you can see sharp on the screen.
Other notes: This was shot handheld hence a slightly higher ISO than I would normally use.
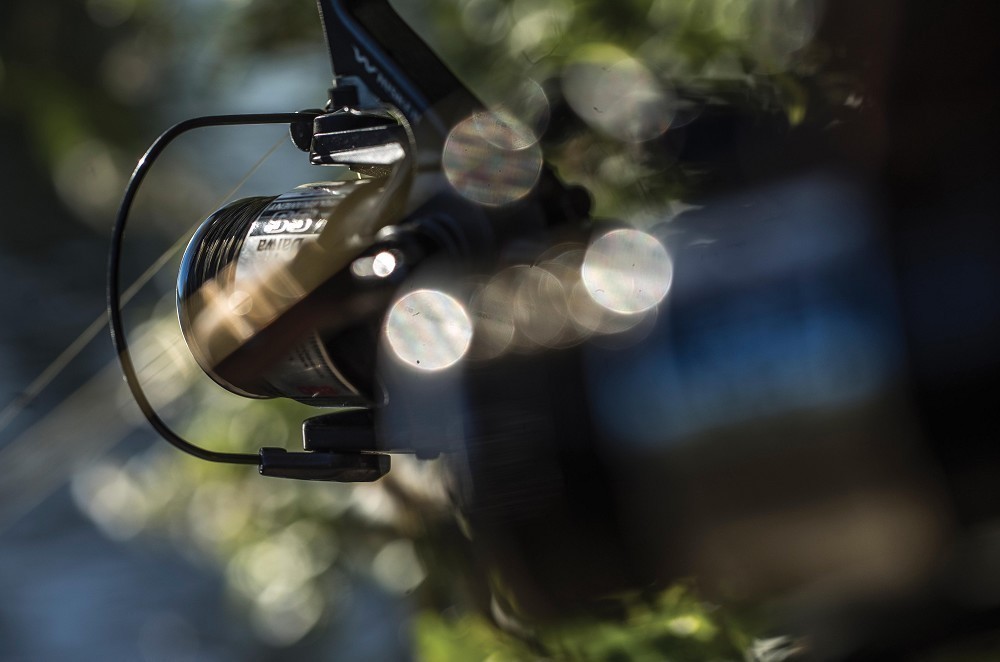
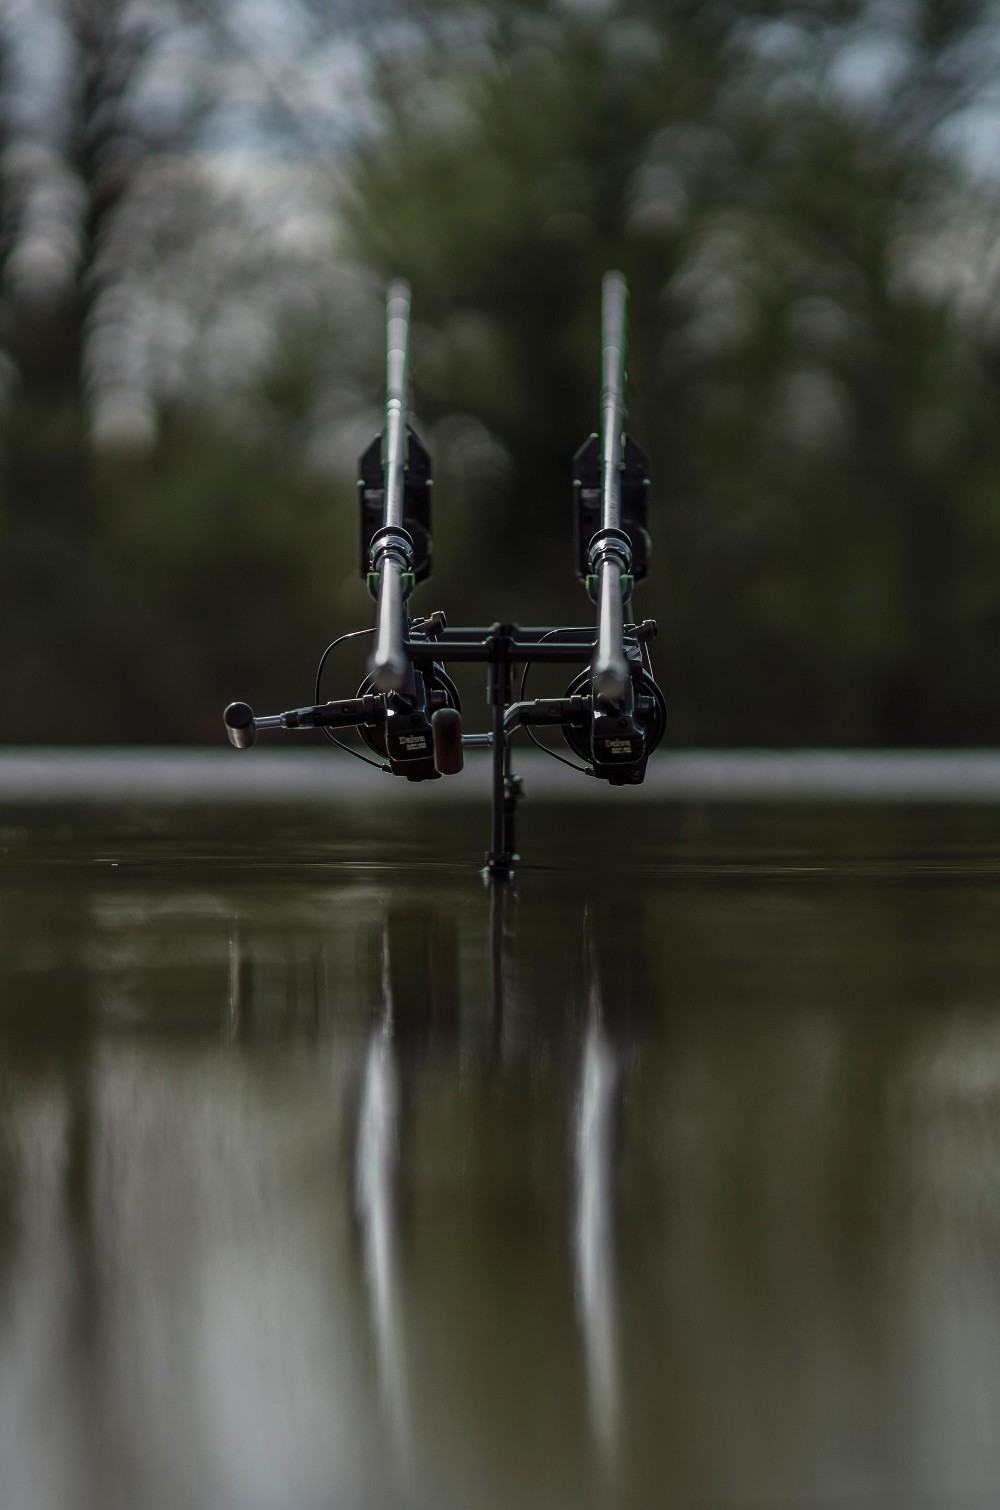 Standing to attention
Settings: 1/4000th, f1.6, ISO50
Lens: 85mm 1.2L. The focal length and low aperture allows for a razor thin DOF that really makes the reels stand out and almost appear to be a mirage against the hazy background.
Lighting: Light source is the low afternoon sun that is coming in strongly from the left and highlighting the rod blanks.
Focal point: Is the writing on the back of the reels. Because it is very bright, I needed a very high shutter to compensate for the low aperture.
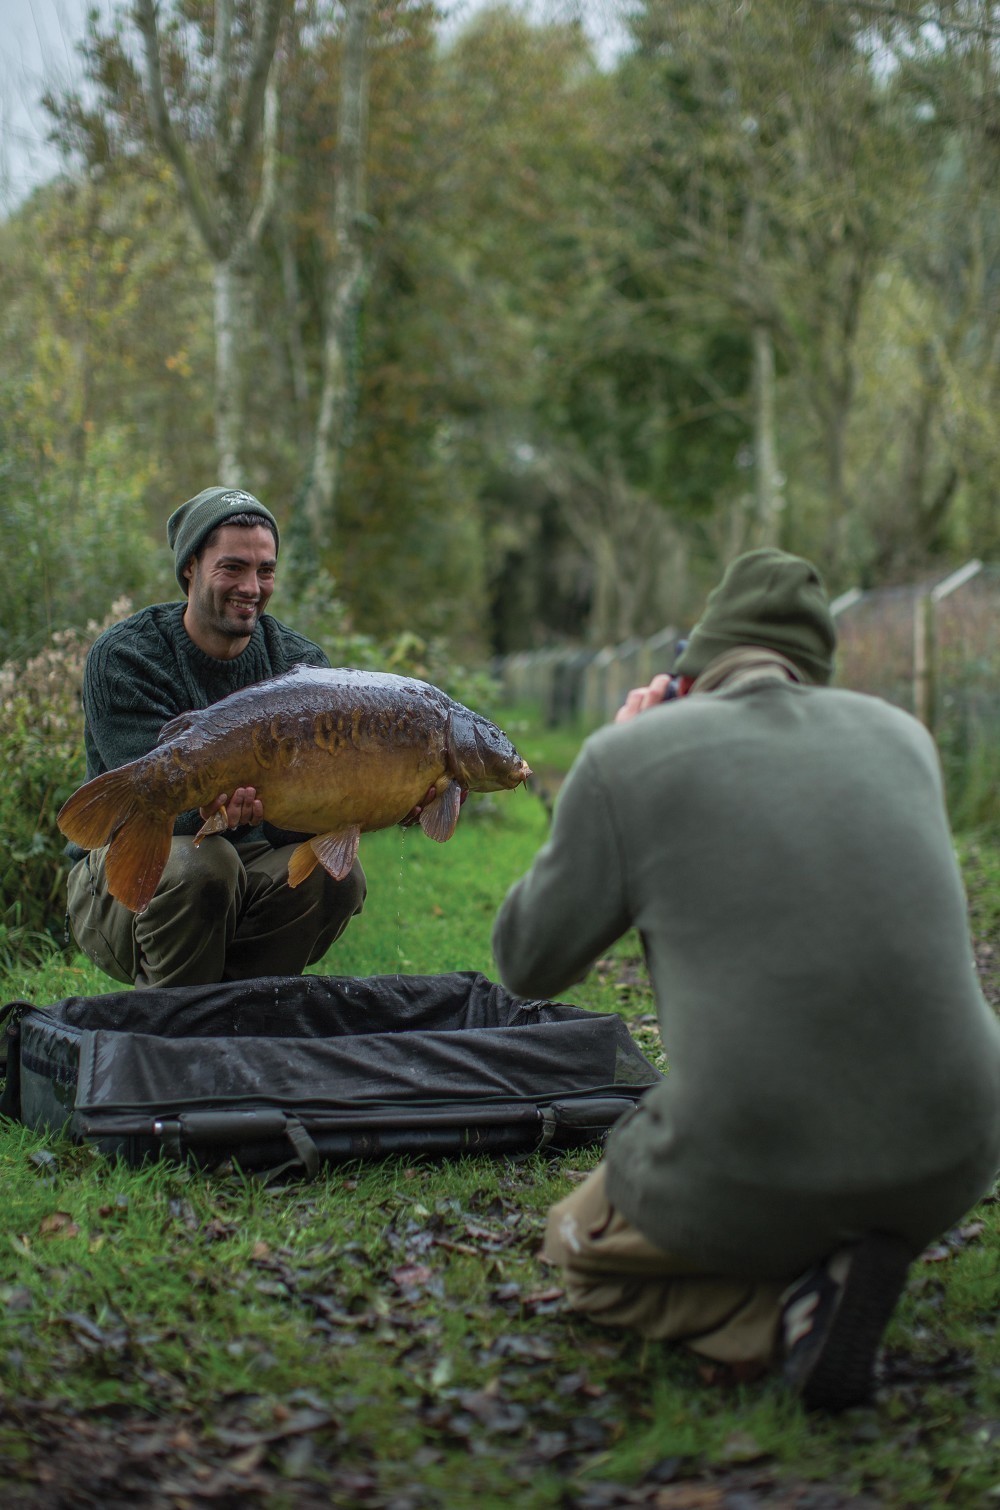
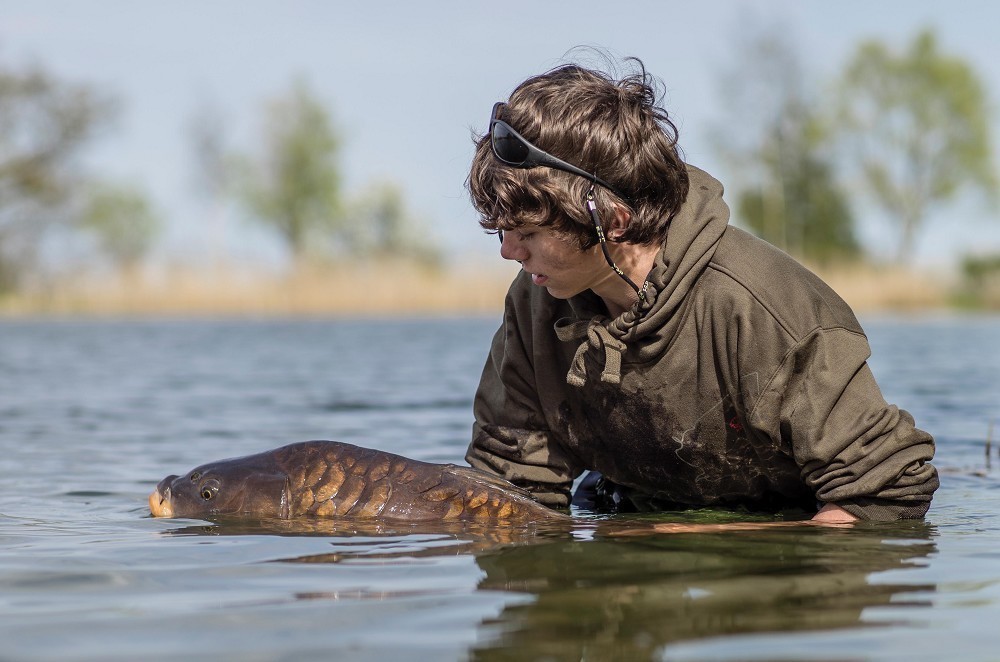 A final goodbye
Settings: 1/800th, f3.2, ISO50
Lens: 85mm 1.2L. Even when stopped up a little for catch pics, this lens gives good separation from the background.
Lighting: With good sunlight coming from behind the camera there is no need for artificial light or flash.
Focal point: Normally the focal point would be the fish itself but I have actually focussed on Alfie’s face – although the fish is still pretty sharp – this shot is more about him than the fish.
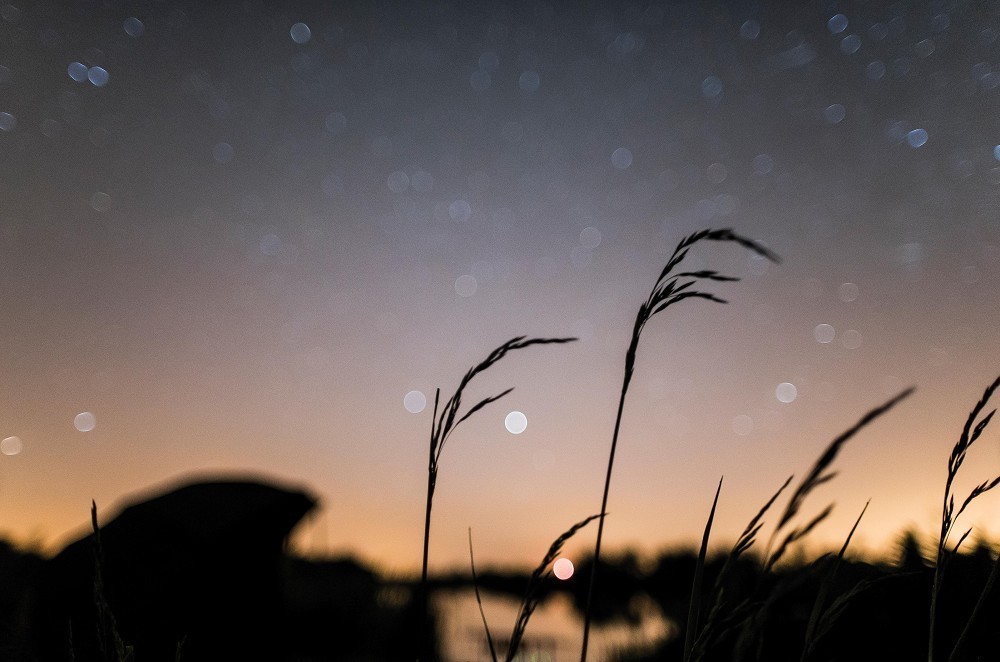
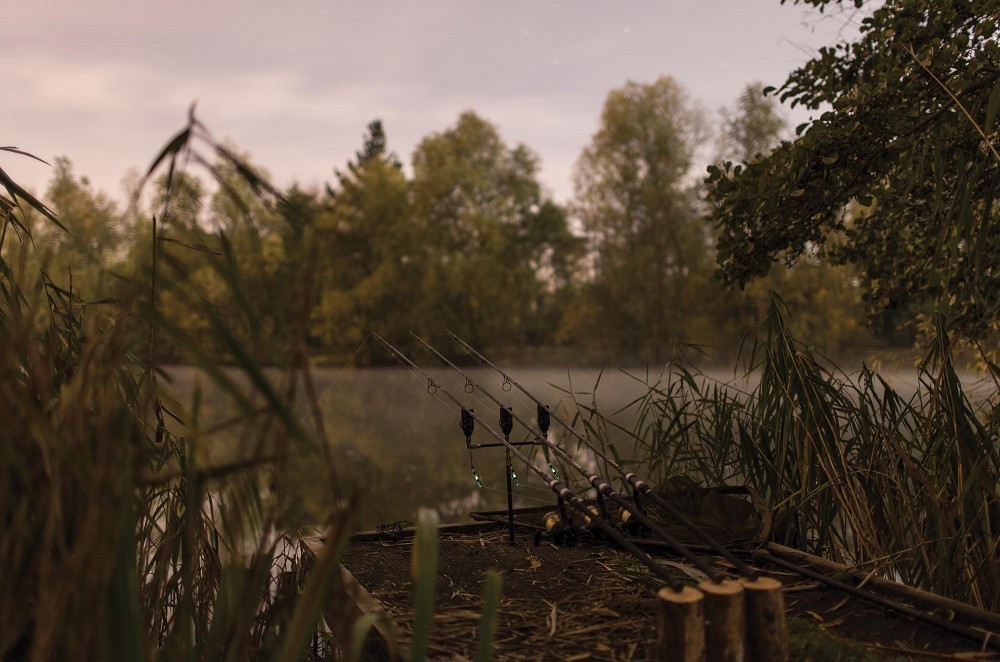 Ready and waiting
Settings: 30sec, f1.6, ISO160
Lens: 35mm 1.4L. 35mm is the traditional wide-angle focal length without being so wide as to distort the image. This lens shot with a wide aperture can produce an almost 3D image.
Lighting: This shot is lit by the moon, stars and light pollution from nearby London.
Focal point: Is the isotopes.
 Moving foliage
Settings: 30sec, f1.6, ISO100
Lens: 24mm 1.4L. A proper wide angle this lens works really well in tight spaces, perfect for where this rod was positioned under a tree!
Lighting: The light source is the super moon, dappled by the foliage.
Focal point: Focal point is the line coming off the spool to the roller – the DOF is that thin! Rather than shooting the moon like many others, I tried to use the brighter than usual moonlight to take some unusually lit night shots. In this instance the floor was my tripod.
 Spring sunshine
Settings: 1/200th, f5, ISO50
Lens: 100mm 2.8L. This macro lens allows you to get really close to the subject and also produces very pleasing circular Bokeh.
Lighting: The light source is bright spring sunlight but filtering through foliage has softened it.
Focal point: The focal point is the line on the spool. Because the DOF is so thin with this lens used close to the object I used a higher aperture rather than shoot wide open.
 Smiles all round
Settings: 1/200th, f1.8, ISO50
Lens: 50mm 1.2L. This is the focal length that I go to for all catch shots, perfect for blurring out the background.
Lighting: It was a dull grey day and the light is flat and from no particular direction so no additional lighting.
Focal point: The focal point is the man and fish, but using a wide aperture means that just the fish is perfectly in focus, really making it stand out from the background.