
Why you should try the Multi Rig
It’s not only extremely effective, but incredibly versatile too. Here’s why you should try it…
When it comes to targeting a big carp water or trying to capture a particular fish, using thoroughly tried and tested rigs is surely a prerequisite. Most waters of this type require huge effort to crack, and the last thing you want to do is flick out a rig in the hope that it might do the job. That’s essentially why set-ups like the Hinged Stiff, Clone and Ronnie Rigs are extremely popular among big fish anglers; the mechanics of all these presentations are virtually bulletproof. By that I mean that the bait essentially sits in a position in relation to the hook and reacts in a controlled way when inhaled beyond those big rubbery lips.
The Multi Rig works in a similar manner to the Hinged Stiff in that the bait sits on a ‘D’, with the hooklink just below and with the hook and at an angle. This then promotes a positive, fast reaction when the bait is sucked in. It also gives potentially good solid hook-holds when tied correctly, and so this presentation should be right at the top of the fully trusted big fish rig list too. The simple facts that it also utilises fewer key components - so you can get away with smaller or less buoyant hookbaits - and also offers the angler the chance to change hooks whenever required just by removing a Covert Flexi Screw or Flexi Hook Swivel from the ‘D’, are obvious huge advantages.

Hooklink material and hook choice are personal, but naturally very important decisions. Certainly hooklink choice is critical in terms of how it lays and should be considered carefully in light of what you’re trying to achieve. So key factors to think about include the lead arrangement you want to use the rig with (which relates to stiffness), the colour, and finally the diameter and breaking strain of the hooklink material.
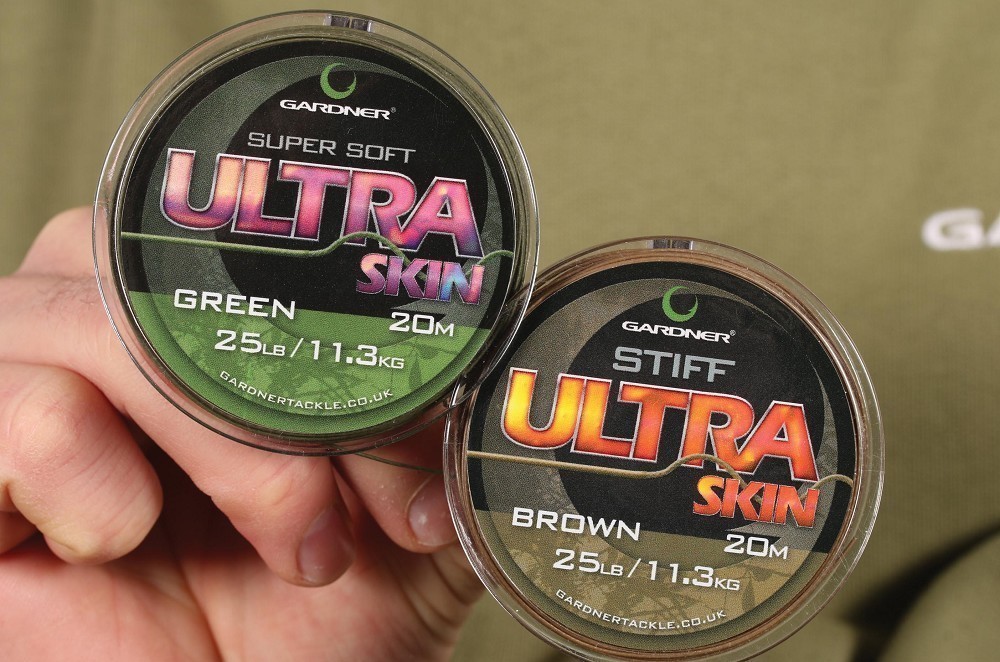
Skinned hooklinks vary enormously in terms of true strength, their (skinned) diameter, the material’s stiffness and how they knot when tying the loops. These are all vital factors that need to be considered with the Multi Rig, so choose carefully.
A true Figure-Of-Eight-Loop Knot is probably the best performing and simplest choice with ‘skins’. Overhand Loop knots are not as strong – the last thing you need is for an inadequate knot to ‘give’, just because “It’s the knot I’ve always used”. There’s simply no room for rig failures. If in doubt, tie yourself a few rigs in different materials and try your hardest to brutalise and destroy them; show no mercy and be extreme and if it survives, you’re probably on the right lines (no pun intended!).
Most of us will choose something like 25lb or 35lb Ultra Skin for its inert strength. As it’s a soft(ish) skinned hooklink it’s perfect to use with conventional lead clip arrangements; it beds down really nicely on Figure-Of-Eight-Loop knots and it has a lovely feel. The suppleness makes tying it easy and with the larger eye on the slightly beaked Rigga BCR it’s a doddle to get through the eye, even at the highest breaking strain/diameter.
If you choose to use this rig with a ‘helicopter’ style lead arrangement, you’ll be advised to watch the rig carefully in flight, or use the much more rigid Stiff Ultra Skin, which is absolutely tip-top and perfect for the job. The rigidity really helps prevent the hooklink wrapping up the line and ensures excellent presentation.
Obviously the height of the pop-up is controlled by the length of the loop, but you also need to factor in the width of the break in the skin, as ideally you’ll be positioning the counterbalance on the hooklink side and away from the loop knot. The hook section therefore, is able to spin and twist and react faster and more freely. Perhaps it’s a small detail, but it’s always these small details that make the difference between an adequate rig and a great one!
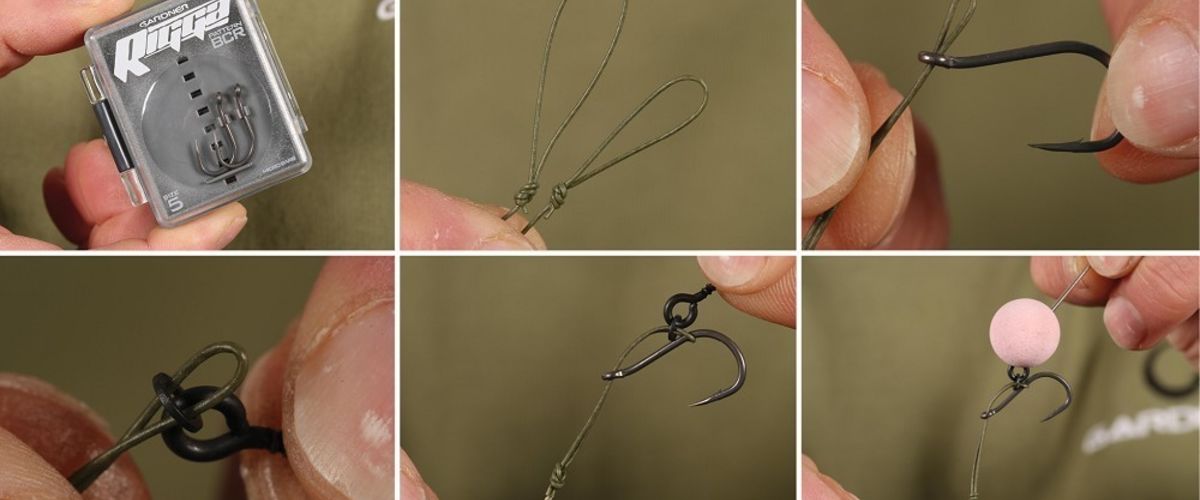
Rig Tying Bushcraft
Step 1 Skinned hooklinks such a Ultra Skin and Stiff Ultra Skin are perfect for tying Multi Rigs.
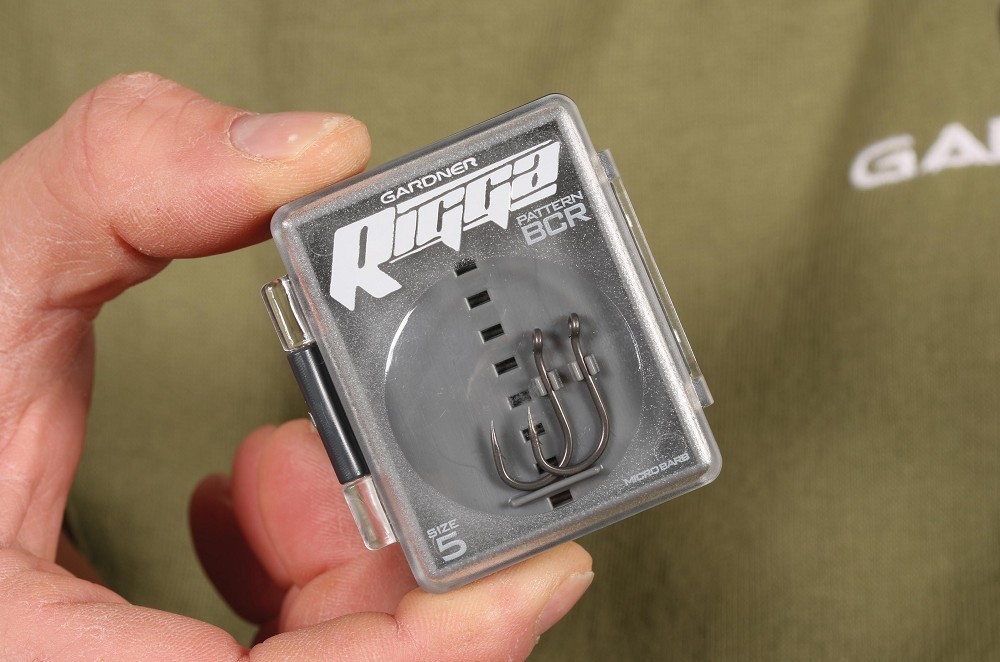
Step 2 Take a Rigga BCR Hook.
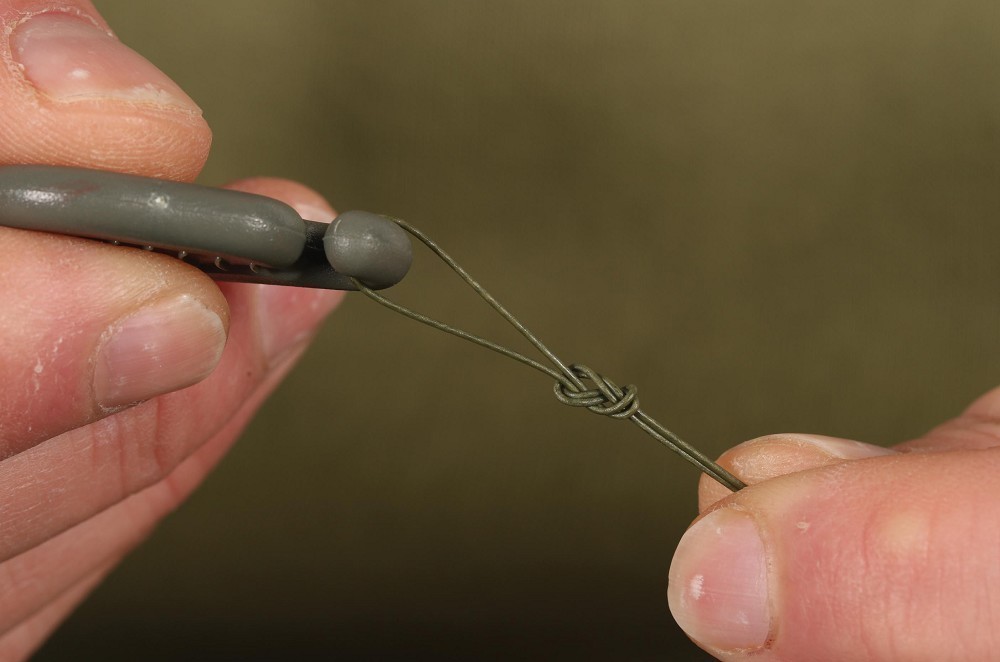
Step 3 Form a Figure-Of-Eight-Loop at both ends and bed down.
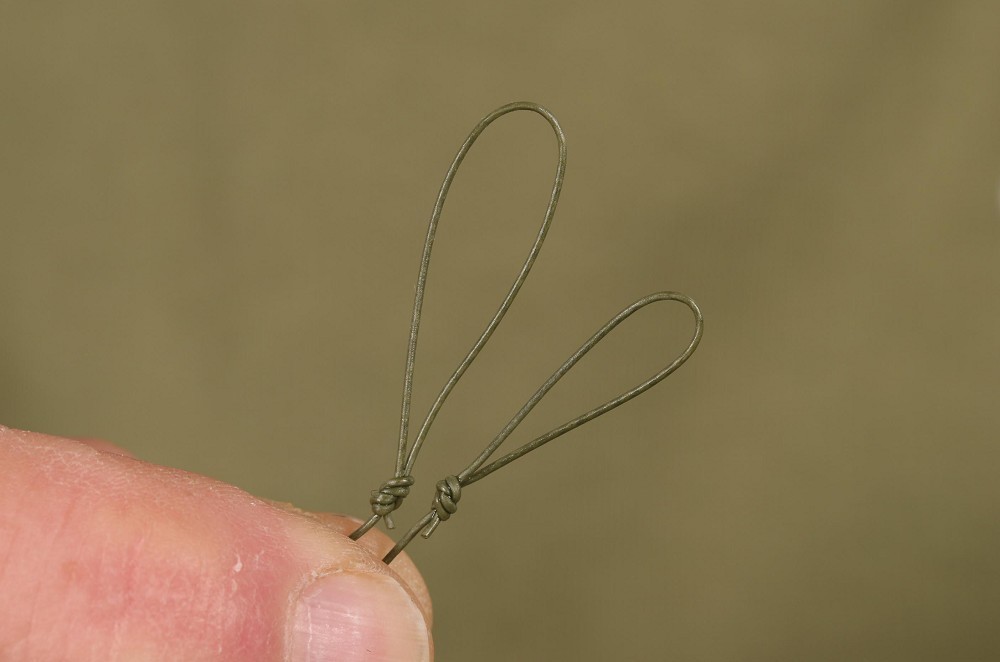
Step 4 Make sure the loop at one end is large enough to fit a hook through (lengthways).
Step 5 Now make a small break in the coating just above the knot.
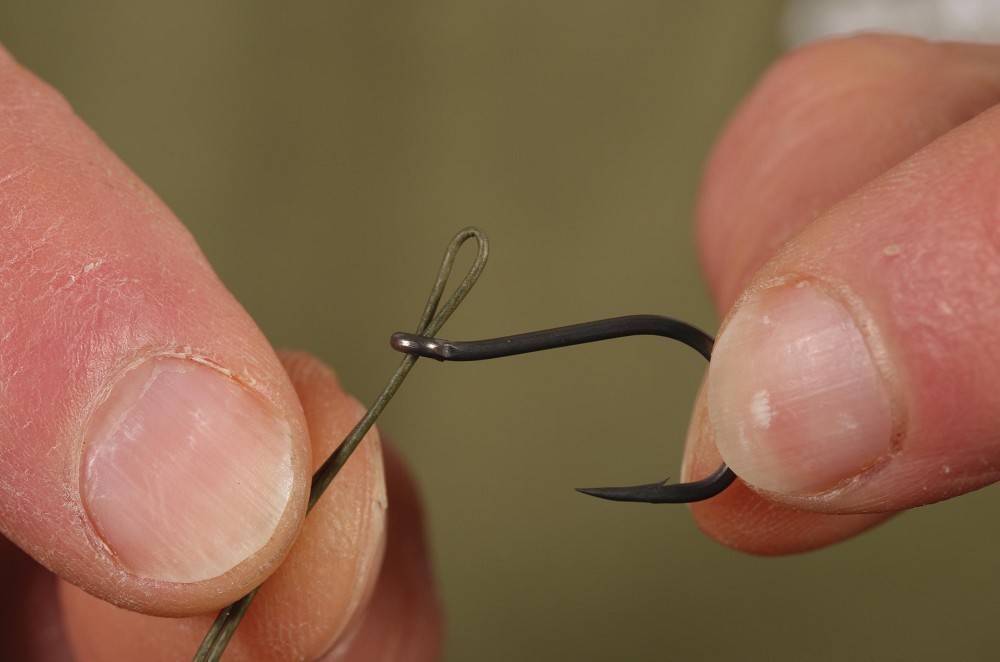
Step 6 Push the loop through the eye of the hook.
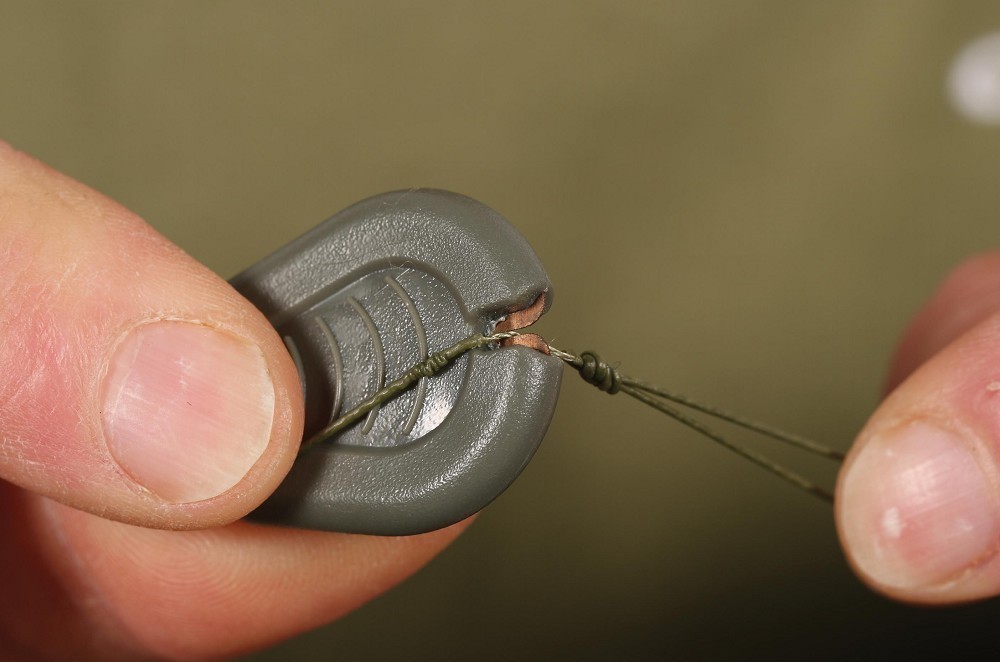
Step 7 Slip a bait screw onto the portion of hooklink loop you have already passed through the eye of the hook.
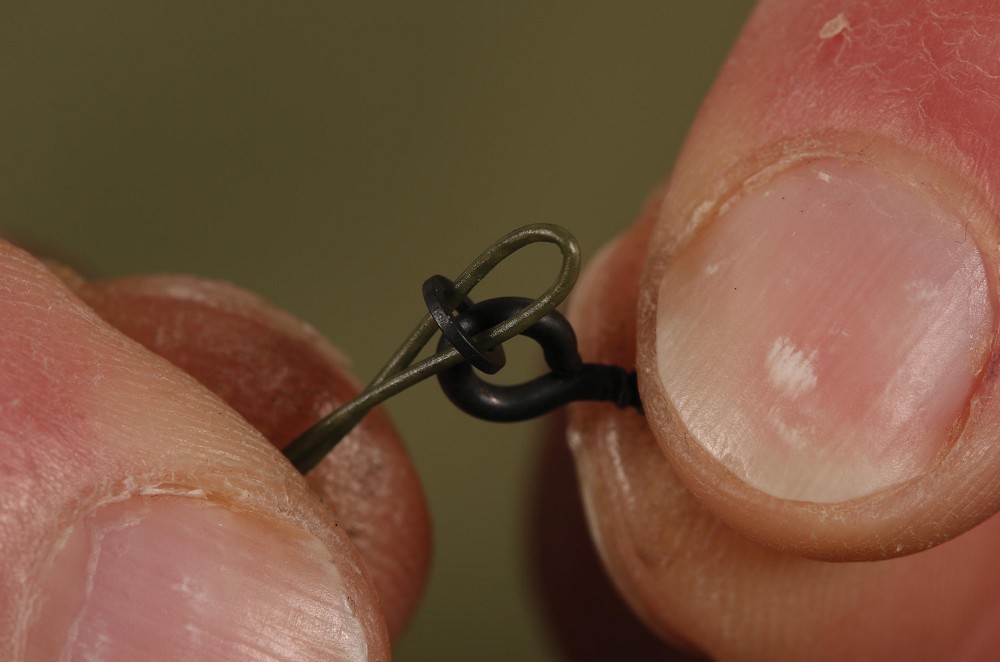
Step 8 Secure the hook and bait screw in position by passing the loop over the hook as shown.
Step 9 With the hooklink and bait screw now in position, it should look like this – with the hooklink forming a ‘D’ on the back of the shank.
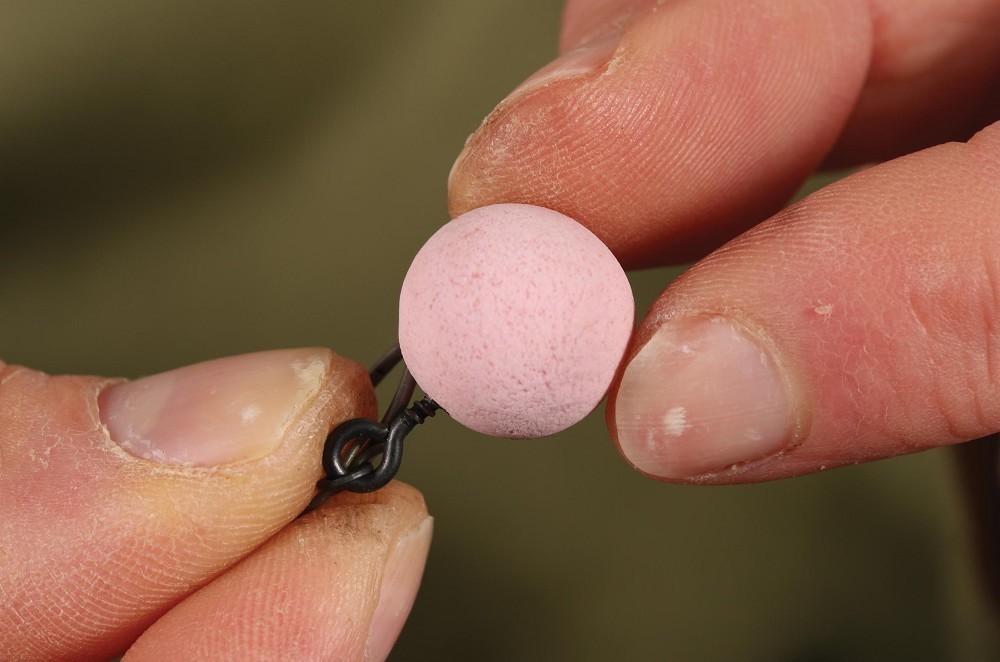
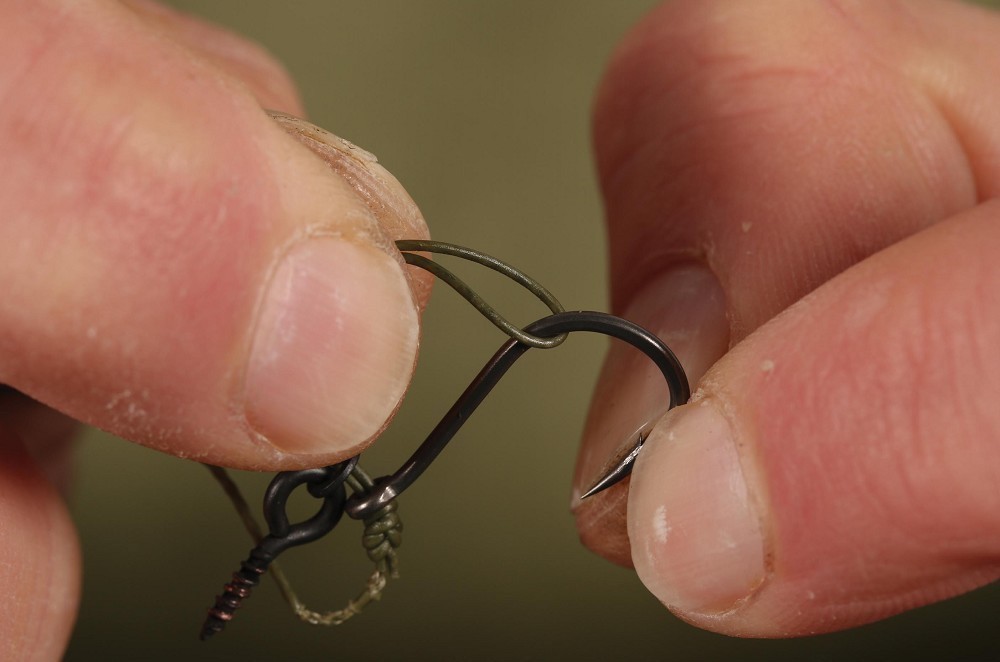
Step 10 Take a super buoyant pop-up and screw it onto the bait screw.
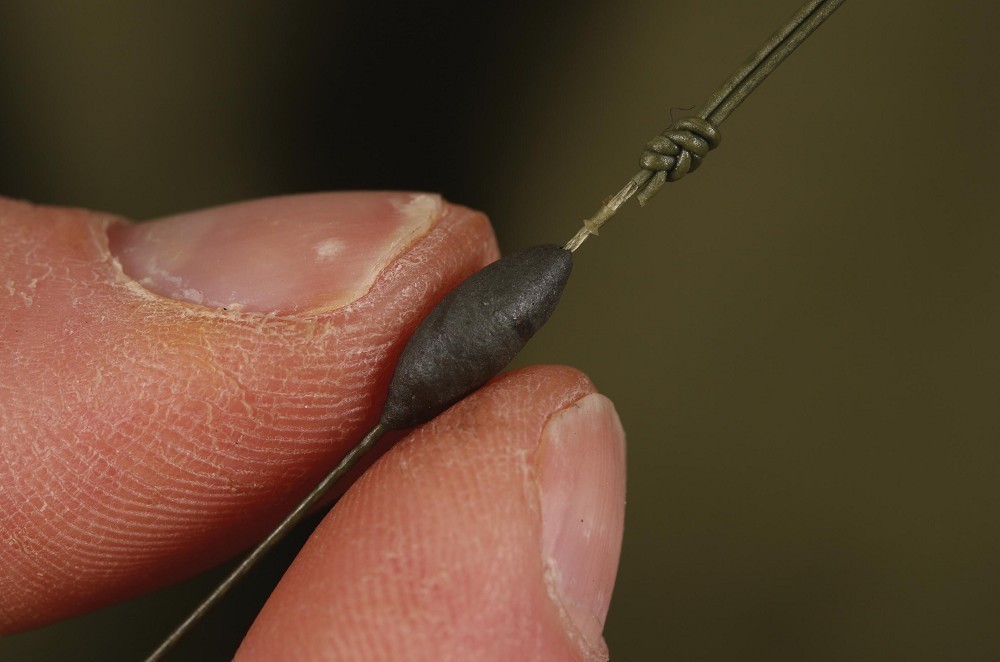
Step 11 Mould on just enough putty to make the hook and pop-up hookbait sink when testing it in the edge.
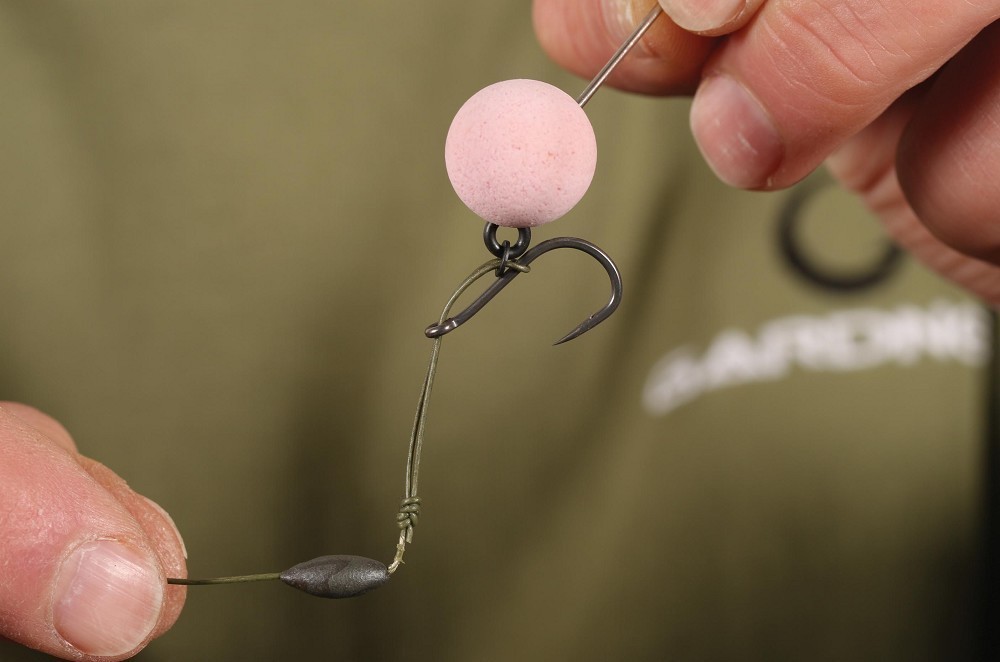
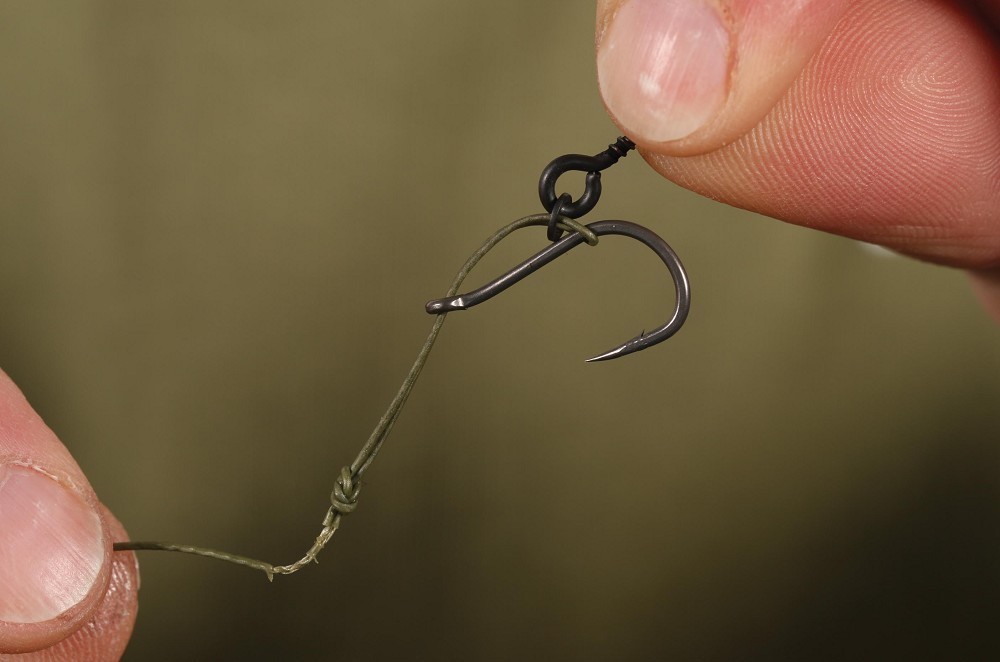
Step 12 And here’s the finished rig.